Another of our Advanced Parameters in PrestaShop 1.5 is the CSV Import. This section allows you to import data using files that use the CSV format> CSV means Comma Separated Values and is usually a simple text file populated with rows of data. The data fields are separated by a specific delimiter such as a comma (most common), tab, or semi-colon. The import function will take the file and import the data into the proper place within the database.
Configuring the CSV Import in PrestaShop 1.5
- Log into your PrestaShop 1.5 dashboard.
- Using the top menu bar, hover over the Advanced Parameters tab and click on the CSV Import option from the menu.
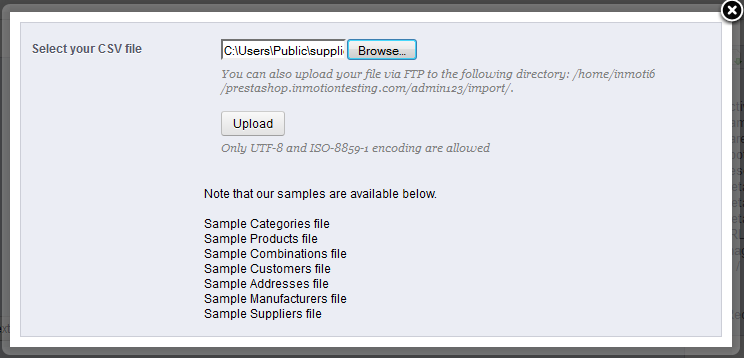
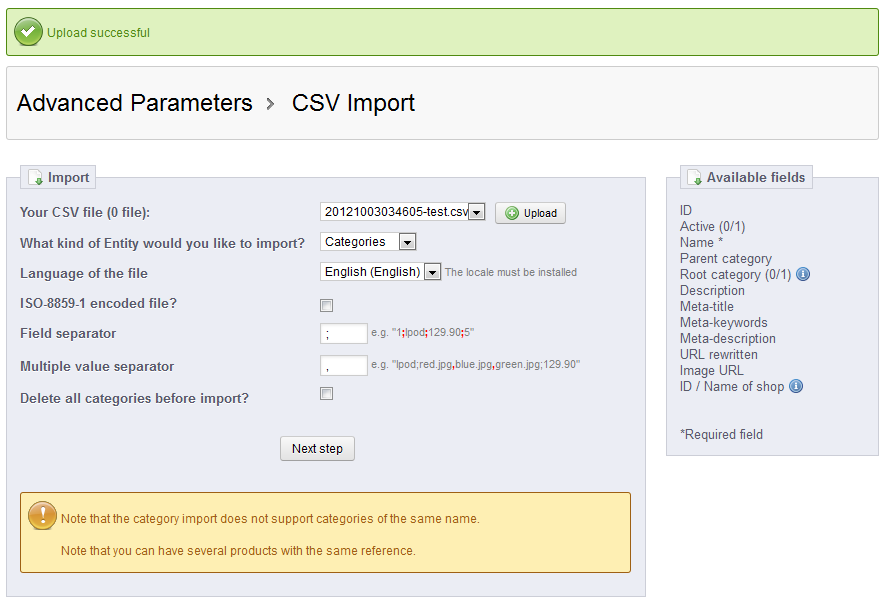
- This brings you to the CSV Import page. From here you will see the several fields you will use to configure how the CSV Import works. You will first need to upload a CSV file.

Your CSV File The name of the file that was uploaded. What kind of Entity would you like to import? A category relating to the file uploaded. Note the fields on the right hand panel will change according to your choice. Language of the File The language the file is written in. You will need to also have the appropriate language pack installed. ISO-8859-1 encoded file A checkbox option that should be selected if the file is ISO-8859-1 encoded. Field Separator The delimiter that separates each field. Multiple Value Separator A delimiter that separates multiple values for a field. Delete All Categories Before Import? Checkbox option for deleting all categories prior to the data import. Once you have the initial settings selected, click the Next Step button.
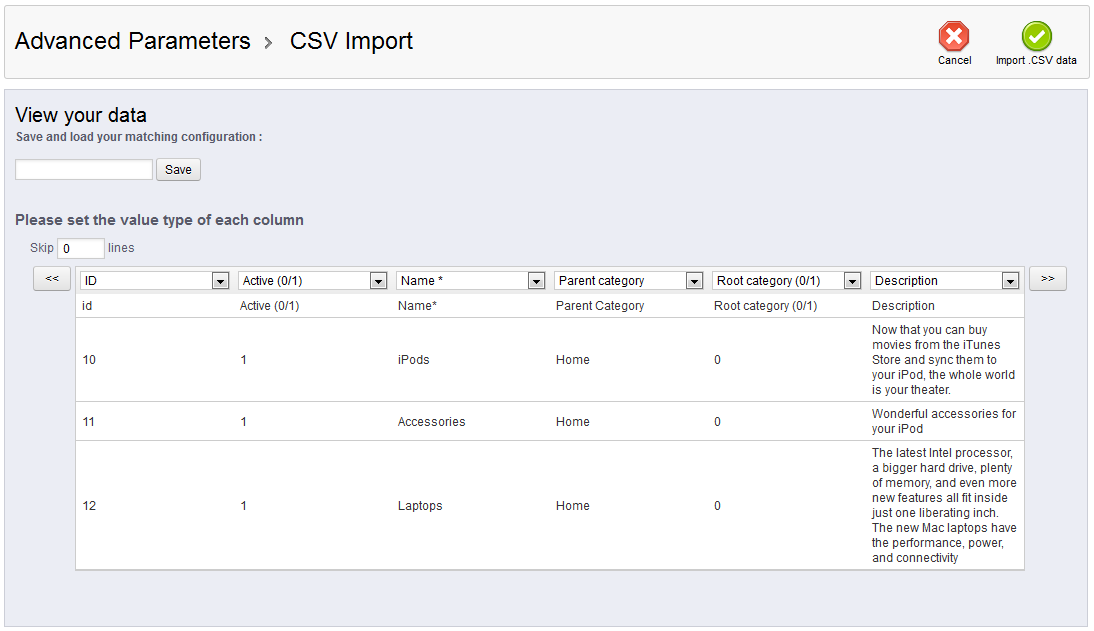
- You are now on the second step of the CSV Import process. This screen has a few settings to help you customize your import.
– The Save button in the upper left relates to the Save and Load Your Matching Configuration field and allows you to save the import configuration that you set up below.
– The Skip Lines field allows your import to ignore a number of rows before the import.
– The << and >> buttons allow you to navigate back and forth through the data.
- Once you have set up your configuration, simply click the Import CSV data button found in the upper right corner of the screen. This initiates the import of the file into your database.

