Welcome to our next article in the managing affiliates and referrers. After learning how to add an affiliate referrer, it is necessary to understand how to modify the data should the need arise. Below are the instructions for accessing and changing the data for an existing referrer in your PrestaShop 1.5 store.
Modifying an affiliate referrer in PrestaShop 1.5
- Log into your PrestaShop 1.5 admin dashboard.
- Using the top menu bar, hover over the Stats tab and click on the Referrers option.
- You are now on the Referrers page. Find the referrer you want to edit and click on the Edit icon at the right side of that row. The Edit icon looks like a pencil and paper.
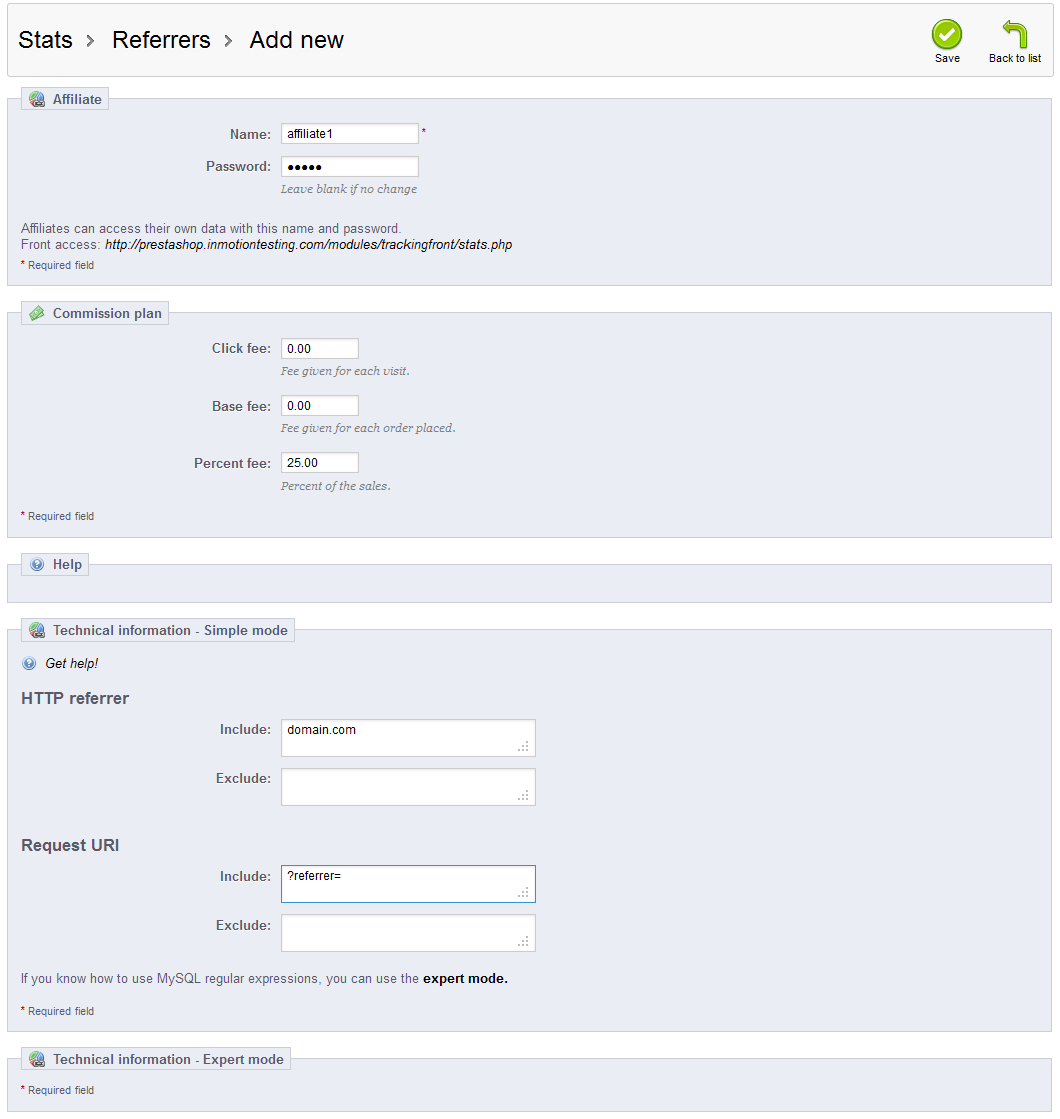
- You are now on the Referrers editing screen. You will be able to edit any of the following data:
Affiliate Section Name Account name of the affiliate Password Affiliate account password Commission Plan Section Click Fee Amount of payment based on clickthroughs Base Fee Amount of base payment as flat fee Percent Fee Amount of payment as percentage of order amount Technical Information Section HTTP Referrer Include Website the visitor will be coming from (domain.com) HTTP Referrer Exclude site name, or portion thereof, to ignore as a referrer Request URI Include Special query string (example: ?referrerID= ) Request URI Exclude String that, if included, will ignore as a referrer 
- Once you have changed all the desired information for your affiliate referrer, click on the green Save button to save the changes. You will be brought back to the Referrers list page.
Be sure to continue on with the course and learn how to delete an affiliate referrer.
WriteGuy,
It’s important to note that the Google Analytics code is only going to show you traffic from users that have JavaScript enabled as well. So this could explain some of the discrepancy you’re seeing in your stats as well.
If you notice much “bot” traffic such as search engine crawlers in your Awstats reports, typically these won’t always show up in Google Analytics depending on how those clients are configured as well.
I agree that it would be nice to have the ability to add data to the HEAD section within the Builder. However as it’s generally geared more towards novice users, I’m not sure it’s something they’ve thought about adding in.
Most users will start off with the Builder until they need more advanced functionality, and then pick a popular CMS such as WordPress or Joomla to continue development with.
You might want to play around with our Softaculous installer and try out different applications to see if one of them might work out better for you than the Builder for these more advanced type of tasks.
[url=https://www.inmotionhosting.com/support/edu/cpanel/softaculous/how-to-install]How to install applications with Softaculous[/url]
Let us know if you have any other questions.
– Jacob
Jacob,
Putting the GA code in the body just “kinda” works. I had it there and have found that doesn’t capture all your traffic. Example, this past Monday according to AWStats I had 68 unique visitors. That seems about right since my Google Adwords campaign recorded 50 clicks and my Facebook ads added 12 more. GA only captured 37 of those 68 visitors (with their code snippet in the body of the page). I hope the SiteBuilder folks are working on a way to allow us to modify the Head section. We really need that if we want to make full use of tools like GA and Webmaster Tools.
Hey WriteGuy,
If you’re trying to use the default asynchronous code for Google Analytics with the Builder, technically it should still function after the closing HEAD tag, but you lose some of the benefits of speed in page rendering, this is why it’s recommend to be placed inside the HEAD tags, but unfortunately the Builder doesn’t support this.
However if that is not working for you, you should also be able to use the traditional snippet which just needs to go above the closing HTML tag. You can get this snippet from the following page on Google by expanding the “Traditional Snippet” section at the bottom of the page:
[url=https://support.google.com/analytics/bin/answer.py?hl=en&answer=1008083]Google – Verify your web tracking setup[/url]
Please let us know if you have any further questions at all.
– Jacob
JacobIMH,
Your answer won’t work properly because the GA code must be added inside the Head tags. The Script module won’t let you do that. It places the script in the Body. With Sitebuilder, unfortunately, every time it rebuilds and publishes a site, it regenerates the Head section. That means the GA code has to be manually inserted again. At least, this is what I’m finding. If someone has a better answer, I need to solve this problem too. Thanks.
No problem at all DonnieC, if you’re still having any issues with it sticking after using the (Script) module, please let us know!
– Jacob
I see. No, I am adding the code manually to each page. I will try the script function and see if that helps.Adding it to each page is not too hard, as long as it stays there.
That should answer the question for me.I’ll try that.
Thanks for the help.
DonnieC