Our last article showed you how to add a new country to your store. You will now learn how to modify an existing country in your PrestaShop 1.5 setup. Data on countries can change at any time, so you must be ready to update the data for consistency. The instructions below will guide you on how to edit a country in your PrestaShop 1.5 store
Modifying a country in PrestaShop 1.5
- Log into your PrestaShop 1.5 admin dashboard.
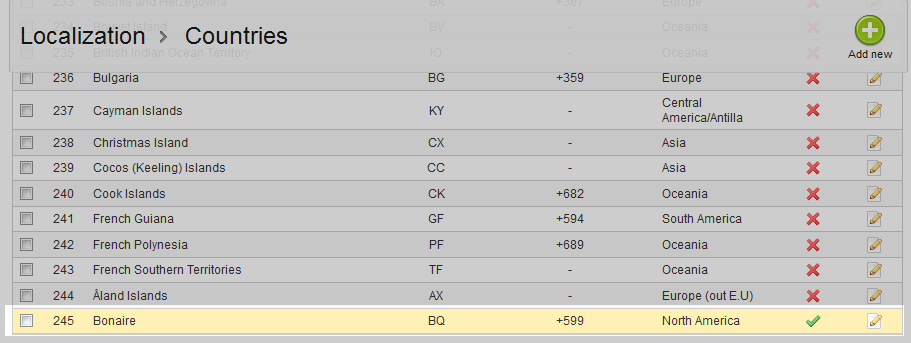
- Using the top menu bar, hover over the Localizations tab and click on the Countries option.
- Now that you are on the Countries list screen, click on the Edit icon on the right hand side of the row of your selected country. This icon looks like a pencil and paper.

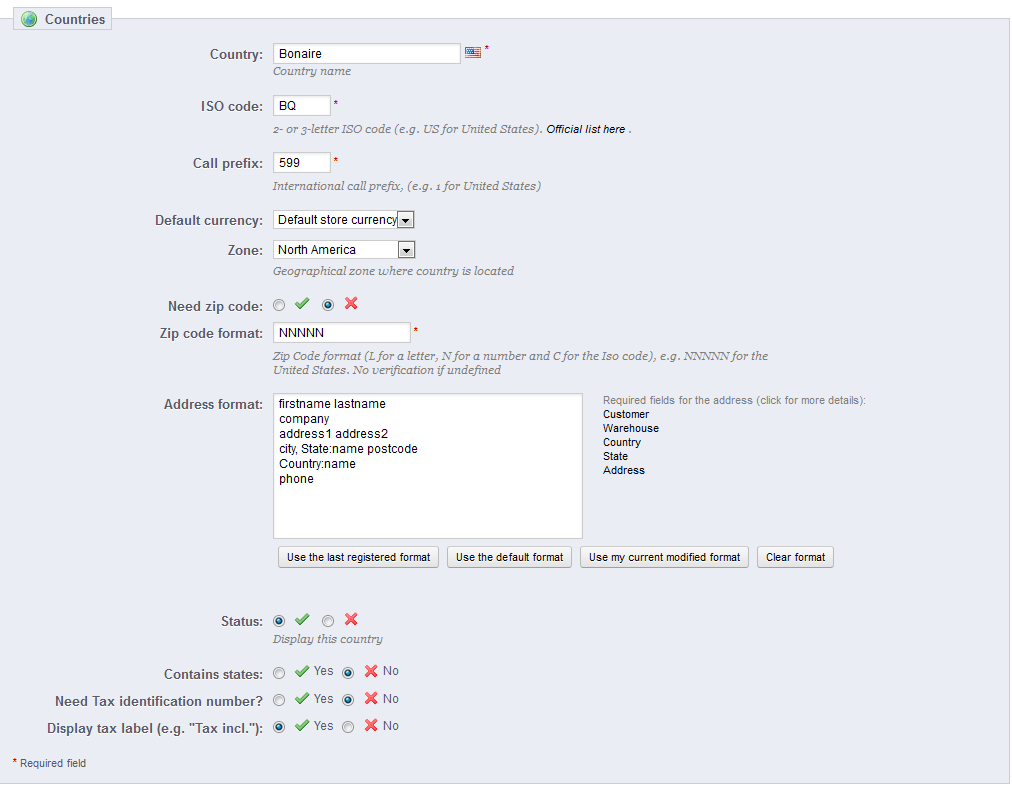
- This leads you to the country Edit screen. Like the article on adding a country you see there are several fields here to edit. Make any changes you need to your country.
Field Description Country the country’s name ISO Code official country abbreviated code Call Prefix prefix necessary when calling the country Default Currency which default currency to use for the country Zone zone the country falls under Need Zip Code if the country needs a zip code for addressing Zip Code Format format for zip code (L for letter, N for number) Address Format format for shipping address Status if country is enabled or disabled for the list Contains States if country contains states or not Need Tax Identification Number if tax ID is required Display Tax Label if tax label is required 
- After making the appropriate changes to your country, click on the green Save button in the upper right corner. The changes will then be saved and you will be returned to the Countries list page.