After creating your shipping carriers in PrestaShop 1.5, there are a few things that need to be set so you can charge shipping costs properly. If you choose to charge your shipping costs based on price, setting different price ranges for a carrier is important. This allows you to set different price ranges off of which your shipping costs will be based. For example, maybe you need to set shipping costs to $2 on any total under $50, and $7 for totals between $50 and $100. These are the types of ranges you will be creating by following the steps below.
To set price ranges for a shipping carrier in PrestaShop 1.5:
- Log into your PrestaShop 1.5 dashboard
- Using the top menu bar, hover over the Shipping tab and select Price Ranges from the menu.
- From the Shipping : Price Ranges page, click the green Add New button in the upper right corner.
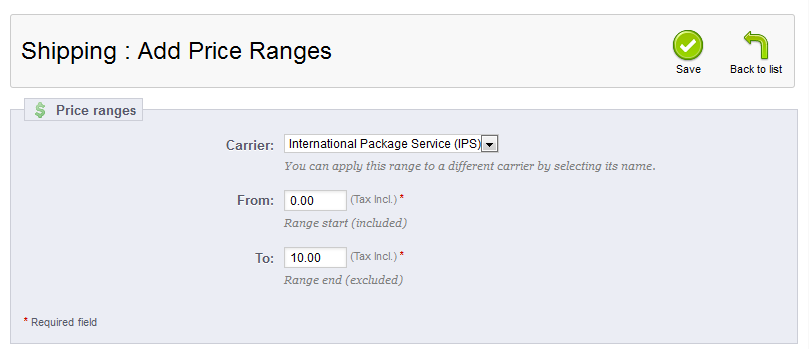
- This brings you to the Shipping : Add Price Ranges screen. Choose which carrier you are working with from the Carrier dropdown. Then set the lower and upper prices for the range you are adding. In our sample case, items that cost from $0 – $10 will need to pay the same shipping. Once you have done that, select the green Save button to save the range.

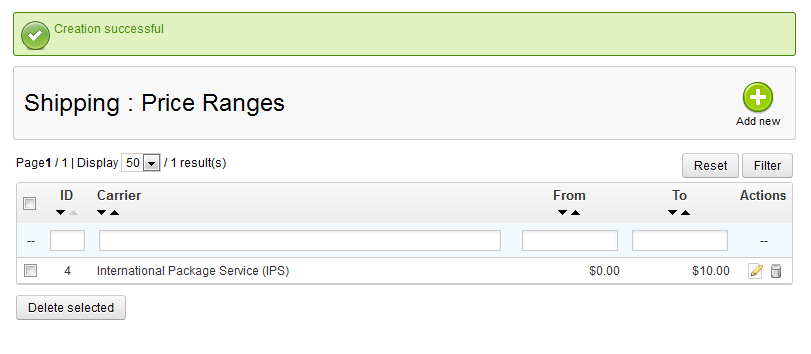
- Your new price range will now show in the Price Ranges list.

You have now learned how to add a price range to a shipping carrier in PrestaShop 1.5!
If you need further assistance please feel free to ask a question on our support center.

