PrestaShop 1.5 provides many different order statuses to help you manage your customers. You may also want to create your own custom order status for your shop. These statuses are color coded for easy identification in the order list. To learn to set a new order status in PrestaShop 1.5, simply follow the instructions below.
How to create an order status in PrestaShop 1.5
- Log into your PrestaShop 1.5 admin dashboard.
- Using the top menu bar, hover over the Orders tab and click on the Statuses option.
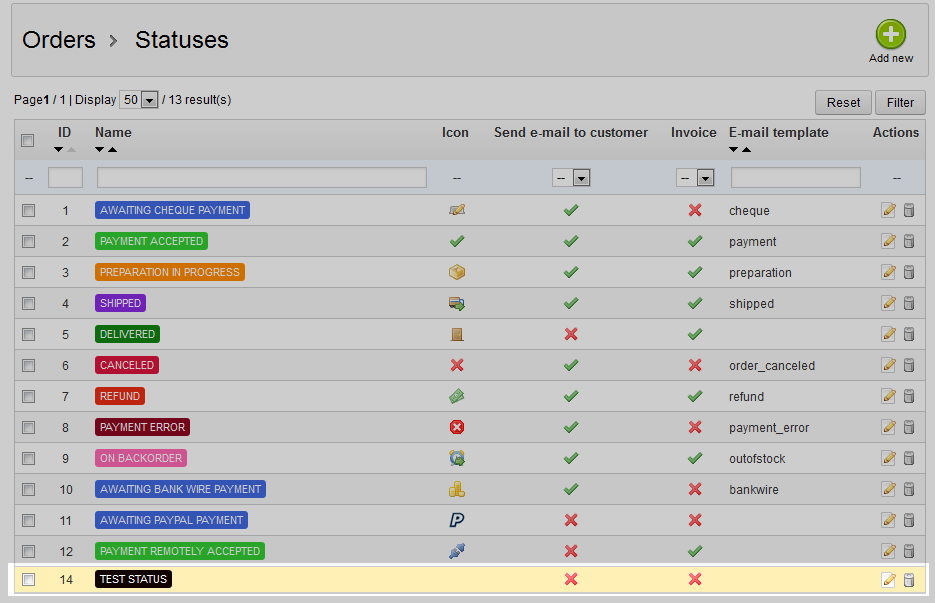
- This leads you to the Statuses list screen. To create a new status from here, click on the green Add New button in the upper right corner.
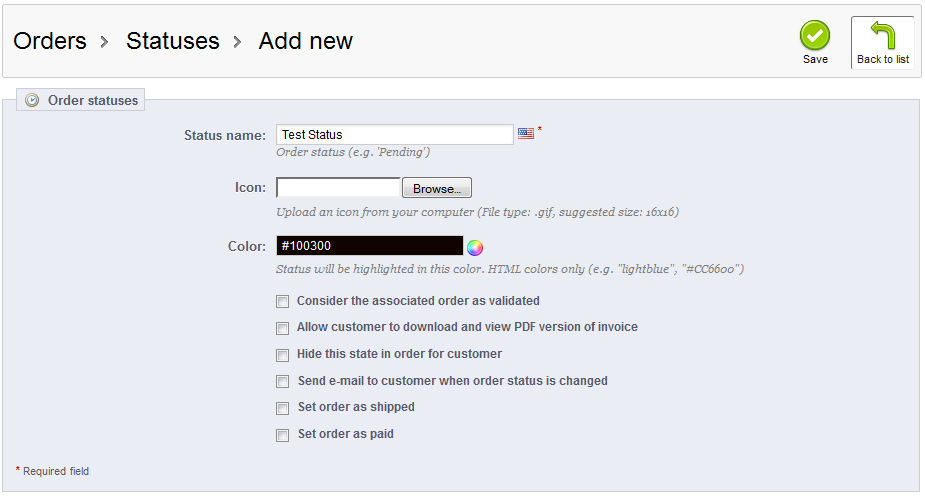
- You are now on the Status creation screen. You will see a form with several fields. The first three are for creating the name and look of the status (name, icon, and color). The second section of fields are checkboxes which govern the action the status takes on the order. Click any of the checkboxes that apply to your new status. You can view them here:
Consider the associated order as validated Allow customer to download and view PDF version of invoice Hide this state in order for customer Send e-mail to customer when order status is changed Set order as shipped Set order as paid - Once you have entered the information and are satisfied with it, click on the green Save button in the upper right corner to finalize the new status. You will return to the attachment list screen where you will see your new status in the list.


