After learning to add and remove product from warehouses, we continue with our Advanced Stock Management course by discussing how to transfer products within the warehouses. You are able to either transfer the products from one warehouse to another or to change the product from one status to another within the same warehouse. The instructions below will explain how to transfer your products or change status in your PrestaShop 1.5 store.
Reducing or Eliminating stock from a warehouse in PrestaShop 1.5
- Log into your PrestaShop 1.5 dashboard.
- Using the top menu bar, hover over the Stock tab and click on the Stock Management option from the menu.
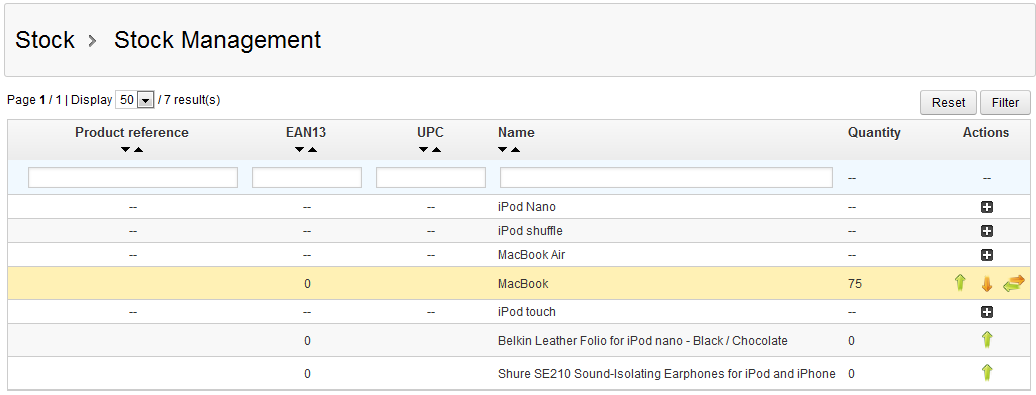
- This brings you to the Stock Management page. The table in the center of the page lists all products that you have for your store. To transfer product quantity to another warehouse, select the icon that has a green and orange arrows pointing to the sides found on the right hand side of the product row you want to edit.
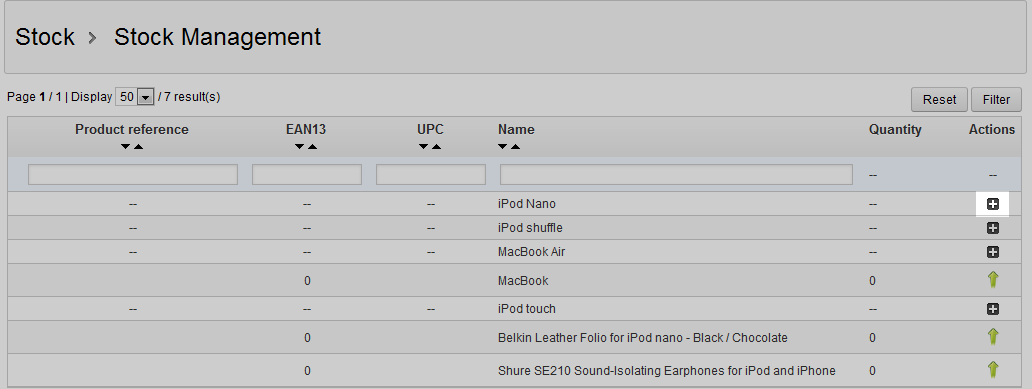
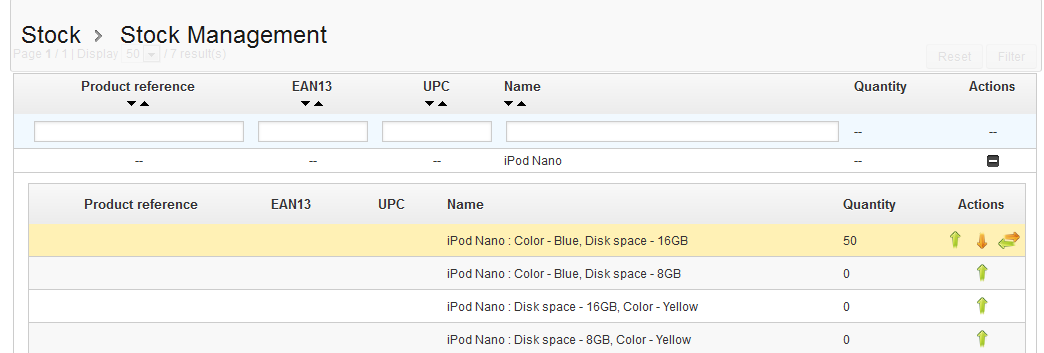
If you notice there is no icon with side arrows on the right, but you do see a plus icon, this means there are one or more combinations for the product type. Click the plus icon to open the combination list.
For our example, we will stick with the Macbook.
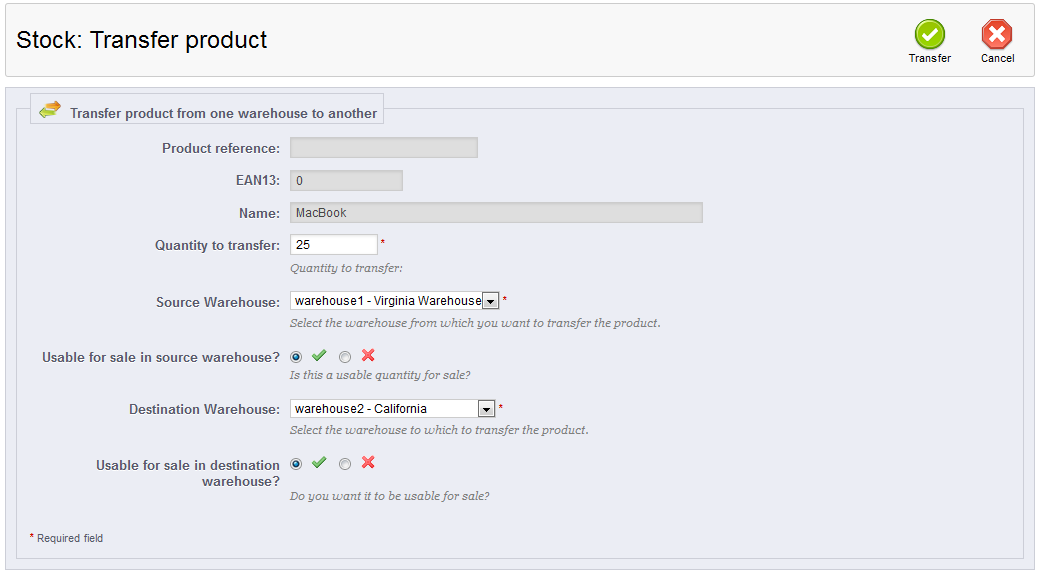
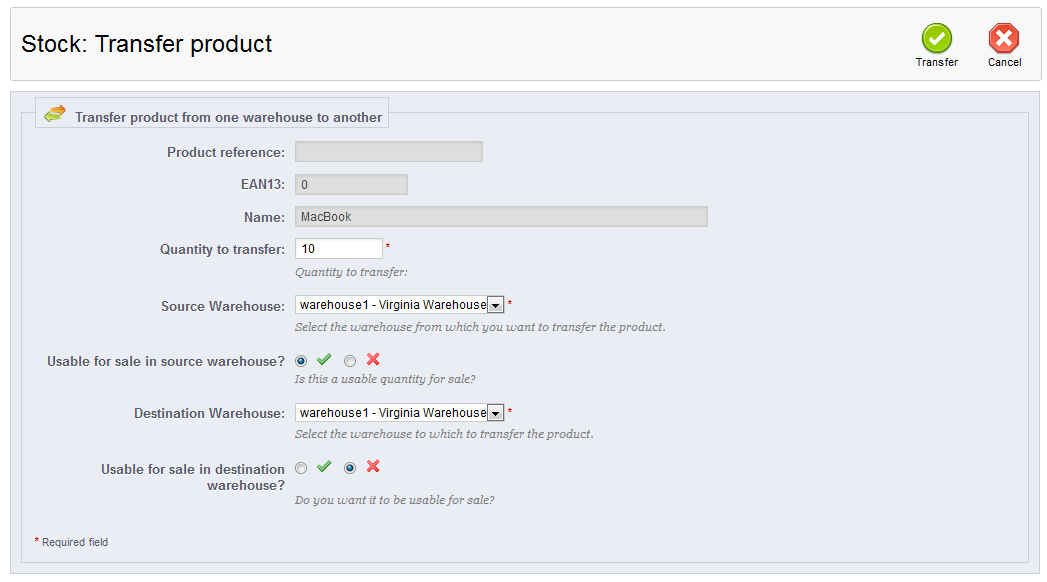
- This new screen is where you will enter your data to transfer the products from one warehouse to another. Below are the fields that are associated with the transfer:
Quantity to transfer Number of units to transfer or change status for. Source warehouse The warehouse the units will be coming from. Usable for sale in source warehouse? Whether the units are to come from the ‘for sale’ group or the ‘reserve’ group. Destination warehouse The warehouse to which the units will be transferred. Usable for sale in destination warehouse? Whether the units will be going to the ‘for sale’ group or the ‘reserve’ group. If you want to keep the units in the same warehouse but simply set some units from the ‘for sale’ group to the ‘reserved’ group of vice versa, you may do that as well.

- Once you have finished your transfer or status change, click the green button labeled Transfer at the top of the page to finalize the transfer.
