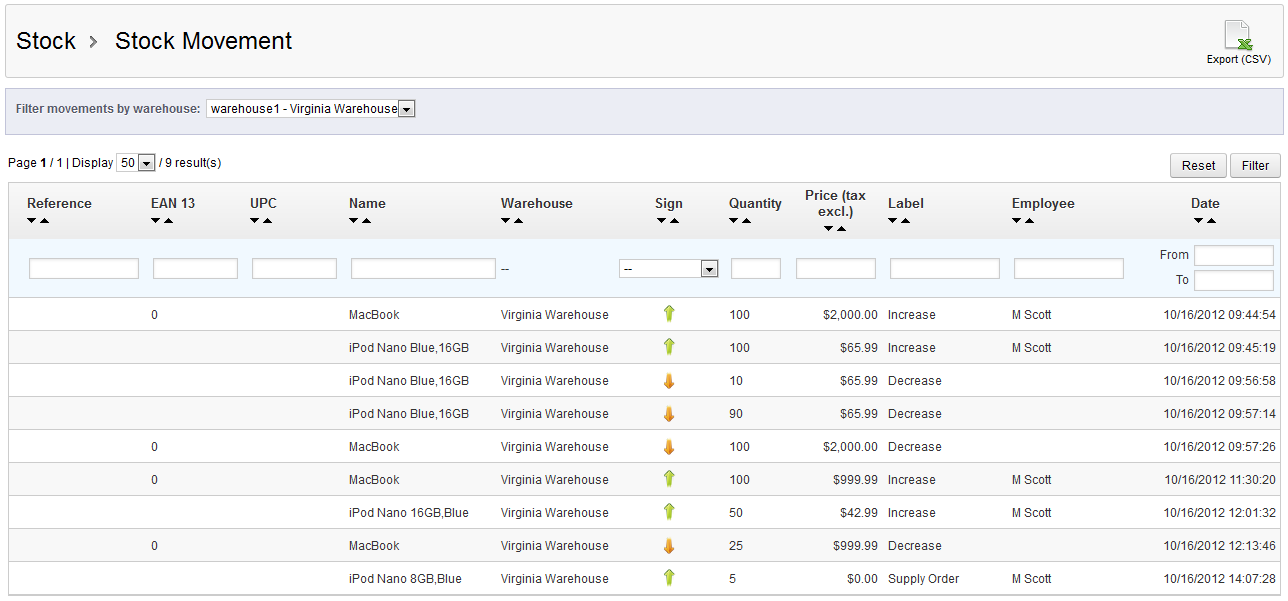
The next step in our Advanced Stock Management course, after learning to transfer stock between warehouses, is our article on viewing stock movement. This section is a report of all stock movement done within the warehouses of your PrestaShop 1.5 store. Below is a guide to help you understand the data in the report.
How to view the Stock Movement report in PrestaShop 1.5
- Log into your PrestaShop 1.5 dashboard.
- Using the top menu bar, hover over the Stock tab and click on the Stock Movement option from the menu.
- This brings you to the Stock Movement page. The table in the center of the screen contains a list of all stock movement. You can filter the list by warehouse by using the Filter Movements By Warehouse dropdown. If you select one warehouse using that method, an option to export the list as a CSV appears in the upper right as a button named Export (CSV). Below is an explanation of the fields and data shown in the report.
Reference Optional internal reference used as a unique identifier. This can be either a number or text. EAN 13 A bar code number used internationally. UPC A bar code number primarily used in America, the UK, new Zealand and Australia. Name The common name of the product. Warehouse The warehouse in which the product is located. Sign Sign that shows what movement was made (up arrow means product moved into warehouse, down arrow means product moved out) Quantity The number of units that was moved. Price (excl tax) The price of the unit (wholesale or manufacturing cost) excluding tax. Label This describes the action Increase means it increased the number of units, decrease means units were removed. Employee The user who performed the action. Date The date the action was performed. The Stock Movement view report has now been explained in its entirety. Be sure to continue with our course by checking out the next article on Instant Stock Status.
