Table of Contents
The Gallery application from Softaculous allows you to create users and groups who can be authorized to view specific albums. You can set if the group can view the image, view the enlarged image, edit, and add images in the album. This tutorial will guide you through adding users and groups and also setting the album permissions based on the groups.
Go Unlimited with Exceptional Shared Hosting
Upgrade your Shared Hosting today and take your business to the next level! Get unlimited NVMe SSD storage, cPanel, professional email and over $400 in savings.
Free Domain
24/7 Human Support
100% Money-Back Guarantee
Adding Users
Adding users is easily done through the administrator menu in Gallery.
- Log in as an Administrator into Gallery.
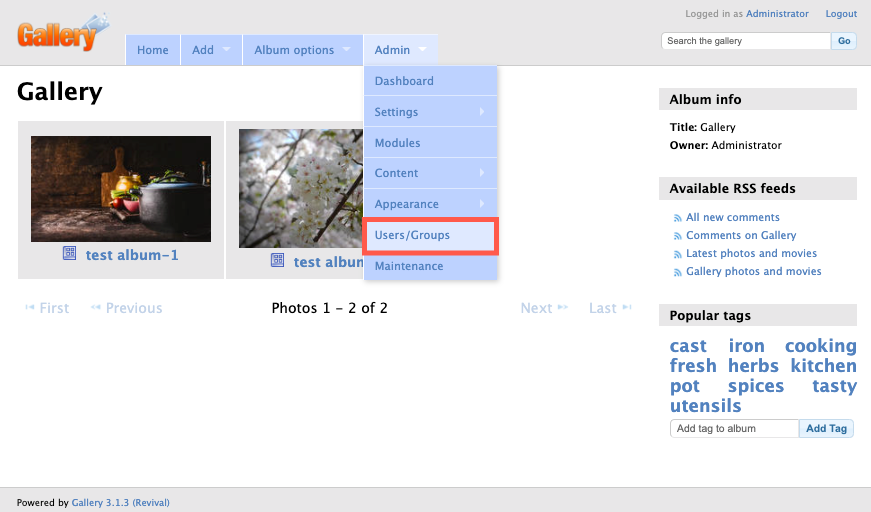
- Click on the Admin tab and then select Users/Groups.

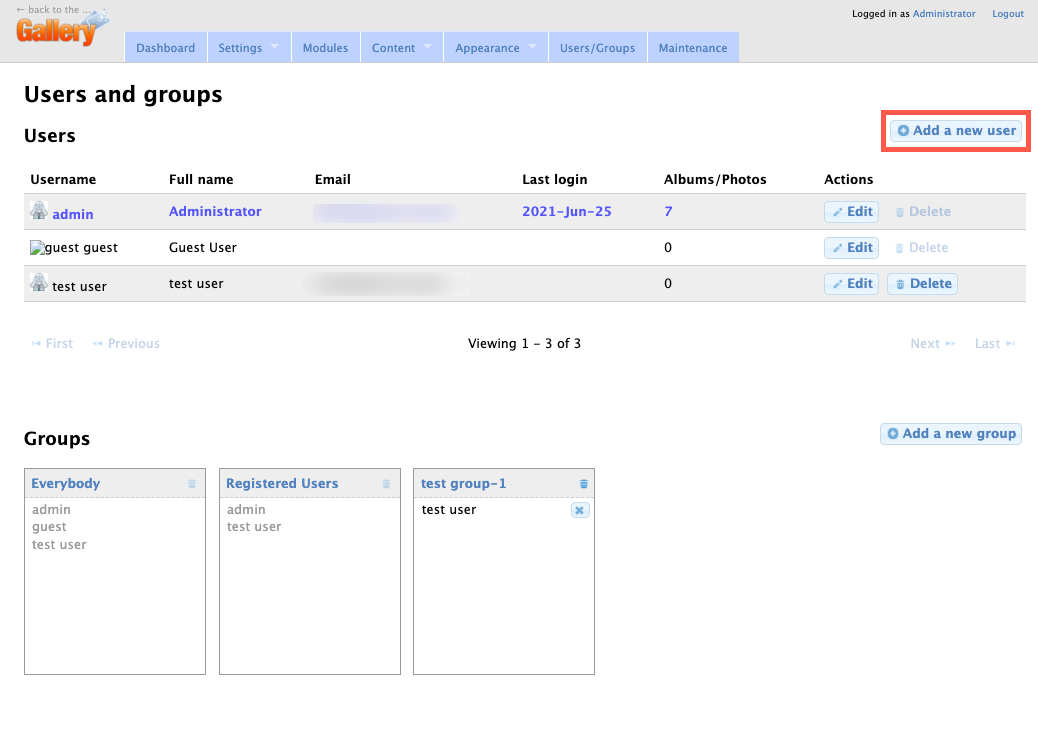
Note that if you’re already logged into the Gallery application as an admin, you may see a different set of tabs. To work with users and groups, click on the one labeled Users/Groups. - You will then see the Users/Groups page. To add a user, click on the Add a New User button in the top right-hand corner.

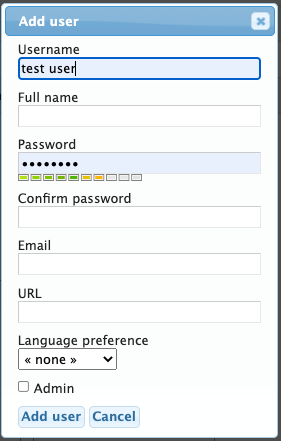
- You will then see the dialog box for adding a new user.

Fill in the username, password, and email address for the new user. The URL associated with the user is optional. You can also set the user language preference using a drop-down arrow or click on the box to make this user an Admin. - Click on the Add User button to save your new user.
Adding Groups
Adding groups in the Gallery application is similar to adding Users, but you have the extra step of adding users to the Group.
- Login to the Gallery application as an Admin.
- Click on the Admin tab and then select Users/Groups from the menu. If you’re already logged in as an Admin, you may see a different set of tabs that will include Users/Groups.
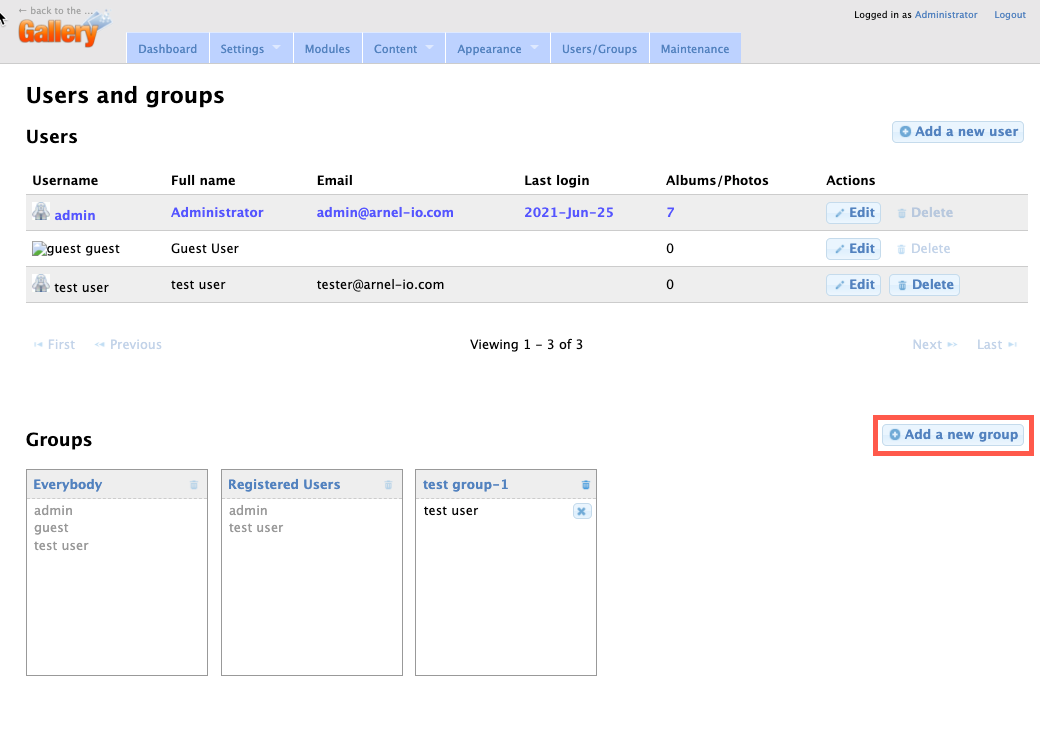
- You will then be on the Users/Groups page. Scroll down to the bottom of the page to see the existing groups.

Click on the Add a new group button to proceed. - You will then see a dialog box open to name the group. Type in a name for the group that you want to add.
- Once you hit enter for the name, the group will be added to the groups at the bottom of the page.
This completes the addition of the new group. Your next step is to add users to it, so that it can be used to limit access to the content you are providing.
Adding users to the group is very simple. You go to the list of users at the top of the page, left-click and hold your mouse button on a user, then drag it into the group at the bottom of the page.
Setting Album Permissions
Once you have your users and groups added, you can then go to your albums and set permissions for the groups so that they see only the content that you are allowing them to see.
- Login to the Gallery application as an Admin.
- Click on the Gallery logo to return to the albums page.
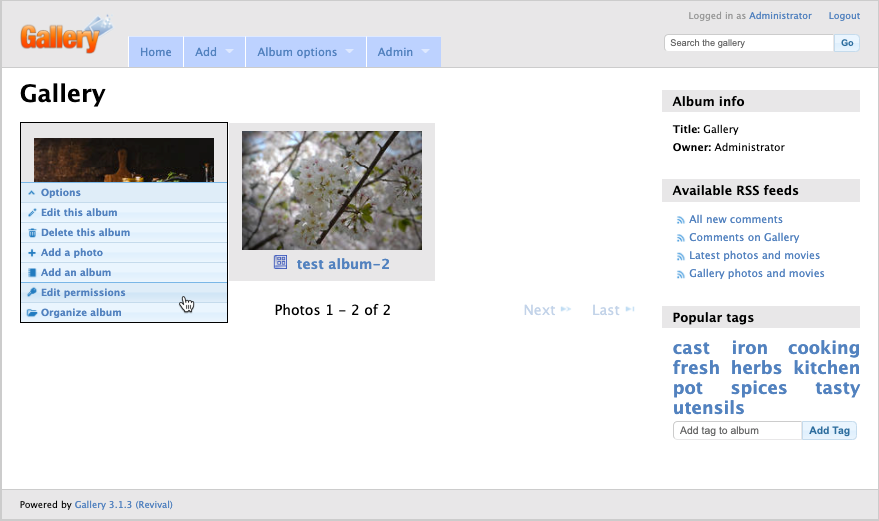
- Hover over the bottom of the thumbnail of the album where you want to set permissions. You should see a menu appear starting with Options. A menu will expand. Click on Edit permissions.

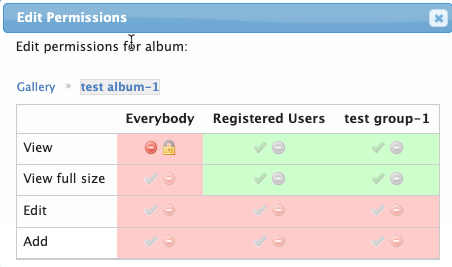
- You will then see the permissions for the album appear. It will appear as a graphic interface where you can set permissions on and off.

- You should see the group you’ve added and the options for View, View full size, edit, and add. If you click on the checkmark, then the option will turn green indicating that it has been enabled. Set the options corresponding to the group in each column.
Permissions are automatically saved, so you simply need to set your the missions then close the window to proceed.
To learn more about using Gallery, check out the documentation from the Gallery Codex.
That completes our tutorial on how to add users/groups and editing permissions for each gallery. To learn more about using Gallery, check out our other articles on the InMotion Support website.
