Table of Contents

Rocket.Chat has native features for connecting with Matomo Analytics (formerly Piwik). This provides metrics to help you better understand how users access your chat system, whether any malicious links are being shared internally, and more. Read on to learn more about the Matomo Rocket.Chat integration.
- How to Configure the Matomo Rocket.Chat Integration
- How to Troubleshoot Rocket.Chat Matomo Integration Issues
How to Configure the Matomo Rocket.Chat Integration
- Log into your Rocket.Chat instance. Ensure that the user you login as has Rocket.Chat admin privileges.
- Select the user icon in the upper-left corner, then “Administration.”
- On the left, scroll down and select “Analytics.”
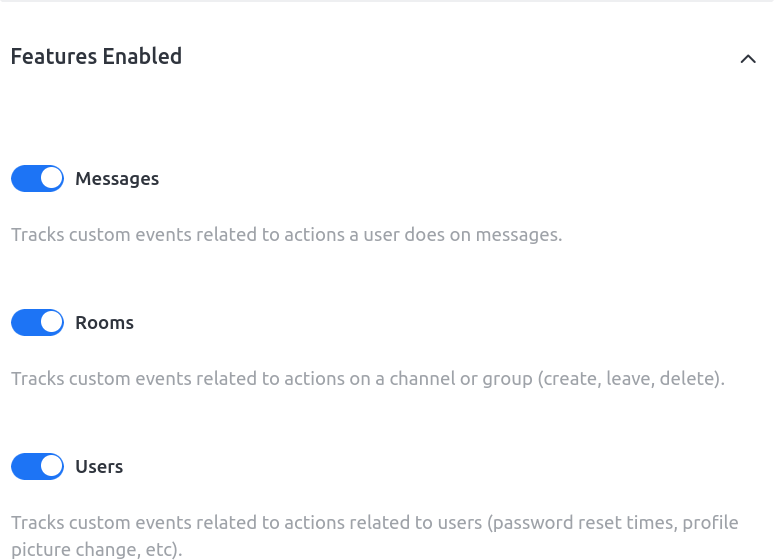
- Select “Features Enabled” on the right.
- Here you can toggle whether to track custom events related to actions a user does in messages, on a channel or group (create, leave, delete), and within user settings (password resets, profile picture changes, etc.).

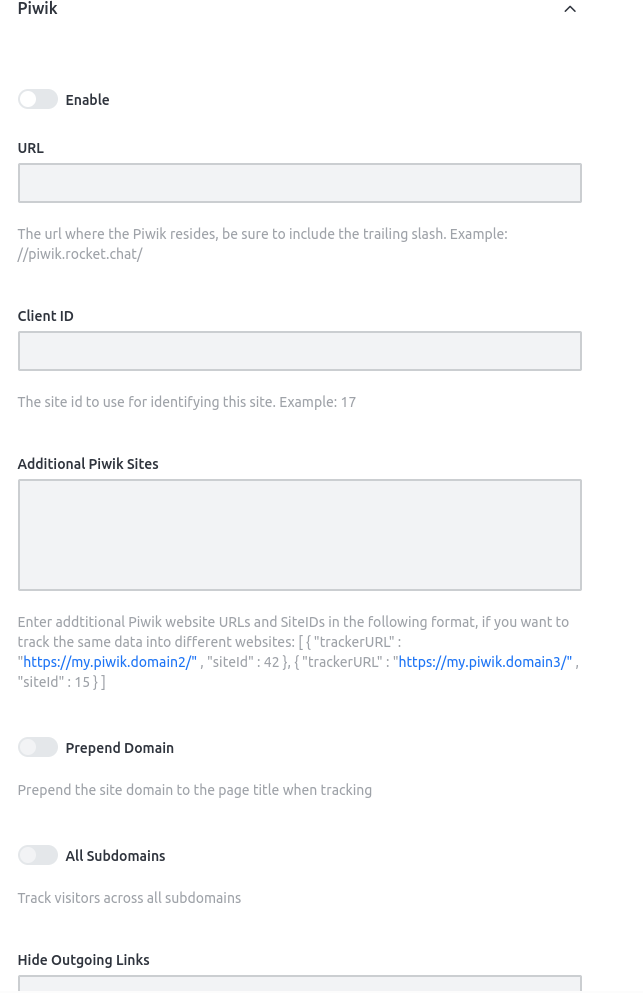
- Under the “Features Enabled” section, select “Piwik” (the former name of Matomo Analytics).
- Select the “Enabled” toggle switch to configure Matomo Rocket.Chat options. The color will update to blue.

- Add your Matomo Analytics instance URL with the trailing “/” at the end.
- Log into your Matomo app.
- Select “All Websites” on the top-right corner.
- Select “Add a new website.”
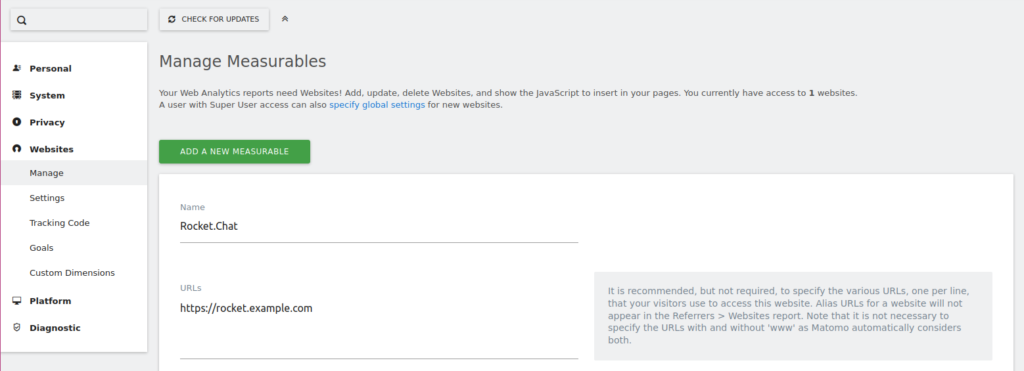
- Follow the setup instructions. The only settings you need to configure for now are “URLs” and “Time zone.” Select “Save” at the bottom once done.

- Once forwarded to the “Manage Measurables” page, you’ll see a Matomo site “ID” number under the website name. Type the ID number for Rocket.Chat in your Rocket.Chat web app under “Client ID.”

Keep Matomo open. - If you have multiple Matomo instances you’d like to integrate, enter them in the “Additional Piwik Sites” text box.
- Enable “Prepend Domain” to use the full URL within Matomo analytics.
- Enable “All Subdomains” to track subdomains under your Rocket.Chat instance.
- In the “Hide Outgoing Links” section, add any internal URLs you don’t want to track.
- Select “Save changes” at the top-right corner.
Test Your Rocket.Chat Matomo Configuration
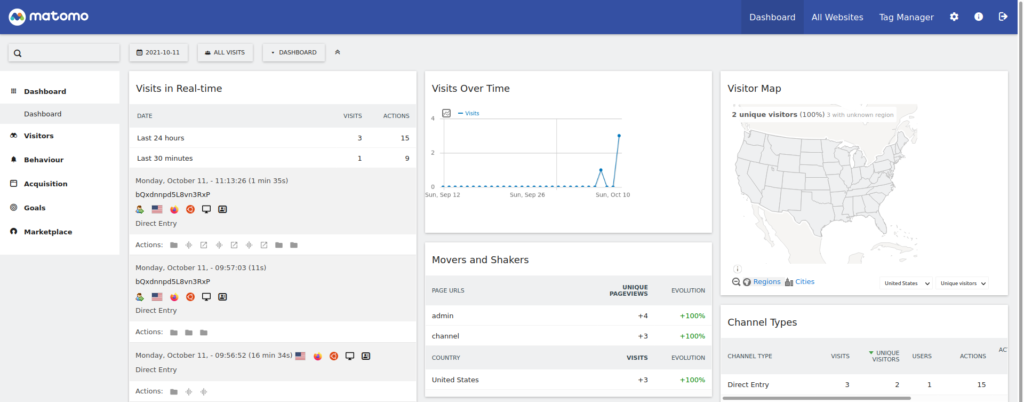
Browse a few pages within Rocket.Chat. Share some hyperlinks in the chatroom and open them. In Matomo, select “Dashboard” at the top. You should see some analytics for visitors and page URLs.
How to Troubleshoot Rocket.Chat Matomo Integration Issues
Troubleshooting web analytics can be frustrating. Here are some tips to help you troubleshoot Matomo Rocket.Chat metrics.
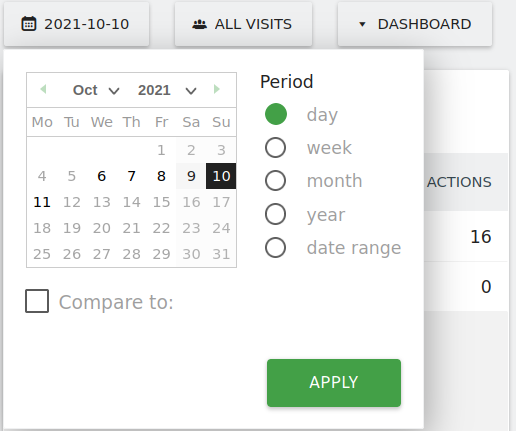
First, ensure your Matomo dashboard is set to today’s calendar date at the top.
Modify Do Not Track (DNT) Browser Settings
Check if your browser sends Do Not Track (DNT). Matomo respects this browser setting by default. If it is enabled in your browser, disable it, refresh your chatroom, and navigate some more pages. Recheck Matomo.
You can also disable Matomo from respecting DNT from Administration > Privacy > Users opt-out. We don’t recommend this for respect of General Data Protection Regulation (GDPR) compliance and user privacy in general.

Disable Rocket.Chat Content-Security-Policy
On your local machine, check to see if something is blocking your Matomo JavaScript URL with the Developer Tools console tab. It may be blocked by the chat application’s Content Security Policy (CSP) header.

As of version 4.0.0, the easiest solution is to disable the application’s Content-Security-Policy (CSP). From the administration page, select “General” and disable the “Enable Content-Security-Policy” feature.
As this is a valuable security feature, we recommend only disabling this if you truly need the analytics now and have taken additional steps to secure your Linux cloud server. Otherwise, you should first contact the Rocket.Chat development team about the best course of action for modifying the CSP to whitelist external scripts.
Contact our 24/7 Live Support if you encounter additional issues.
Experience full control over your server environment and deploy the best operating and management systems that fit your needs with our reliable Cloud VPS Hosting!
