Table of Contents
When working with file uploads in WordPress a multisite configuration, you want to pay attention to the maximum upload file size. Allowing a setting that allows file sizes that are too large will cause performance issues. Below is a guide that explains how to change the maximum upload size.
How to set the Max Upload Size for WordPress multisite
- Log into the Network Admin for your WordPress multisite program.

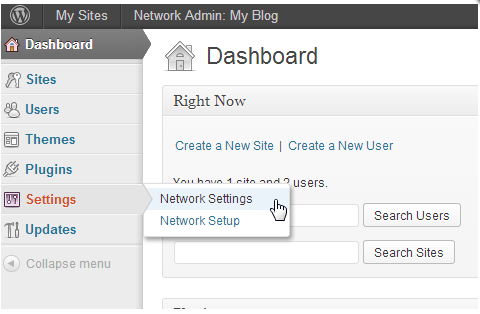
Scroll down the left hand menu and hover over the Settings option. Next, click on Network Settings from the popup portion of the menu on the right.

This takes you to the Network Settings screen. Scroll down until you find the setting that reads Max Upload File Size. Note that size is set in Kilobytes (KB), so 1000kb = 1MB Click on the Max Upload File Size field and then you are able to change the setting by either using the up and down arrows or by typing in a new value directly. The default value for this setting is 1500 KB.
- Once you have entered your desired value, scroll down and click on the Save Changes button to finish and save it
In some cases, this change must be made in conjunction with a change in the php.ini file. Information on changing that can be found here: How to update your local php settings.

