Table of Contents
This tutorial will explain the block preferences of the editors available in WordPress today. The WordPress Full Site Editing (FSE) system includes multiple editors that use the block system originally created through the Gutenberg project.
Understanding the Different Editors in WordPress
Before we review the preferences for the editors, it is important to know the purposes of each editor that you will be using in WordPress.
Each editor has specific block preferences or options that can change the behavior of the interface for the benefit of the user. The editors are specific to the needs of the WordPress site. They include a site or template/template parts editor and the page or post editor.
Site Editor
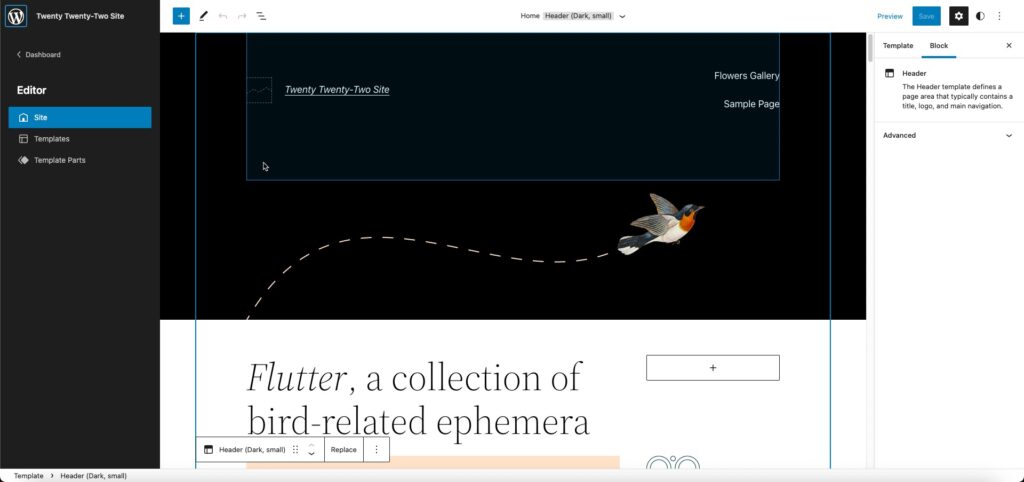
The site editor is used for the structure of the site. You can modify your home page and how it will appear. The site editor also gives you access to edit the templates and template parts that make up your site. For example, there are templates for the format of the pages and posts that display your WordPress content. These templates will vary based on the theme, but the Site editor allows you to modify them for your needs.
Page/Post Editor
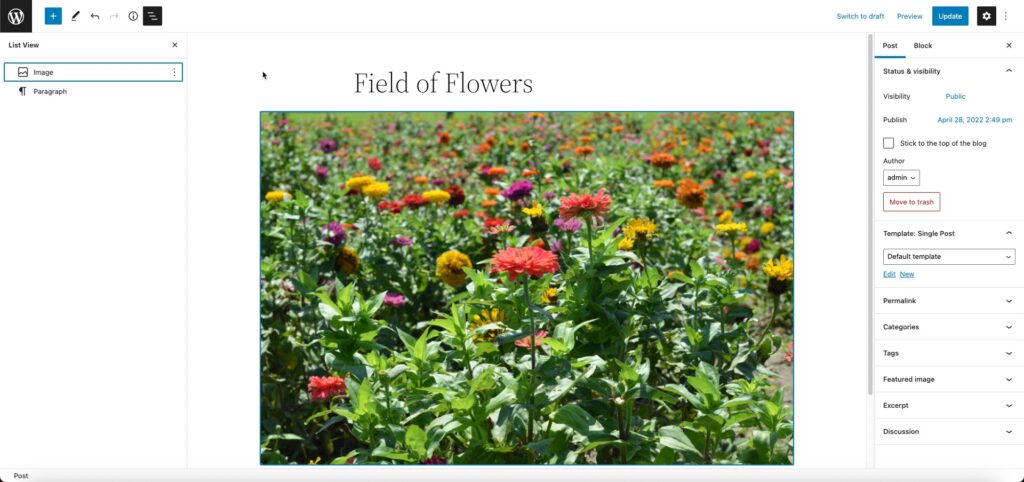
The page or post editor allows you to modify the content of your WordPress site. Pages tend to be content that is mostly static – meaning they don’t change. And posts can be for content that is frequently updated or changed. Posts can also originate from multiple authors who have been given access to your site.
Each of these editors has similarities in that they use blocks, but how they work with your WordPress site is different. These differences will also be seen in the preferences that you can select for editor type.
Describing the Block Preferences for Each Editor
The block preferences of each editor type can be found in the same location when you’re in an editor. If you click on the 3-vertical dot menu in the top right corner you will see a drop-down menu appear that is identical for the different editors. At the very bottom of that list is the Preferences option.
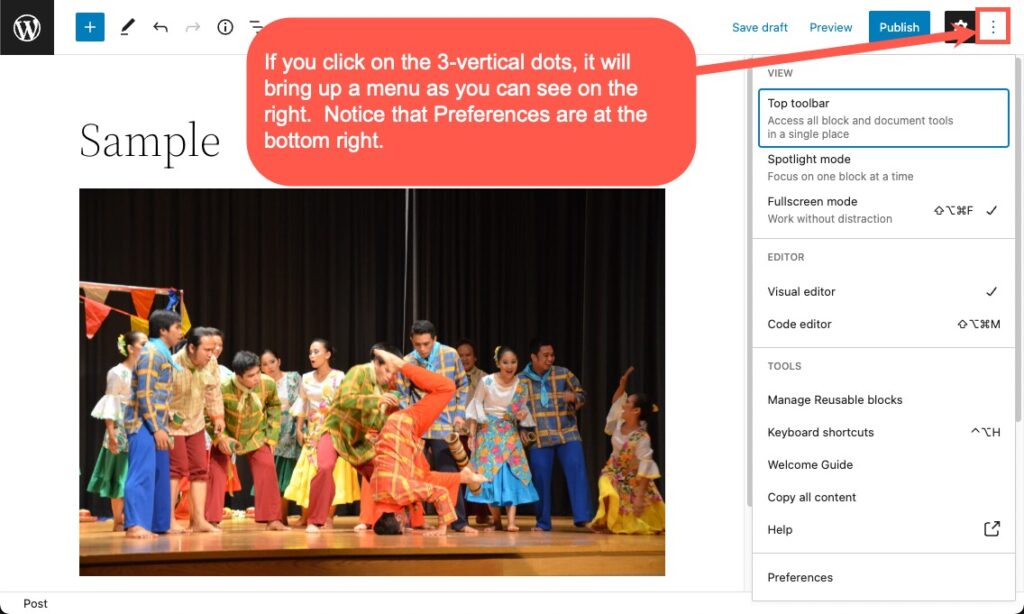
Site Editor Preferences
When you look at the Site Editor options, you will notice that there are only two options that you can select: General or Blocks.
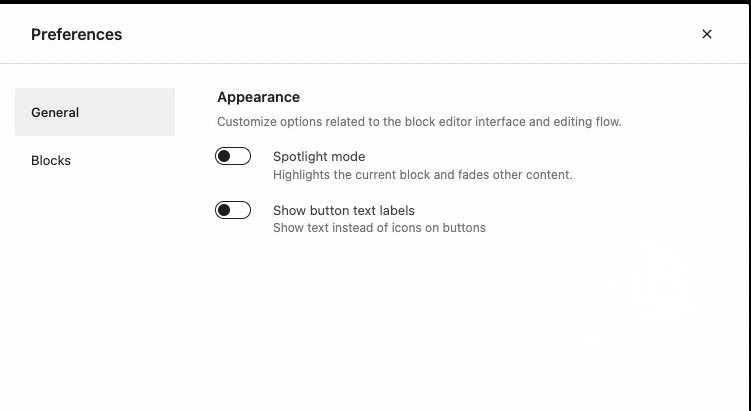
When you select the General option you will see that there are two options that are under Appearance.
- Spotlight Mode – Focuses the interface to show only the block that you’re viewing in the editor. Everything else is faded out to allow you to concentrate on a specific area.
- Show button text labels – Removes any icons from the menu toolbar and replaces them with text. It’s pretty easy to see in the screenshots below:


Blocks show the block interactions – leaving the text cursor in the block. This helps screen readers by keeping the text caret in the blocks. This keeps them from having to find the caret elsewhere on the page.

Note that the site editor uses the same preferences as the editor used to edit the templates or template parts.
Post/Page Editor Preferences
There are many options that can be selected in the 3 sections. However, it’s best to remember that you can use these options to remove what you don’t want to use in order to make your worker quicker.
General Preferences
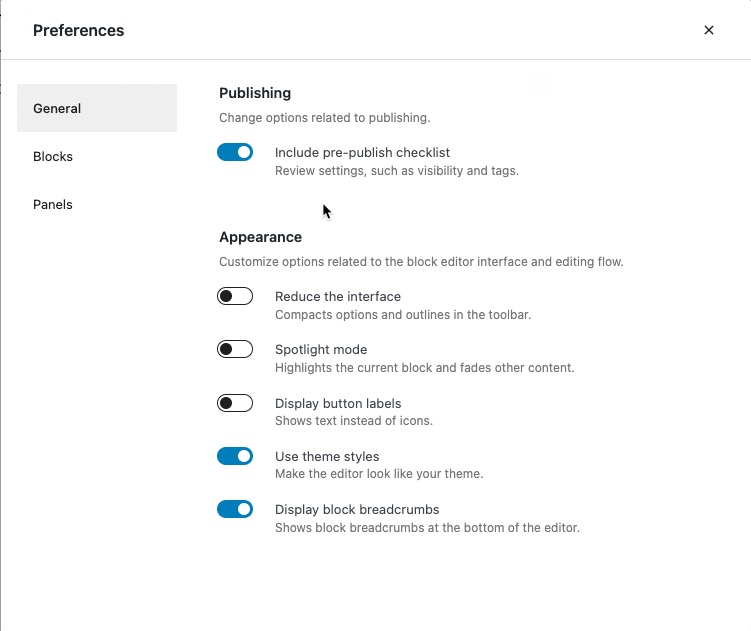
The first section under general is Publishing. The only option here is a slider to enable the pre-publish checklist. This checklist looks like this when you click on the Publish button:
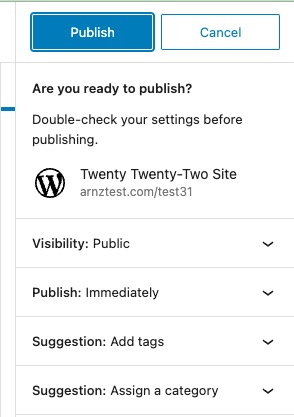
If you disable the option with the slider, then when you click on the Publish button the post would be immediately published.
The next section that appears in the general preferences is labeled Appearance. Each option can be enabled or disabled with a slider:
- Reduce the interface -(defaults as off) | Reduces the options that you see in the top toolbar of the editor. If you bring the mouse pointer up, the options will re-appear.
- Spotlight mode – (defaults as off) | Highlights the block you’re currently editing and fades out the other content.
- Display the button labels – (defaults as off) | shows the buttons in the toolbars as text.
- Use theme styles – (defaults as on) | Changes the appearance of the editor to look like your theme.
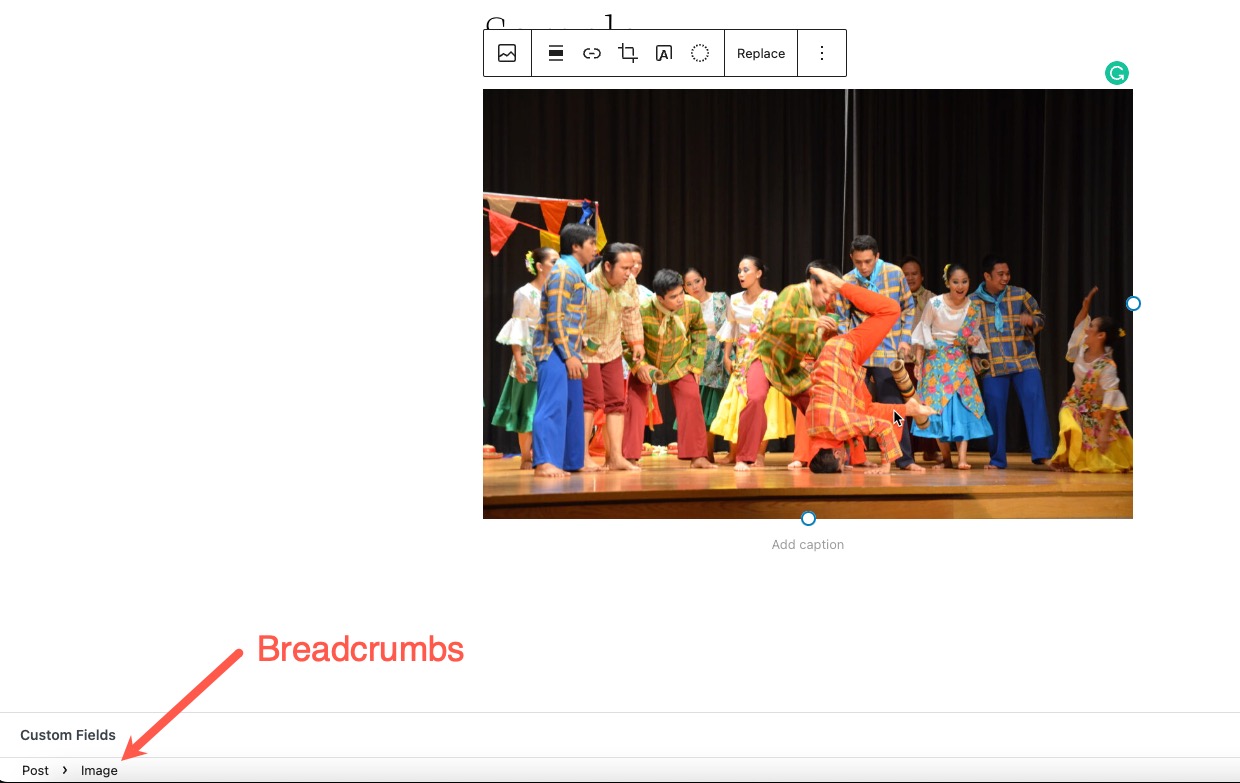
- Display block breadcrumbs – (defaults as on) | Displays the block breadcrumbs at the bottom of the editor. In the screenshot below you can see the image block highlighted and breadcrumbs for the image at the bottom

Blocks Preferences
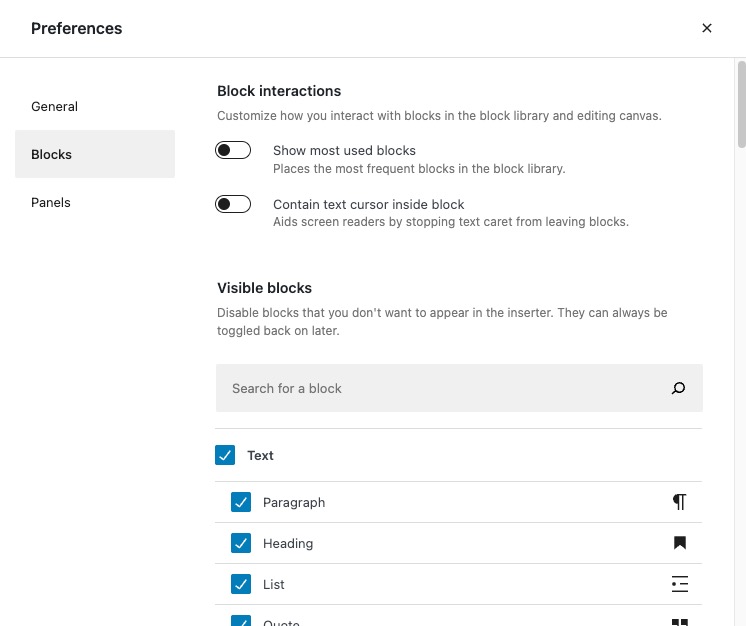
There are two main sections under Blocks: Block interactions and Visible blocks.
Block interactions customize the behavior of blocks that you use from the block library and in the editor.
- Show most used blocks – (defaults as off) | This will prioritize the blocks you use most in the library.
- Contain text cursor inside block – (defaults as off) | This option helps screen readers by keeping the text cursor from leaving a block.
Visible Blocks allow you to disable blocks that you don’t want to appear in the block inserter. This does not remove the block and you can re-enable them if needed. The interface lets you search for a block and uncheck it to disable it. Blocks are all enabled by default.
Panels Preferences
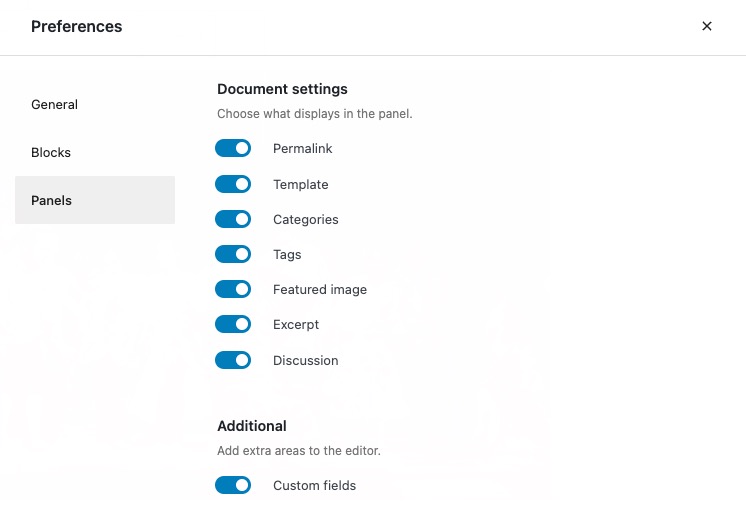
Panels preferences are all enabled or disabled by sliders and grouped as either Document settings or Additional.
- Permalink
- Template
- Categories
- Tags
- Featured image
- Excerpt
- Discussion
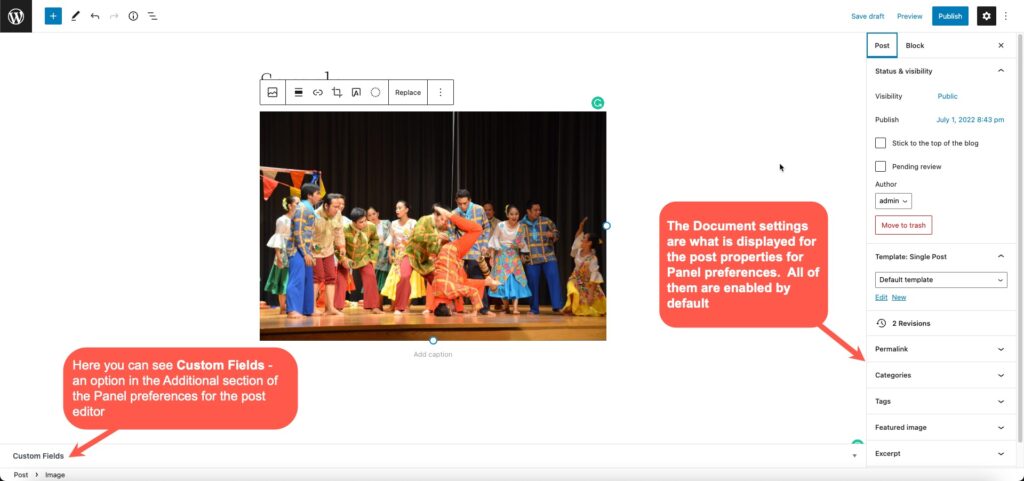
All of these options are the parts of a post/page. You can access edit these options within the post in the right-hand column.
You can change preferences settings to determine what is active and visible in the post editor. This includes the Custom Fields that are visible at the bottom of the post. You can see the options in the screenshot below.
You should now have a pretty good grasp of the preferences and the options available for the site or post editor. The site editor is used to customize the structure of the site, while the post editor is for the content on the page or post. And the preferences for both help to streamline or change the functionality of the options that you can use in each editor. Learn more about Full Site Editing in WordPress through our InMotion Hosting Support Center!
WordPress is constantly evolving! Stay up to date with the latest WordPress news and releases to keep your website modern and secure!

