Table of Contents
The navigation block and menus have been updated in WordPress 6.2. The site editor allows you to create and edit menus using the block properties. This benefits the user by providing a clearer and easier interface to work with your menu.
This tutorial will walk you through creating menus using the site editor in the front end of WordPress.
This tutorial uses the free Bibimbap theme in WordPress version 6.2 to demonstrate menu creation and editing in a block-based theme.
Creating Menus
Menus are navigation tools for your visitors and will remain in the same location from page to page. Typically, these menus are found in the header or footer of a website.
The block that manages menus is the navigation block. You won’t see the word “menu” in the interface until you add and edit the navigation block.
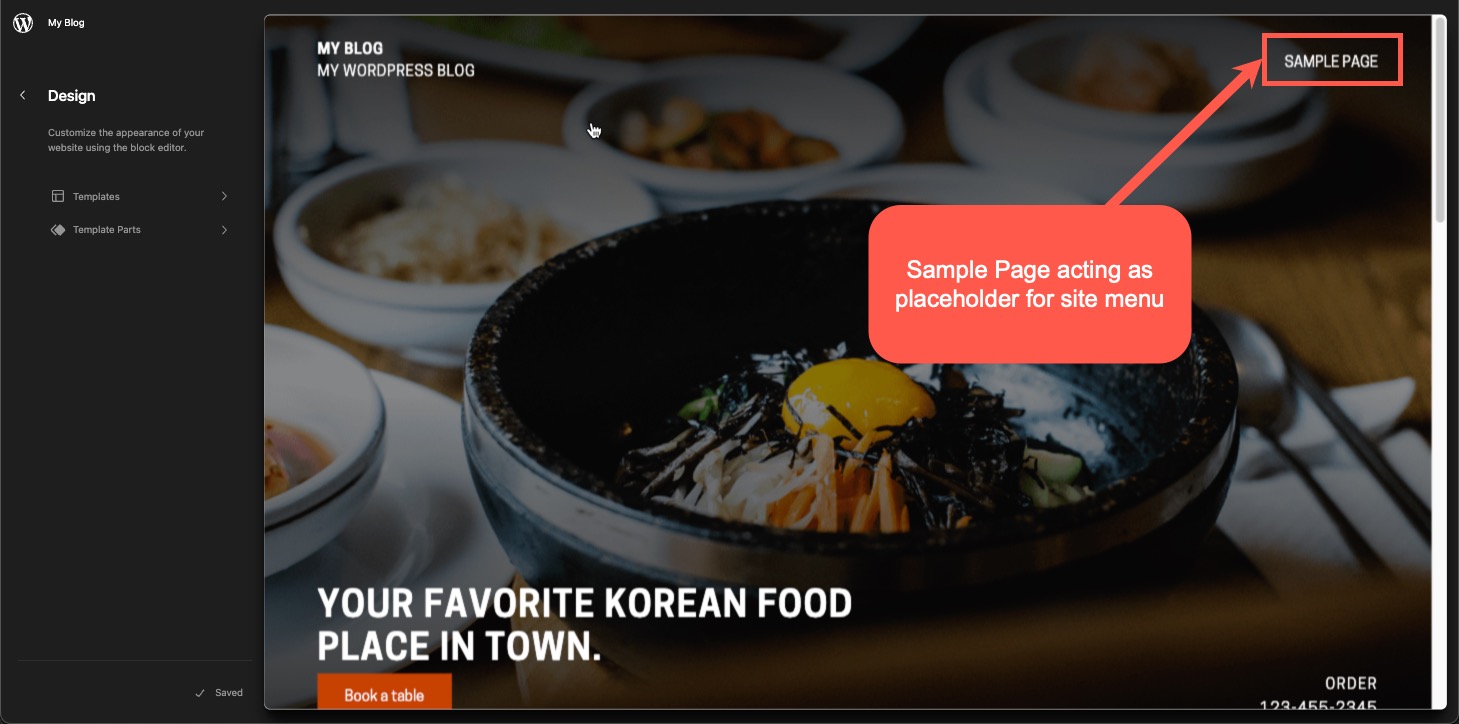
The location of the menu will depend on the theme. Generally, the menu has a placement holder when selecting a theme. They may have a single page that marks the menu’s location.
If you are adding a menu to the header or footer with no placeholder, then follow the directions below:
- Log in to the WordPress Administrator.
- Click on Appearance, then click on Editor.
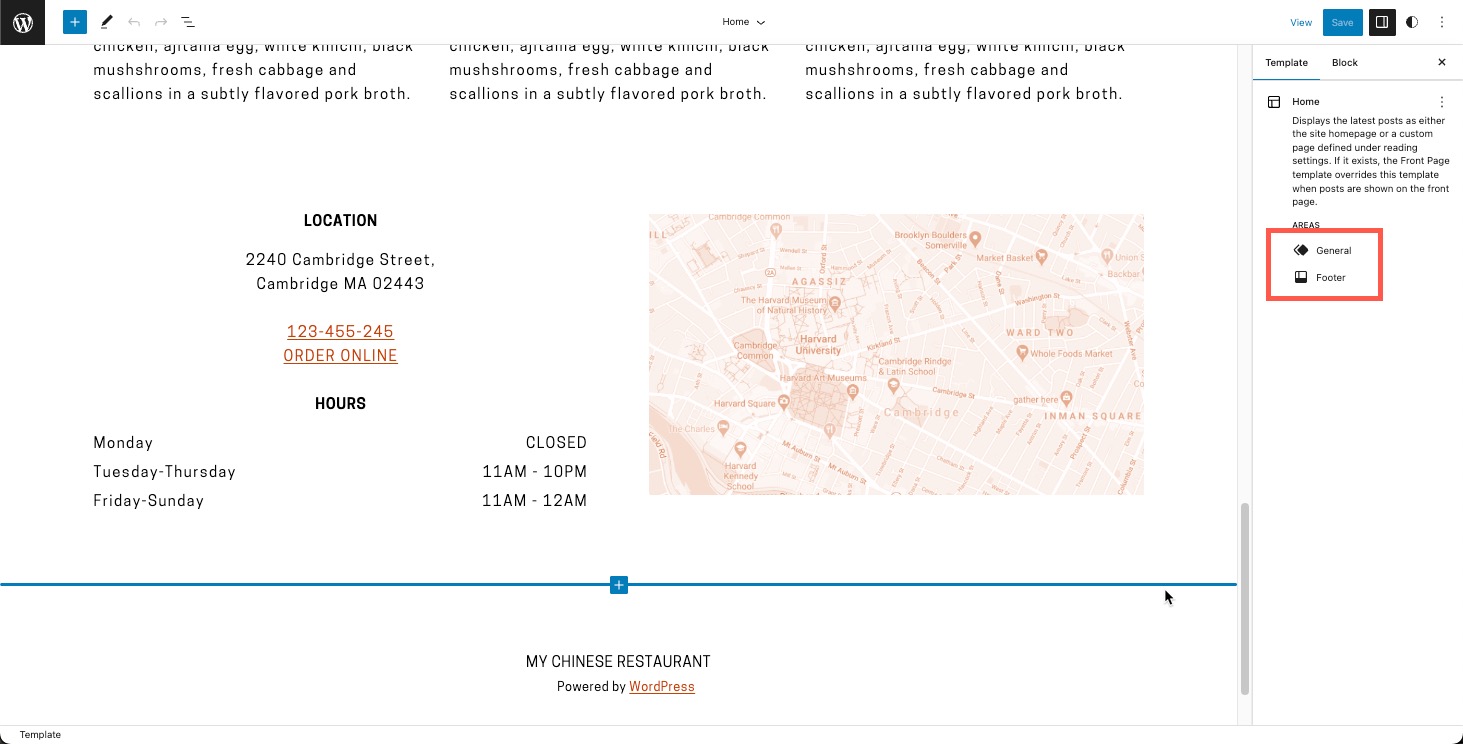
- You will see the home page of your site. Click on the Header or Footer.

- If you click in the area of the header or footer, you will see the area noted in the right column where the block properties are displayed. Click on Footer in the column.

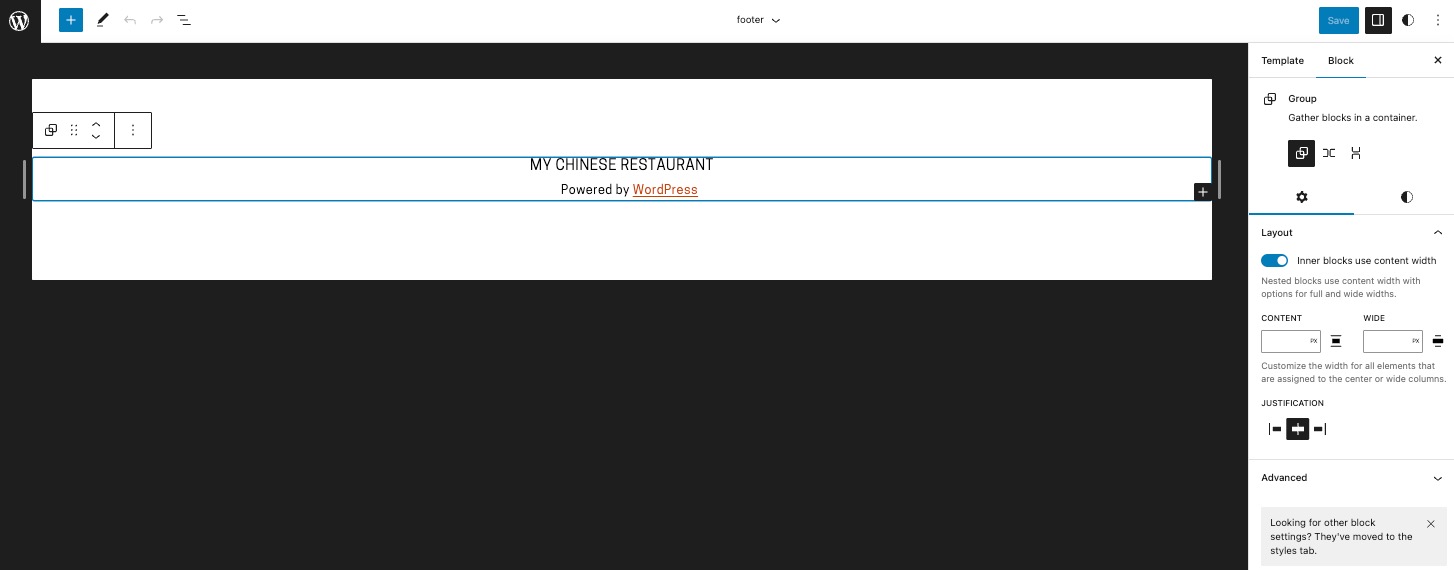
- When you select the footer in the right column, a toolbar will appear above the selected area with an Edit option. Click on Edit.
- The footer or header that you have selected will be isolated in edit mode. You can then select the specific area to add the navigation block. Left-click in the area where you wish to add the menu.

- Click on the plus sign (+) in the bottom right-hand corner of the block.
- In the search bar, type “navigation.” When the block appears, click on it to insert it.
- Click on Save in the top right corner to save changes.
Once you have the navigation block in place, if you have published pages, the menu is automatically populated.
Adding Items to Your Menu
If you have a new menu and it’s blank with no pages, you do have some options that you can use to populate your menu.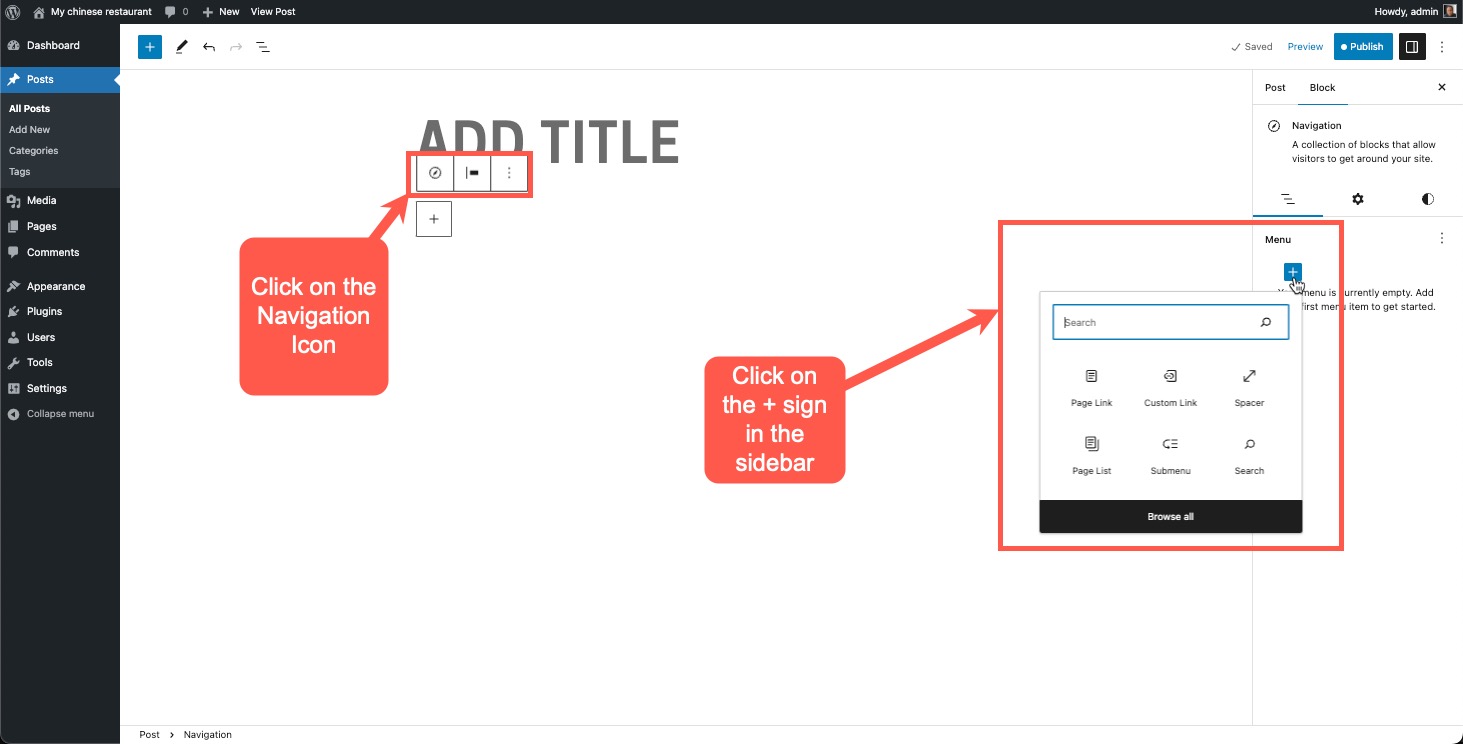
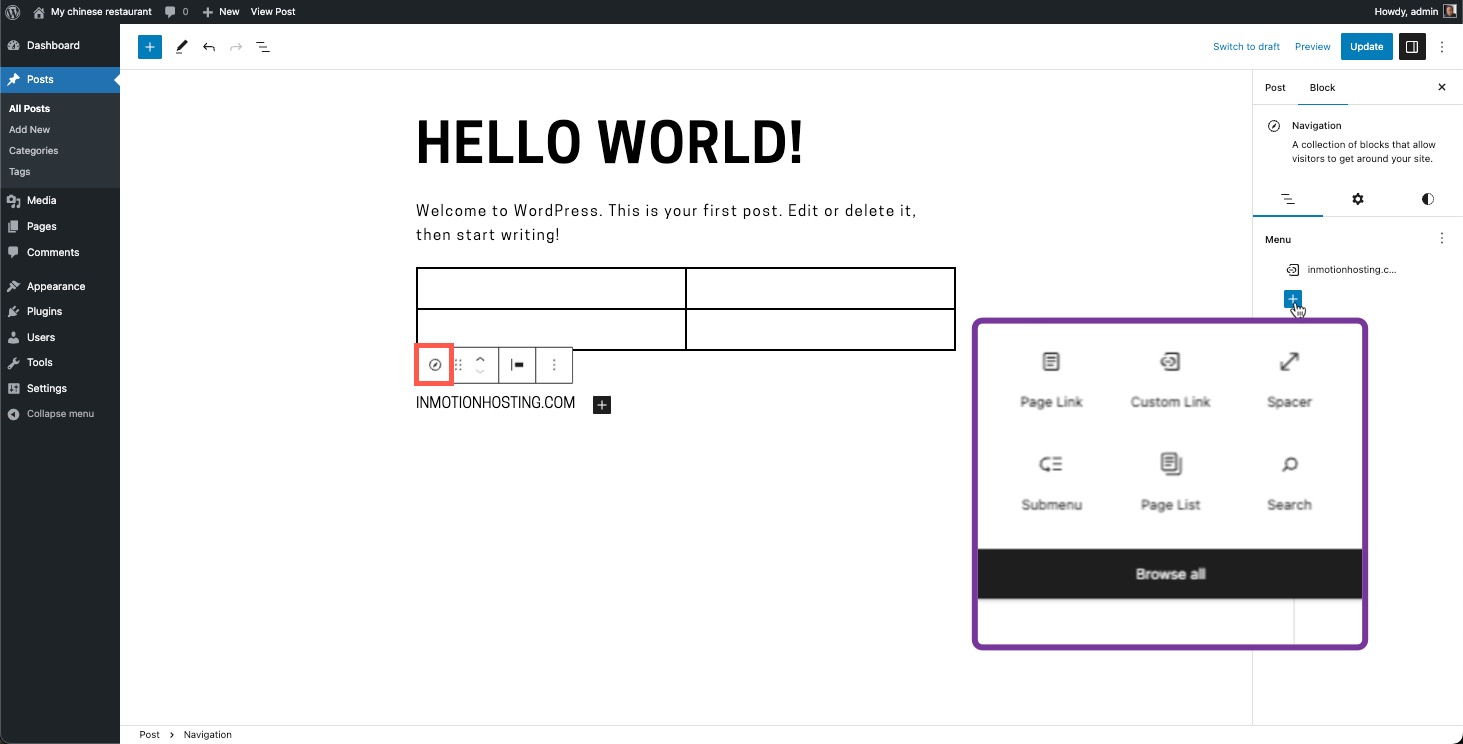
In the screenshot above you can see how to add items to your menu:
- Click on the Navigation icon.
- Click on the plus (+) sign in the sidebar under “Menu.”

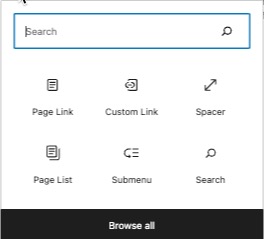
The options that appear are all related to items that you can add to the menu. Here’s the list:
- Page link
- Custom link
- Spacer
- Page list
- Submenu
- Search
Select the items to add to your menu.
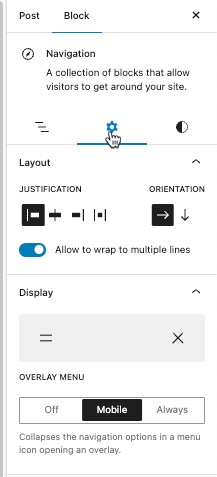
After you have finished adding your menu items, you can choose to edit the navigation block. The block properties have settings that include:
- Layout – Set the justification and orientation of the menu
- Text wrap – Enable or disable text to wrap to multiple lines
- Display – Enable or disable the button to display the visual appearance of the overlay menu. This can be set to off, mobile, or always.
If you are working with a theme with a placeholder for the menu, then your steps are the same, except when choosing where to place the menu. Simply click on the placeholder, and then the menu appears in the right column.
Selecting and Managing Menus
Menus can be created and assigned per template. For example, you can have a main menu on your homepage and then a different one in the header of your pages.
You can create multiple menus and select when the time is appropriate.
In the steps below, we will first create a new menu on a page/post and then show you where you would select a saved menu. The menu will be created on a page or post.
- Open or create a new page or post.
- Add a new Navigation block. When you create it, it will be set to the last saved menu.
- In the right column, click on the 3-vertical dot menu.
- Select Create new menu from the menu that appears. This will give you a blank menu to start.

- Click on the navigation icon. You can add pages, posts, submenus, page lists, page links, spacers, and a search using the column at right. Select an option to add to your menu.

- You will need to create the new menu by populating it. For this example, I have just put in two URLs as placeholders. You can always go back later and edit the links.

That navigation settings icon lets you select menu justification, menu alignment, wrap options, and overlay options (for the menu). Select an option for your menu if needed. - The next section (to the right of Settings) is the Style options. Here you can set the color for the text, background, submenus, overlay text, and overlay background. Pick the option that you want to use for your entries.
- Click on Save.
If you are creating menus on a page or post and you see an error that the menu failed to create, go to the site header, select the menu in the header, and create a new menu there. You can choose the created menu on your post or page.
Managing and Deleting Menus
You must go into the settings to access the page for managing menus.
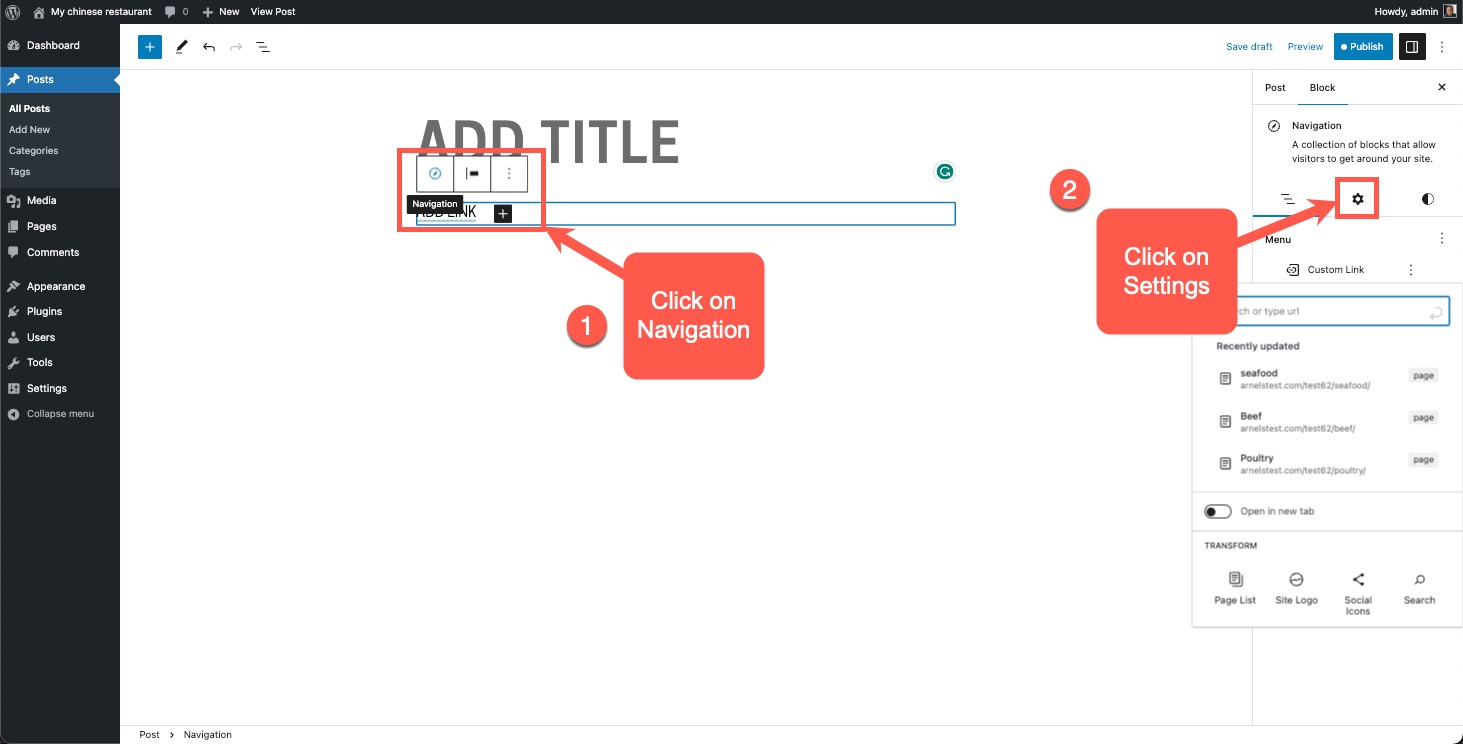
- Click on the Navigation icon to select your menu.
- Click on Settings in the sidebar.

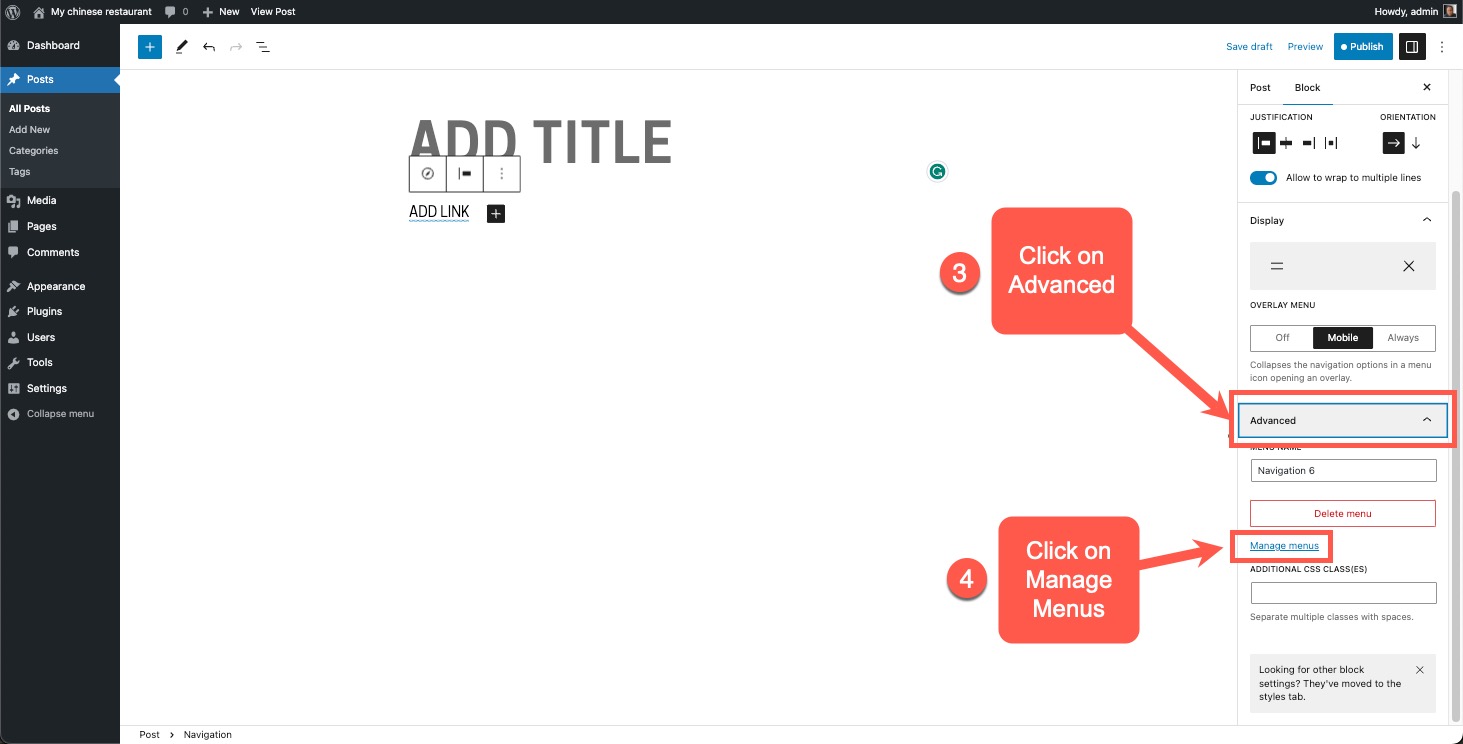
- Click on Advanced. Here you will have a chance to delete the menu you’re working on.
- You can also click on Manage Menus to see all of the existing menus.

- The Manage menus section lets you see the existing menu names, rename the menus, and delete the menus. You can also use the quick edit option for each menu to make it private or add a password for access.
Creating menus is an essential part of any website design. They provide a navigation interface for your viewers to use your website. The options to build menus through WordPress 6.2 gives you a visual interface and options to create simple menus or more complex ones with many submenus.
The WordPress full site editor is still evolving. So, more functionality may be added to the Manage Menus section in the future.
