Table of Contents

The Search block is a widget used to search the published content of your WordPress site. This tutorial will show you how to use the search block in the WordPress Full Site Editing (FSE) system. We will also provide some background information on the block and how it works with your WordPress site.
This tutorial uses WordPress version 6.0 and the Twenty Twenty-two theme.
How to Use the Search Block
The search block can be used in the site editor or the post/page editor for your content. Using it on your home page, header, or footer of your site provides search functionality throughout your website. Searches will bring up all instances of the search term from your published content.
You will need to be logged into the WordPress Administrator Dashboard as an Administrator before following any of the steps below.
Site Editor – Templates or Template Parts
In order to add the block through your site editor follow these directions:
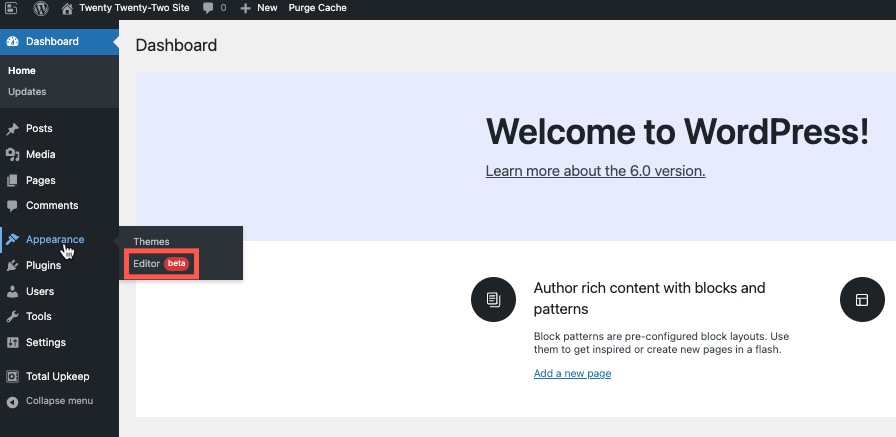
- In the main menu, click on Appearance, then click on Editor.

- You will need to decide where to place the Search option. For this tutorial, we will show you how to add it to the header. Click on the WordPress logo in the top left corner.

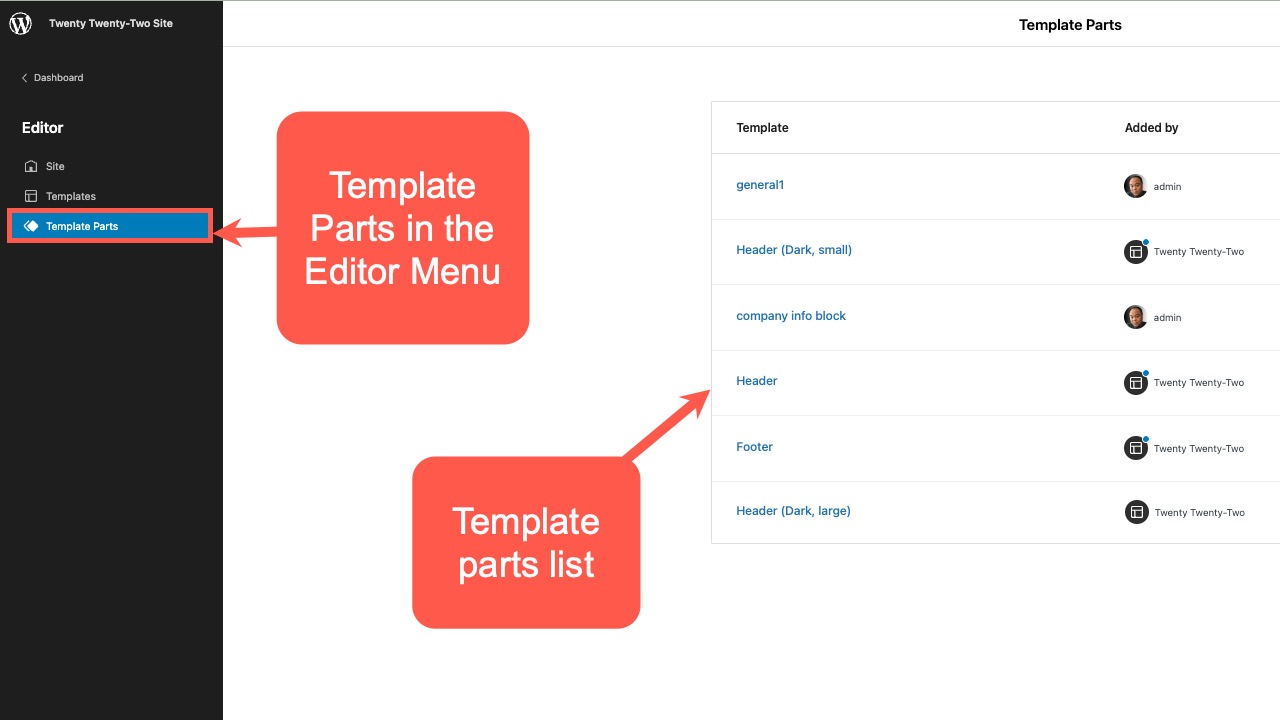
- Click on Template Parts. Since we are adding the search block to the header, we will need to edit the header of the theme.

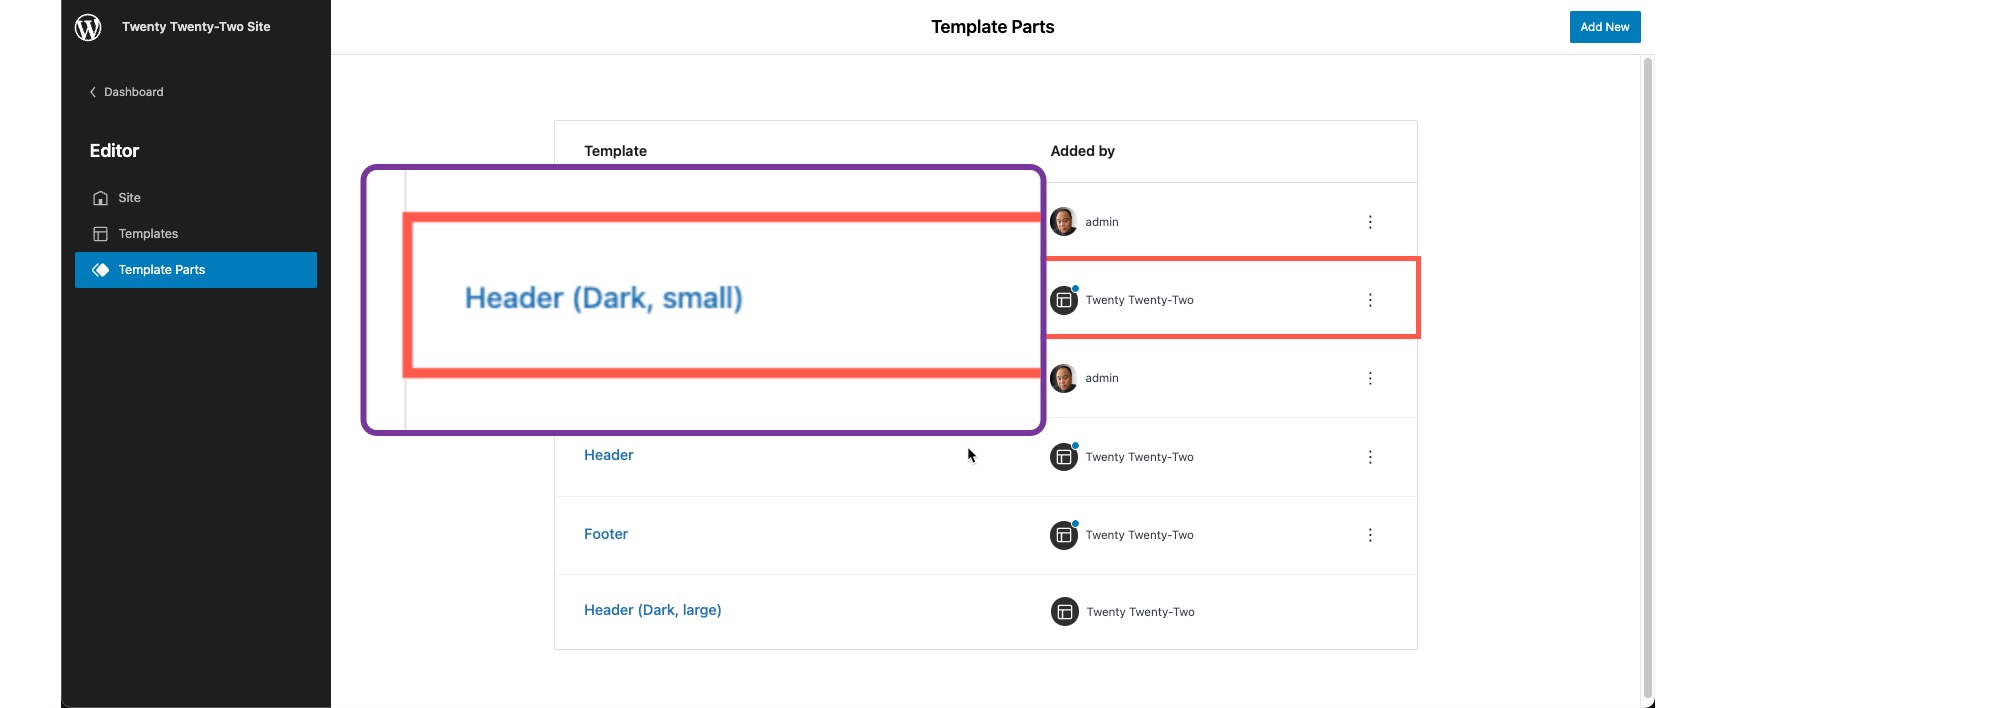
Depending on the theme that you’re using, you may see more than one header. If you’re using the other headers, then you will need to edit them all in order to add the search option. - Click on the header that you wish to edit. Click on the template part title to open it in the editor.

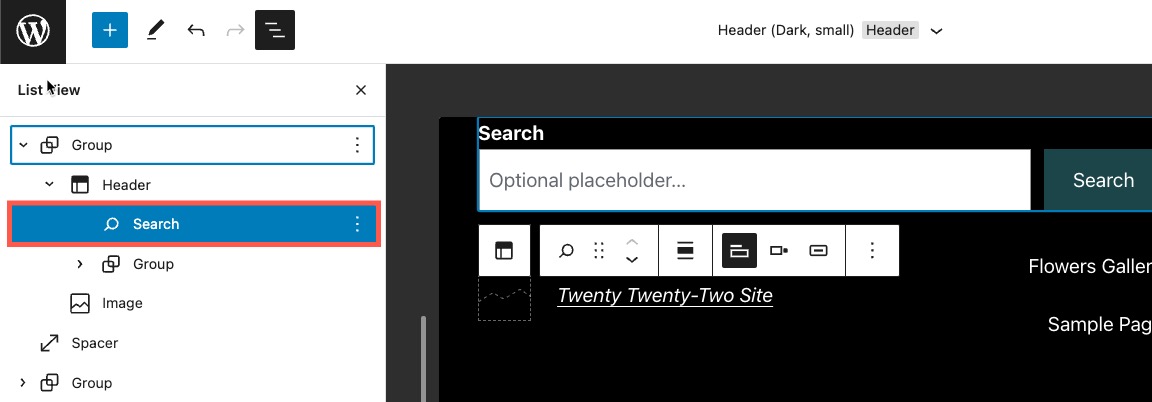
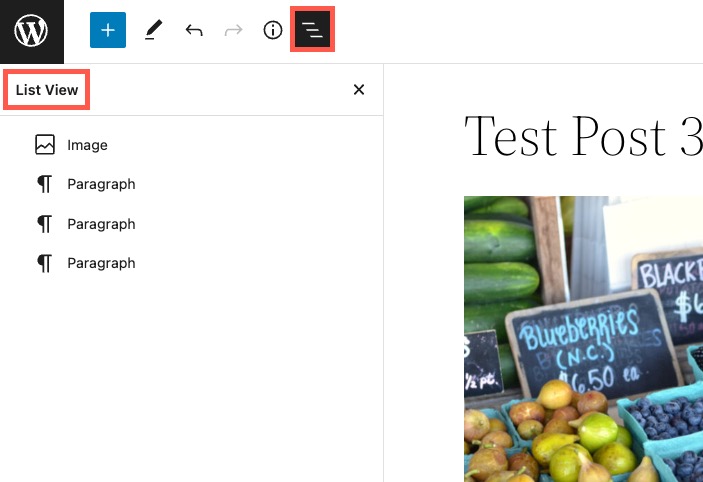
- Click on list view in the top menu bar (it looks like 3 staggered horizontal lines on top of each other).
- The list view allows you to accurately determine where you want to place the search block. Select a location, then click on the + sign(Toggle Block Inserter) in the top left corner.
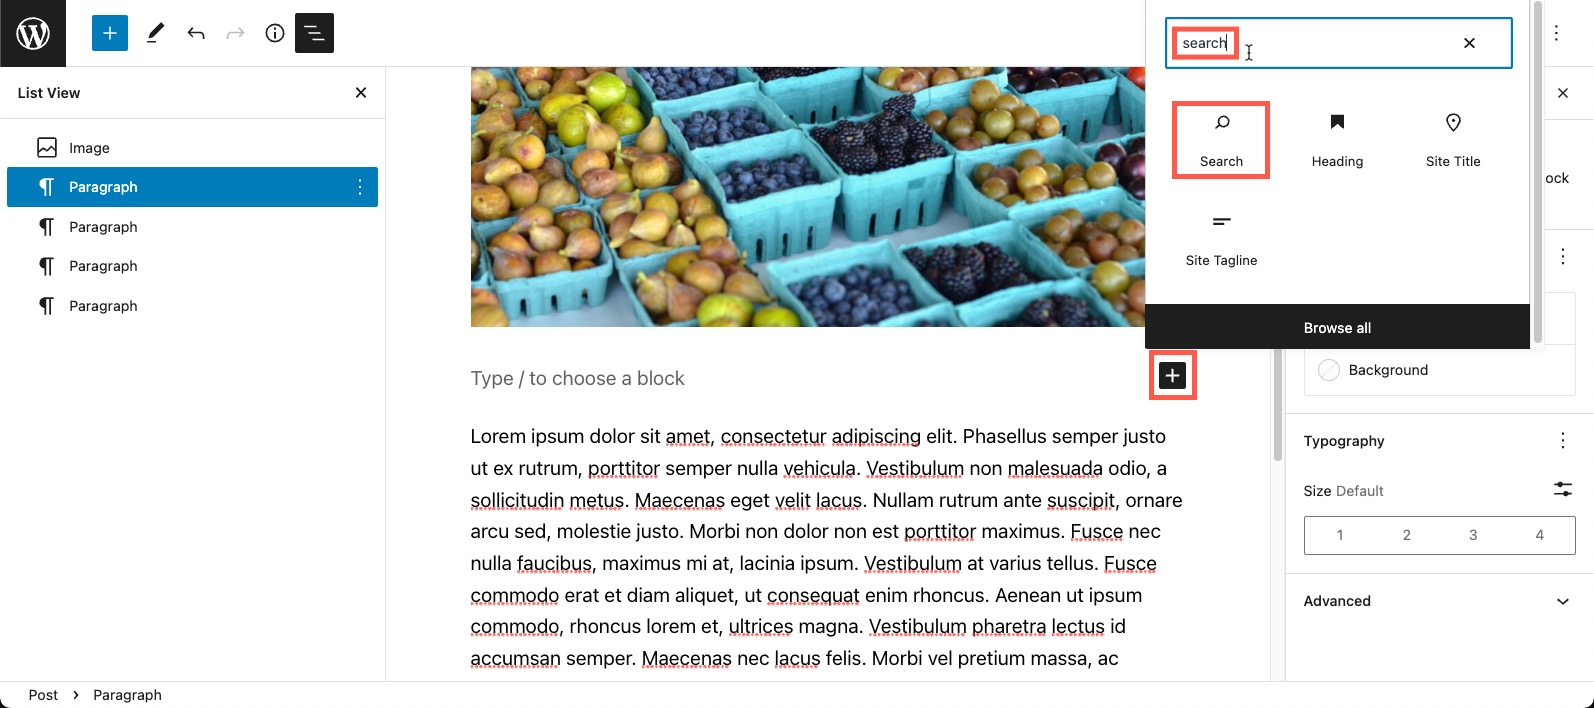
- In the search field, type “search”. Click on the search block when you see it. The search block will be added.

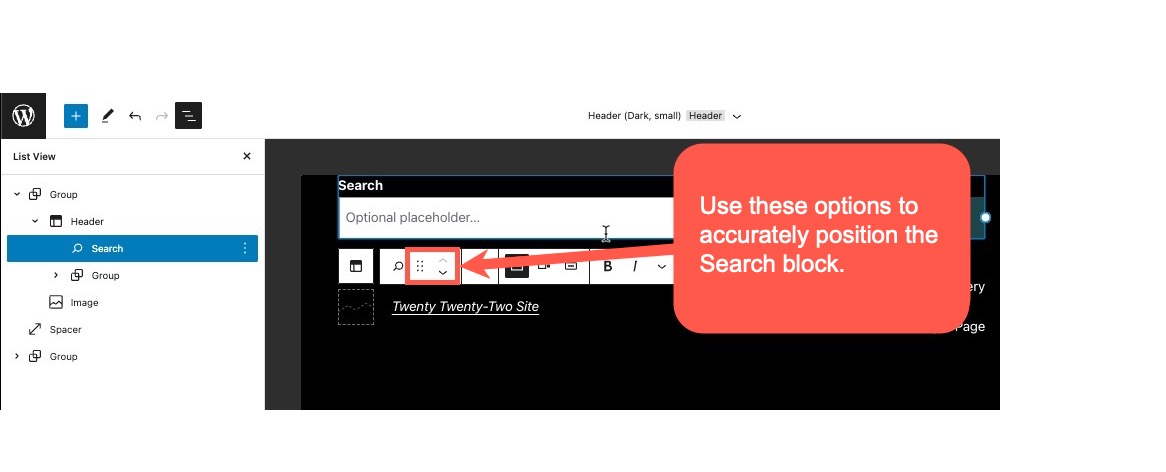
- If it’s not in the right spot, you can easily re-position it using your mouse to drag and drop it or click on the up or down arrows to move it. Make sure it’s in the right spot, then go to the next step.

- Click on the blue Save button in the top right corner. You will be asked to confirm that you’re saving the header and the Header Template part that you selected earlier. Click on Save again to confirm.
Post or Page Editor
The search block can also be used in a post or page that is displaying content on your WordPress site. Typically, if you have a large post or multiple images that you want your viewer to be able to search when viewing that page or post, then you can add the search block in order to make it easier for the viewer to find specific content.
- Open a new or existing post (or page).
- Select the area where you want to add the search block. You can also turn on list view to more accurately place the block if you have existing content.

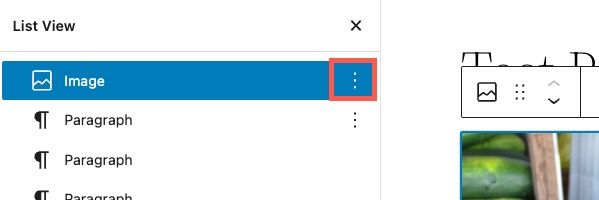
- In list view, click on a block adjacent to where you will place the search block. Click on the 3-vertical menu, then select to insert the block before or after the block that you’re on.

- Click on the Add block (the + sign). Type “search” in the search field. This will bring up the search block. Click on it to select it.

If the block is not in the correct position, remember that you can always easily move the block using the drag and drop option or the positioning arrows on the block toolbar. - Once the block is in the proper place and set up the way you want it, click on Save Draft, Update, or Publish in order to save your post or page.
Search Block Options
The search block has a number of options that you can select from the toolbar and from the block options at the right of the page. We’ll cover each option below. To bring up the toolbar, click on the block.

Toolbar options specific to the search block
 | These two options allow you to move the toolbar by dragging and dropping or using the up and down arrows to position it |
 | Alignment options – none, left, center, or right |
 | Toggle the Search label above the search box (off or on) |
 | Search button position – outside, inside, or no button |
 | Toggle icon or text for the search button |
Search Instruction Text

When you’re editing the search block or just adding the search block, you have the option to add instructional text where you see “Optional placeholder…“
You can type in your own instructions. For example, “Type your search text here.”
In addition to the toolbar settings, the block has properties that affect how the search block will appear. These properties include:
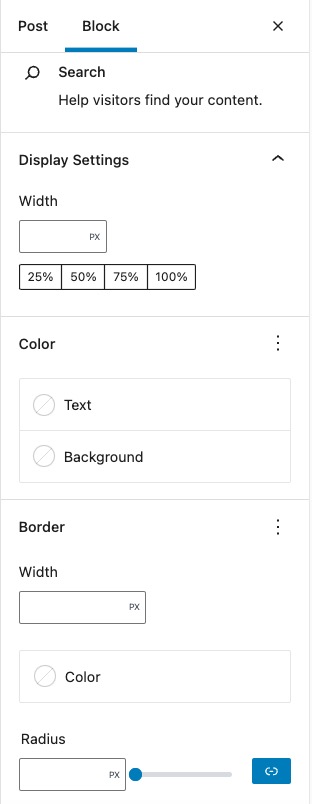
- Display Settings -you can select a width in pixels, or use percentages to determine how wide the block will appear.
- Color – Here you can set the color for the text or background in the Search block. There are no colors not selected by default. Note that this option may be determined by the theme that you use.
- Border Width – This determines the width of the border around the search field.
- Border Color – This determines the color of the border around the search field. This option may be determined by the theme you are using.
- Border Radius – This determines the shape of the border and the button used by the search block. The maximum value makes the search field and button into pill shapes. Size can be set by pixels or using the slider.
Information on Using the Search Block
The WordPress Full Site Editing System (FSE) uses many blocks that were developed as a result of moving to the Gutenberg system for content development. Some of these blocks were originally widgets in the older versions of WordPress. The search block is one of the widgets that were moved into the blocks of the WordPress visual editor. Though, it is still categorized in the blocks as a widget.
The search block is essential for your WordPress site because it allows visitors to find specific content. The search looks through all of your published content. It can find specific text in a published post, or even alt text that you may have assigned to a file in your media library.
The search block provides a powerful tool to find content that you may not have categorized or tagged. However, although this tool provides that functionality for your users, it is still very important to develop a system in how you use categories and tags that make up your published content. Using well-ordered categories and tags will help with your search engine optimization by providing order to your content so that search engines can more easily index your site.
The search block is a potent tool that enables your users to make more use of the content you provide on your WordPress site. Go to our InMotion Support Center to learn more about the WordPress Full Site Editing (FSE) system.
“
If you need a new home for your WordPress site, look no further than InMotion’s WordPress Hosting solutions for secure, optimized, budget-friendly servers.
Fast & Easy Transfers
Free SSLs
Hack Protection
Affordable
“
