Table of Contents

In this tutorial, we will show you how to manage WordPress comments. When you create a new blog Page/Post, you have the option to allow visitors to post comments that other visitors may view. Also, there may be times when you need to remove or modify comments a visitor has posted to your WordPress site.
Set How Comments Are Managed
- Log in to your WordPress Dashboard.
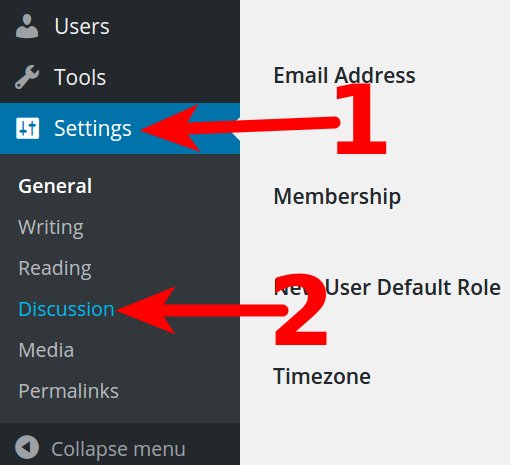
- Click Settings, then Discussion in the navigation menu.

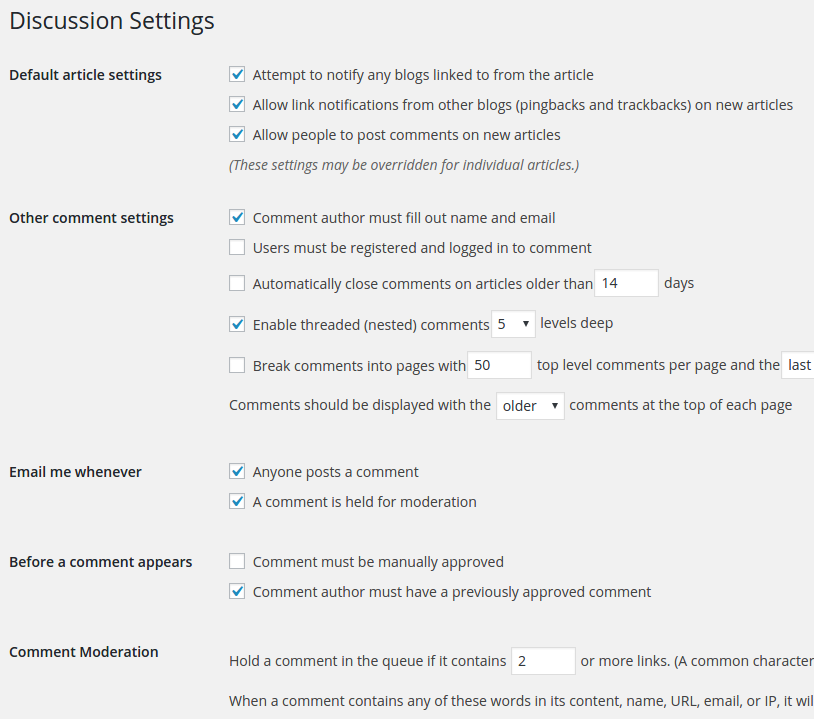
- You will then be on the Discussion Settings page. It will look like this:

Choose your settings as needed. Below is a brief description of the available settings.
Option Description Default article settings This is where you decide if comments are allowed on new posts on your website. Other comment settings The most important options in this section are deciding if you want your visitors to register in order to make a comment. While this will increase the chances of relevant comments, it also may decrease the number of comments on your website. E-mail me whenever This is where you can decide to be notified when a new comment is posted. Before a comment appears If you would like to approve comments before they are posted, make sure this box be checked. Comment moderation To help fight spam, you can add a filter to block messages that contain an excessive number of links. Comment blacklist If you notice alot of Spam containing a specific pattern such as the same IP address or the same content you can choose to block those posts. Avatars If a visitor has an avatar (a picture that appears next to their name), you can have it set so that they are allowed to display it on your website. You can also change the default avatar. - Once you are done making changes to your settings click the Save Changes button. You are finished when you see a message stating “Settings saved.“
How to Delete Comments
If you review your website and receive a comment that you do not wish to be displayed you can “unapprove” the comment or send the comment to the trash to remove them from your website altogether.
- Log in to your WordPress Dashboard.
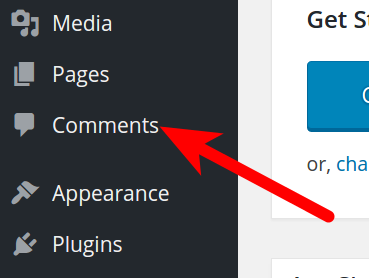
- Click Comments in the WordPress navigation menu.

- Click on the check box next to the comments that you want to remove from your website and select “Unapprove” or “Move to Trash” from the drop down menu under “bulk actions.”
- Click the Apply button to remove the comment. You can also use this bulk method to approve comments as well.
Congratulations, now you know how to Manage your WordPress comment spam!
If you need a new home for your WordPress site, look no further than InMotion’s WordPress Hosting solutions for secure, optimized, budget-friendly servers.
Fast & Easy Transfers
Free SSLs
Hack Protection
Affordable


This is a very informative and helpful post, very honest and practical advise. It’s very helpful for all new comer public. Specially this complete information will be helping to the newcomer. Thanks!