Table of Contents
Learn how to use the Super Socializer plugin to seamlessly integrate social media tools with your WordPress site. This helps drive more online interactions and engagement from your visitors since it provides a fast and easy way for them to share and interact with your website.
- Installation and Setup
- General Options
- Enable Social Commenting
- Enable Social Login
- Enable Social Sharing
- Enable Like Buttons
- How to Add Super Socializer Widgets

If you’re having trouble with your WordPress host, then check out InMotion’s WordPress Hosting. We provide secure, optimized servers that are priced to meet your budget needs!
Free Domain
Free SSLs
Unlimited Bandwidth
Installation and Setup
The first steps are installing the Super Socializer plugin and updating your privacy policy due to GDPR requirements. The specific verbiage depends on the plugin options you plan to utilize.
- Install and Activate the Super Socializer plugin by Team Heateor.
- You must now update your privacy policy based on the specific features you are going to use. Super Socialize provides example text you can add here.
We also have the following helpful guides:
- How to Add a Privacy Policy Page to a WordPress Site (for GDPR Compliance)
- Adding a Cookie Notice for GDPR in WordPress.
General Options
Now that you have the Super Socializer plugin installed we’ll show you how to access the General Options page and go over what you can modify there.
- Login to your WordPress Dashboard.
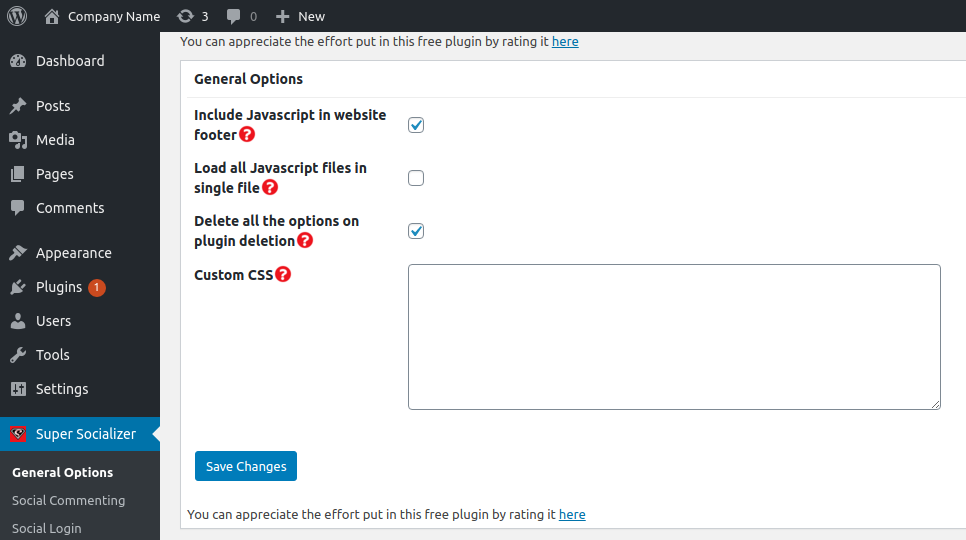
- Click Super Socializer then General Options in the navigation menu.
- Here you can select if you want to include JavaScript on your website footer and load it all in a single file. You can also choose if you want to delete all your option if the plugin is removed and add custom CSS.

- Click the Save Changes button after changing your settings.
Enable Social Commenting
Allowing visitors to comment using their preferred social media platform is a great way to encourage engagement and utilize word of mouth promotion. We will now show you how to enable social media commenting to allow Facebook and Disqus along with the default WordPress commenting ability.
- Login to your WordPress Dashboard.
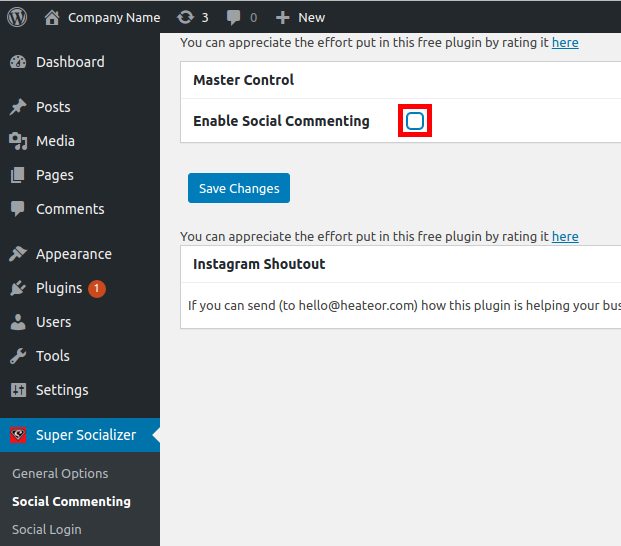
- Click Super Socializer then Social Commenting in your navigation menu.
- Check the box to Enable Social Commenting.

- You will then see additional settings appear. Choose your General Options, Labels, and Facebook Commenting Options.
- Scroll down to the Disqus Commenting Options section and check the box to Enable Disqus Commenting if you want to integrate this platform.

- Enter your unique Disqus Shortname.
- Click the Save Changes button.
Enable Social Login
Allowing users to login to your site using social logins is a convenient way to encourage people to comment on your site. It saves the visitor’s time since they do not have to create a new account on your site. They simply authenticate with an existing account such as Google, Facebook, LinkedIn, or Instagram. We’ll now show you how to enable the social login option.
- Login to your WordPress Dashboard.
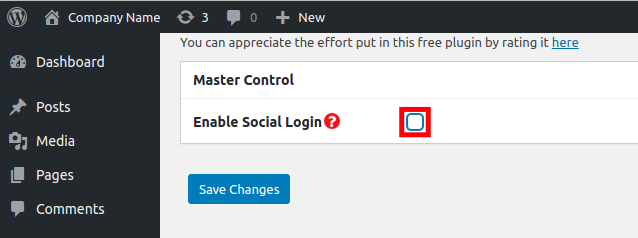
- Click the Super Socializer then Social Login link in your navigation menu.
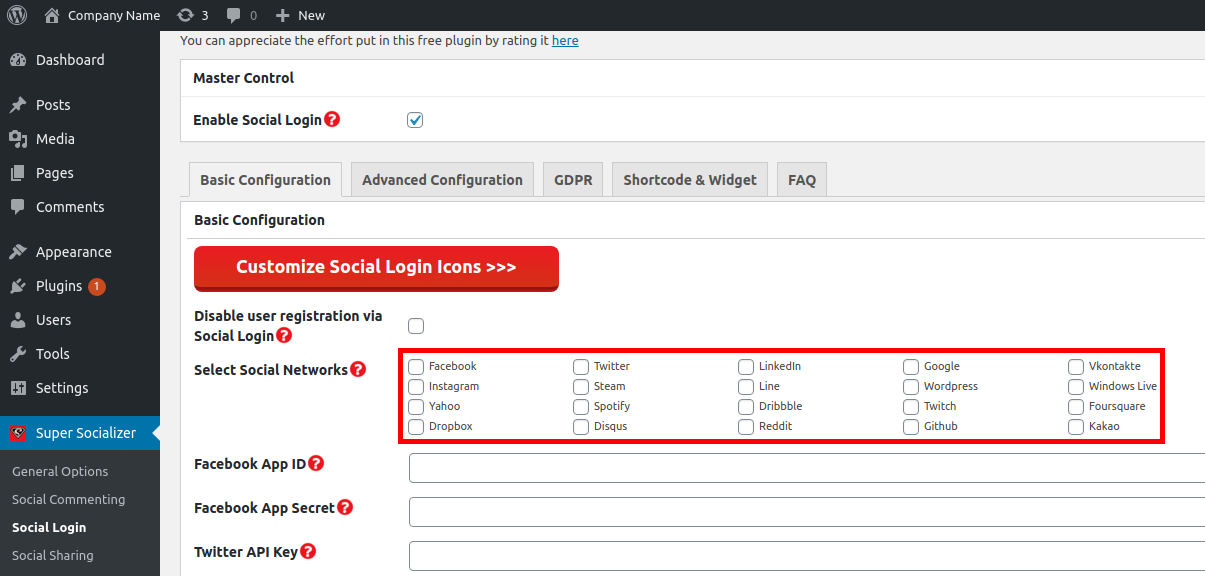
- Check the box next to the Enable Social Login option.

- You will then see additional settings. Select the social networks you want to enable. There are 20 options to choose from such as LinkedIn, Google, Facebook, Twitter, and Instagram.

- Enter the App ID for the options you have selected. (This is also referred to as the API Key, Client Secret, Client ID, etc.)
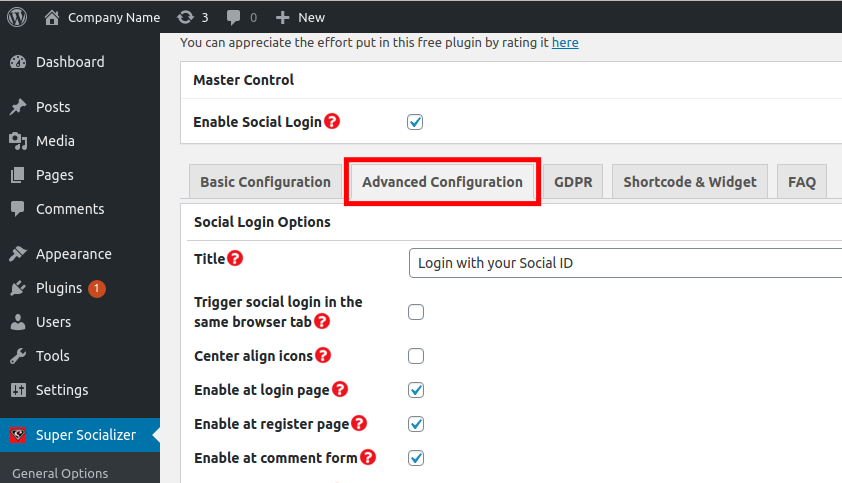
- Click the Advanced Configuration tab to set up the following options: Social login, Social Account Linking, and Email popup options.

- Click the GDPR tab to enable the GDPR opt-in option. You can then enter additional settings such as the location and opt-in text.
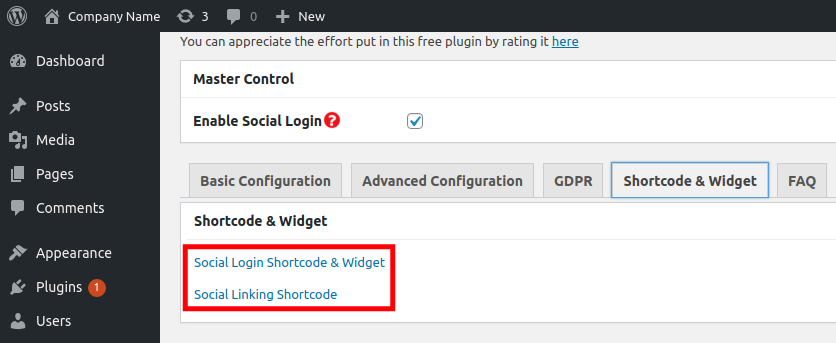
- Select the Shortcode & Widget tab if you want to add social login and social linking to your site using shortcodes.
- Click the available links to be redirected to a listing of shortcodes with styling options you can use.

Enable Social Sharing
Adding social sharing buttons is a good way to encourage visitors to post your content. With just the click of a button, they can share or recommend your pages and posts on their own social media accounts. This helps you reach more people with organic word of mouth marketing. Here is how to enable this option in the Super Socializer plugin.
- Login to your WordPress Dashboard.
- Click Super Socializer then Social Sharing in your WordPress menu.
- Choose your theme and icon settings on the Theme Selection tab.
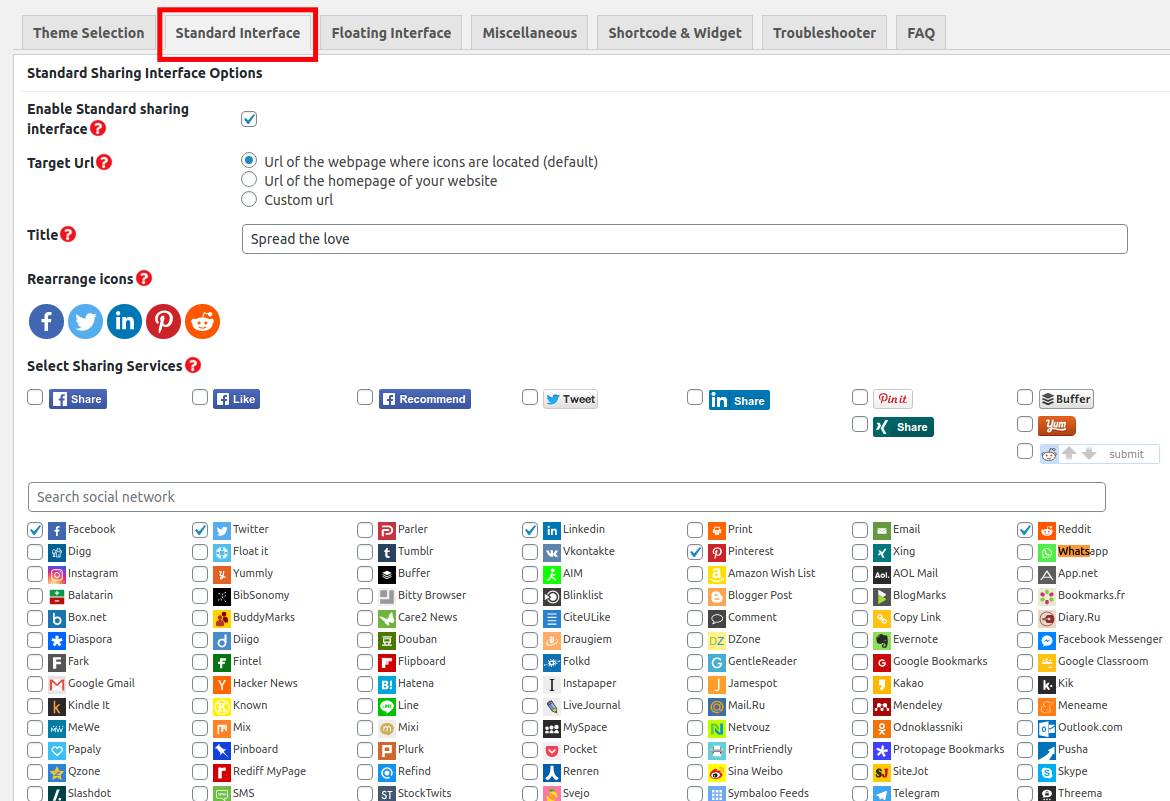
- Select the Standard Interface tab to choose which Social Media platforms you want to add sharing buttons for. Check the box next to the ones you want to use, there are over 100 to choose from and even an option for sharing via email.

- You can drag the icons to change the order they display in.
- Click the Save Changes button once you have chosen your social sharing options.
Enable Like Buttons
Like buttons are a quick way for visitors to show their approval or acceptance of your site. Since they don’t have to write any comment text or create a post, this is an easy way for people to engage with you. Below we will show you how to enable like buttons on your WordPress site using the Super Socializer plugin.
- Login to your WordPress Dashboard.
- Click Super Socializer then the Like Buttons link.
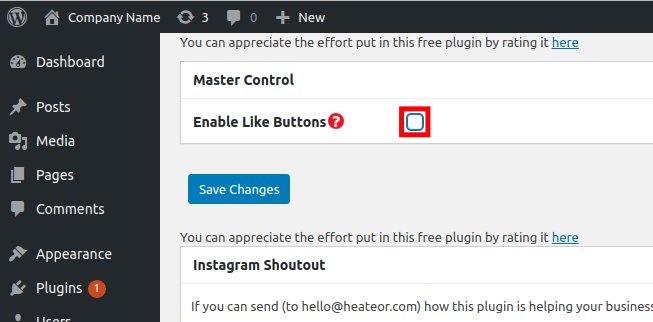
- Check the box next to the Enable Like Buttons option.

- You can then choose your Standard Interface Options.
- Click the Save Changes button.
How to Add Super Socializer Widgets
- Login to your WordPress Dashboard.
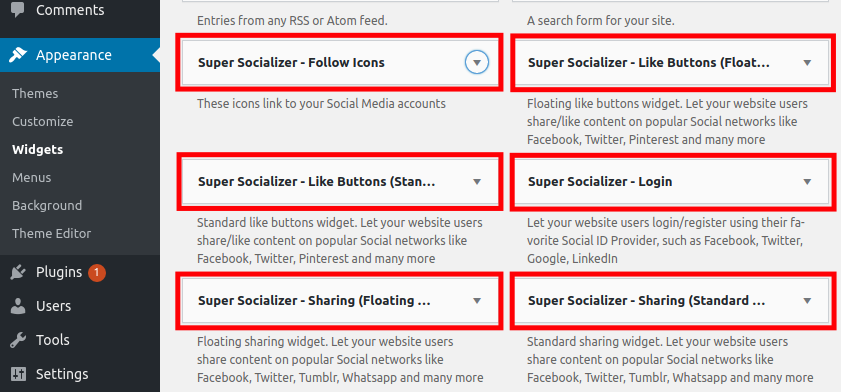
- Click Appearance then Widgets in the navigation menu.
- Click the Super Socializer Widget that you want to add.

- Select the location you want to add the widget to. The location options will differ based on the specific theme you are using.
Thank you for joining us for this Super Socializer tutorial. Visit our WordPress Education Channel for more how to guides for your website.
Learn more tips and tricks about WordPress backups to protect your website from risks!

