Table of Contents
If your WordPress website has multiple users that produce and edit content, it can be difficult to keep track of content production and editorial workflows. To assist with this, the Oasis Workflow WordPress plugin provides a number of features that will help you organize editorial workflows and keep track of content updates on your site. In this article we will discuss the features of the Oasis Workflow plugin and provide some instructions for using the plugin on your WordPress website.
Topics Include:
Oasis Workflow Features
Visual Workflow Designer
This feature allows users to create visual flow-chart style workflows that give you and your team an easy way to learn and understand the editorial workflow process. This is useful for on-boarding new content contributors and maintaining productivity throughout all steps in your content production process.
Role-Based Content Assignments
This feature allows you to assign content based on user roles. This means you can easily plan and execute content production strategies that utilize all team members based on their roles and relevant skill sets.
For example, you may want to assign article updates to team members more familiar with proofreading and assign wholly new content to writers familiar with the applicable subject matter. By assigning work through Oasis Workflow you can ensure that each job goes to the right person to get it done.
Inbox
An interactive inbox allows users to see pending assignments and mark assignments as completed. This feature ensures that all team members are on the same page and aware of project due dates and completed work.
Custom Statuses
Oasis Workflow supports the creation of custom statuses. By setting custom project statuses, you can identify bottlenecks in the content production process and easily keep track of project completion progress.
For example, if article production is slow for articles in the “Under Review” status, you may want to reassess your editorial review process to overcome this bottleneck. These statuses also provide fine-grain control over your editorial workflow, as you can create as many statuses as you see fit. If you have a complex, multi-step editorial workflow, you can create custom statuses to reflect each step of the process.
Process History
Oasis Workflow tracks all process updates for easy auditing and logging purposes. Every time a task is moved into a new status or completed, the plugin keeps track of the change. This is useful for identifying workflow bottlenecks and monitoring editorial workflow efficiency, as it tracks the progression of a project from start to finish. If there is an issue with one of the steps on the editorial workflow, you can use the Process History feature to locate it.
Production Reassignments
If you find that a given user is not the best person to complete a specific task, Oasis Workflow allows you to easily reassign the project to a new user that is better suited. This is useful for promoting teamwork and encouraging collaboration across projects.
Due Date Reminders
To help your team ensure that content is produced on time, due date reminders provide users with simple notifications regarding impending deadlines. If you have projects that must be completed on time, this feature is crucial for aligning team members with project due dates.
Creating a Visual Workflow
- First, log into your WordPress dashboard and select the Workflows tab from the left-hand navigation menu.
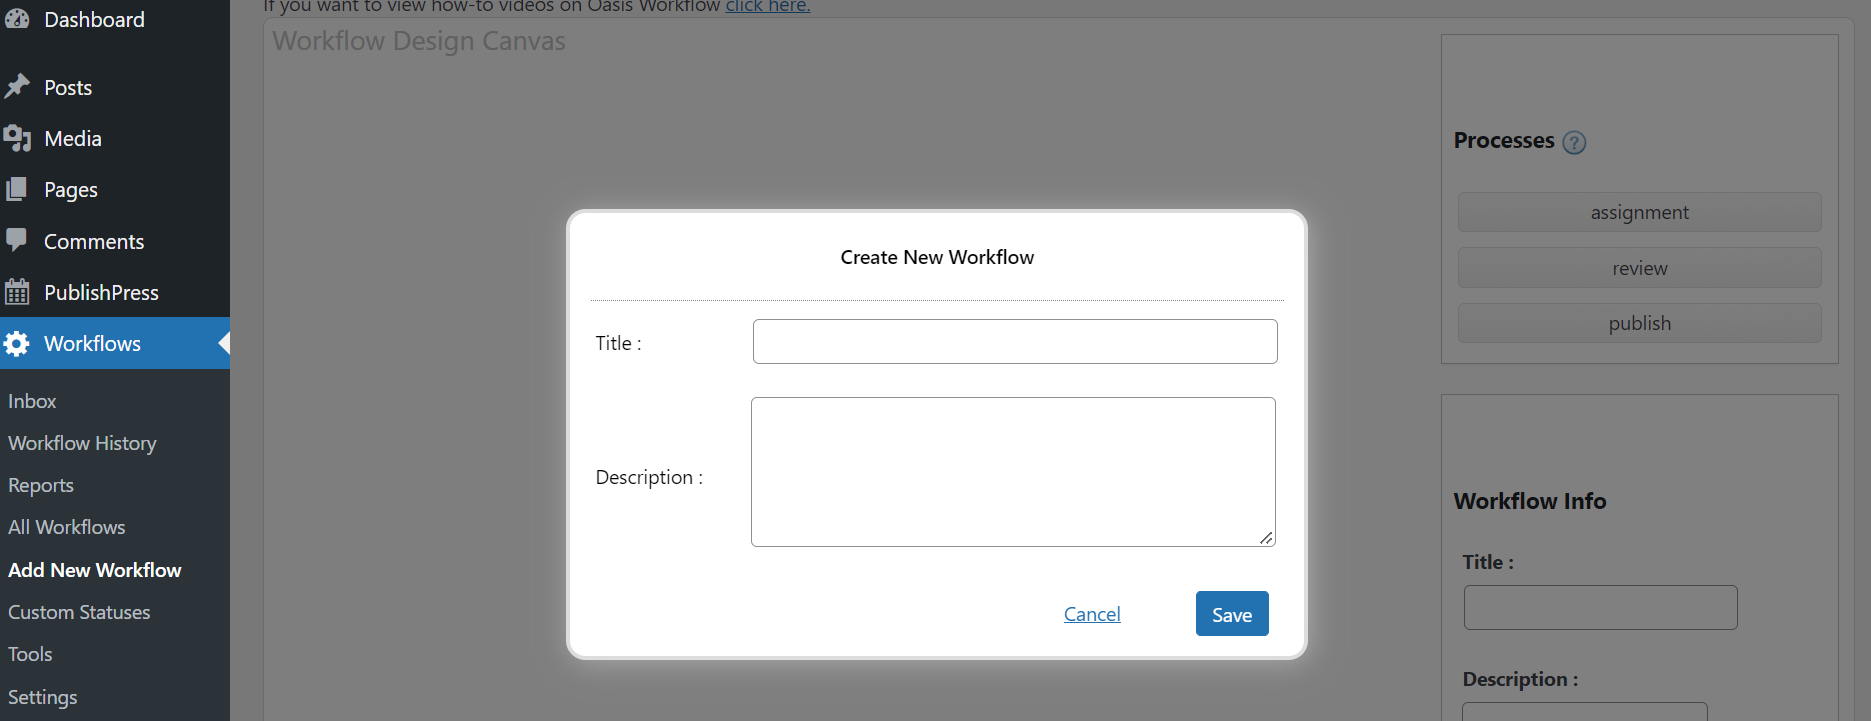
- After selecting the Workflows tab it will expand to include the following options: Inbox, Workflow History, Reports, All Workflows, Add New Workflow, Custom Statuses, Tools, and Settings. Select Add new workflow.
- On the following page, a pop-up menu will ask for a title and a description. After completing these fields, select Save to proceed.

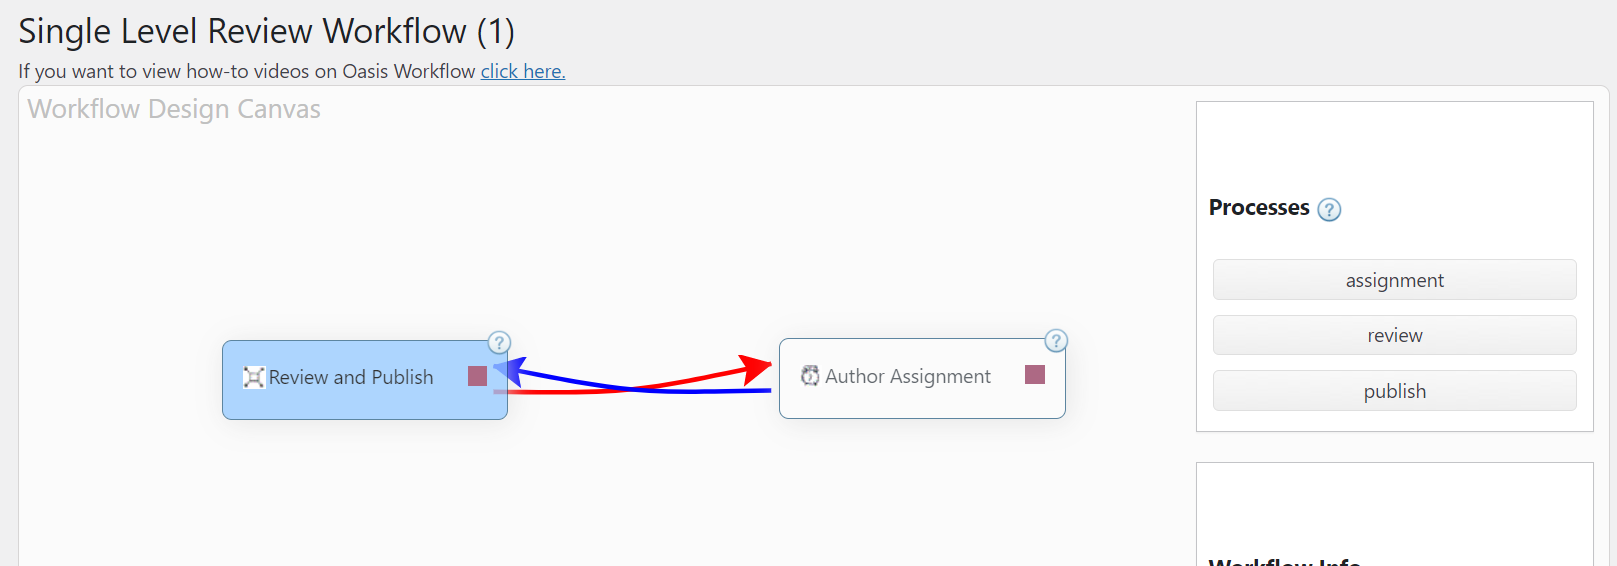
- The page will now display the Workflow Design Canvas, a blank slate that allows you to build a visual workflow. To create your workflow, drag-and-drop one of the three items from the right-hand menu labeled Assignment, Review, and Publish.
- After dragging one of the items to the canvas, it will produce a pop-up menu that allows you to input details for each step in the workflow. If you selected Assignment or Publish, you will be asked to input the name of the step, designate assignees or assign to all using the available checkbox. You can also designate whether or not the step is the first part of the overall workflow using the available checkbox. If you selected Review, there are additional settings that determine how many people are required to approve the step.
- After entering the details for the new step in the workflow, you can create assignment emails and reminder emails that will be sent to assigned users using the bottom part of the menu. Once done, click Save.
- To connect the steps in your workflow design, click on the red square next to the name of the step and drag it to the step you want to connect to. This will produce a pop-up menu showing the direction of the connected steps.

- Specify a post status for this connection using the drop-down menus and specify whether the connection is based on success or failure using the checkboxes, then click Save. Repeat this as many times as necessary to connect all chains in your editorial workflow process and create your visual workflow chart.
- Once you’ve finished designing your workflow, you can specify where the workflow applies to the rest of your WordPress website. Under the section labeled Workflow Applicable To select the roles the workflow applies to. If left blank, it will apply the workflow to all users. Do the same with Post Types and click Save.
Congratulations, you now know how to use Oasis Workflow to design a Visual Workflow!
Next Steps
If you want to enhance your editorial workflow even more, consider using PublishPress alongside Oasis Workflow. One of the many features of PublishPress is a detailed editorial calendar that can provide a high visibility resource for content planning and team collaboration. By using this calendar in conjunction with a detailed Visual Workflow, even the largest teams can stay aligned on project timelines and editorial processes.
Say goodbye to slow loading times and hello to high-performance websites with our new WordPress VPS Hosting plans. Experience 40x faster WordPress page load speeds on purpose-built servers that guarantee 99.99% uptime.
High-Performance VPS
Fully-Managed Support
Free SSL & Dedicated IP
Advanced Server Caching


