Table of Contents
Uploading a new default WordPress user avatar is a great idea to better match the rest of your site’s appearance. Thankfully, the WP User Avatar plugin can easily be used to upload a new default user avatar with just a single click.
Installing the WP User Avatar plugin
- First, you will need to log into your WordPress admin dashboard.

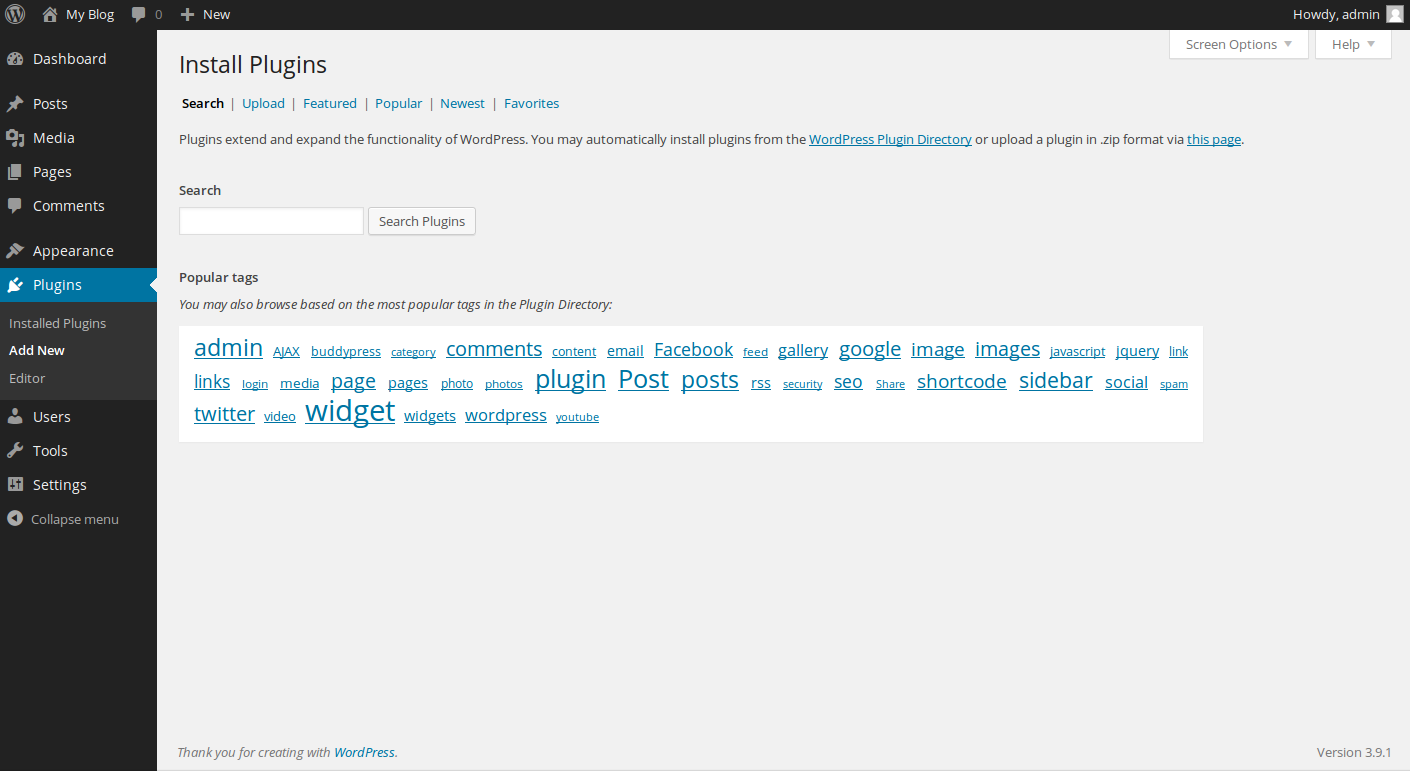
Once logged in, hover over Plugins, then click on Add New.

Within the search box, enter WP User Avatar, then click Search Plugins.

You will then be presented with your search results. The first result should be the result that you are looking for if you searched for WP User Avatar as described in the previous step. Next to it, click on Install Now

WordPress will then handle the full download and installation of the WP User Avatar plugin. Once complete, click Activate Plugin.
Changing the default user avatar
Now that you have installed the WP User Avatar plugin, there is an additional menu item within the menu in the WordPress admin named Avatars. Click on this new menu item.
Within the Avatars page, there is a section labeled Default Avatar in which you can upload your own default avatar by clicking the Choose Image button.
Once you have selected your desired avatar, click the Save Changes button. Once you click this button, all changes will be active.
Become a master of WordPress plugins! Protect, optimize, secure, and expand the functionality of your website easily with the help of WordPress plugins!
