Did you know you can use WordPress to manage your Human resource tasks? The WP-HR Manager plugin makes it a snap to handle employee profiles, leave management, and even provides an employee self-service portal. Conveniently store and access employee information with this powerful HRM system.
This is an ideal setup if your company already utilizes a WordPress website, since everything can be managed from the Dashboard and doesn’t require a separate content management system (CMS). Also, since it is web-based, you can manage employees that are working remotely from home using any computer with internet access. So, follow along and we’ll show you how to use the WP-HR Manager plugin for WordPress. Keep in mind that we are only covering features included in the free version of the plugin.
If you need a new home for your WordPress site, look no further than InMotion’s WordPress Hosting solutions for secure, optimized, budget-friendly servers.
Fast & Easy Transfers
Free SSLs
Hack Protection
Affordable
WP-HR Manager Installation and Setup
The first step is installing, setting up, and activating the WP-HR Manager plugin. We’ll walk you through the process below. Keep in mind that you can skip any of these steps if you want to set them up later.
- Install and activate the WP-HR Plugin by Black and White Digital Ltd.
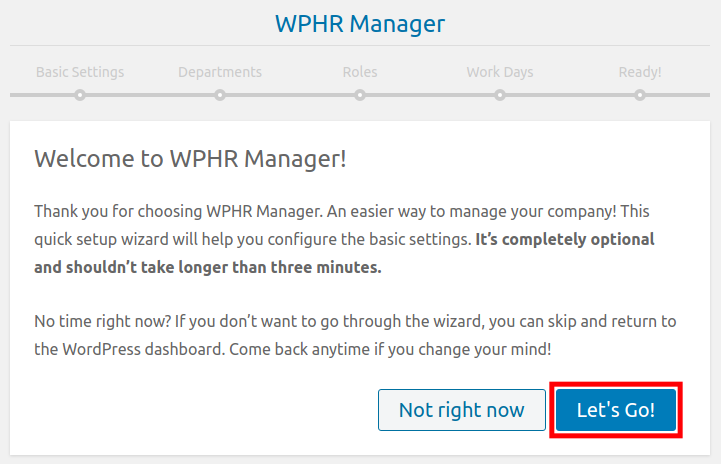
- As soon as you activate the plugin, you will see the quick setup wizard. Click the Let’s Go button.

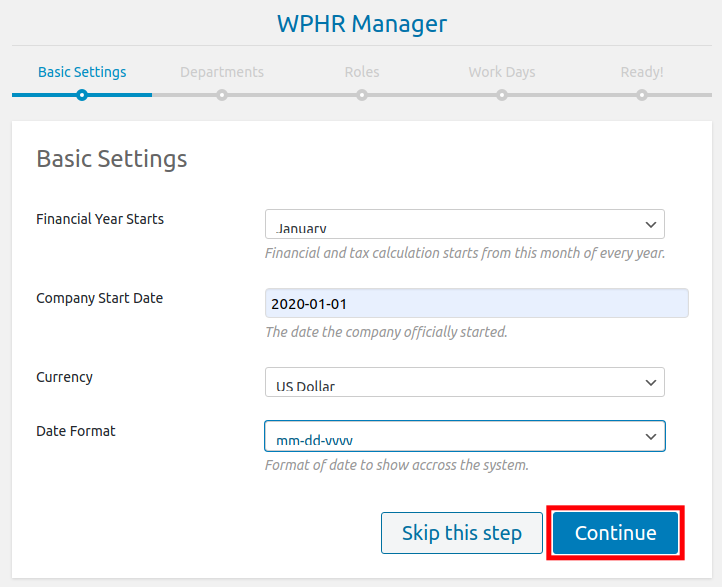
- Select the month your financial year starts from the drop-down menu, enter a date for when your company started, select your currency, and choose a date format. Then click the Continue button.

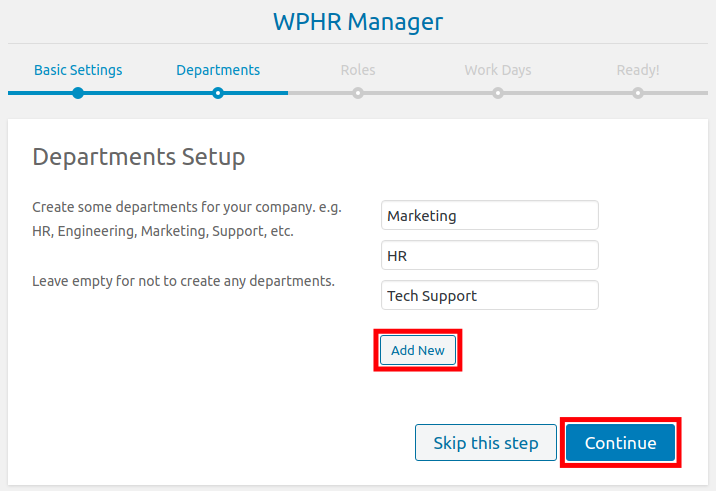
- Enter your department names in the available boxes. You can click the Add New button if you need more fields, then click the Continue button. You can also add departments later by clicking WPHR Manager, Departments, then Add New in your WordPress Dashboard.

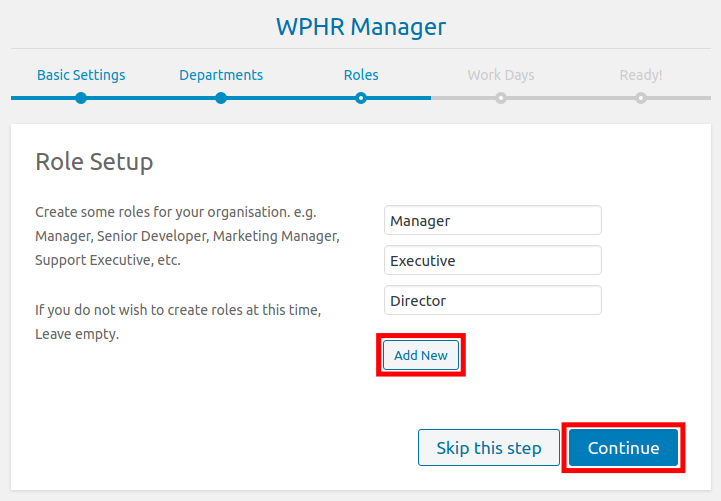
- Fill in your company roles in the blank boxes, such as Director, Manager, or Executive. Click the Add New button if you need more fields. Then, click the Continue button. If you skip this step, Roles can be created by clicking WPHR Manager, Roles, then Add New in your WordPress Dashboard.

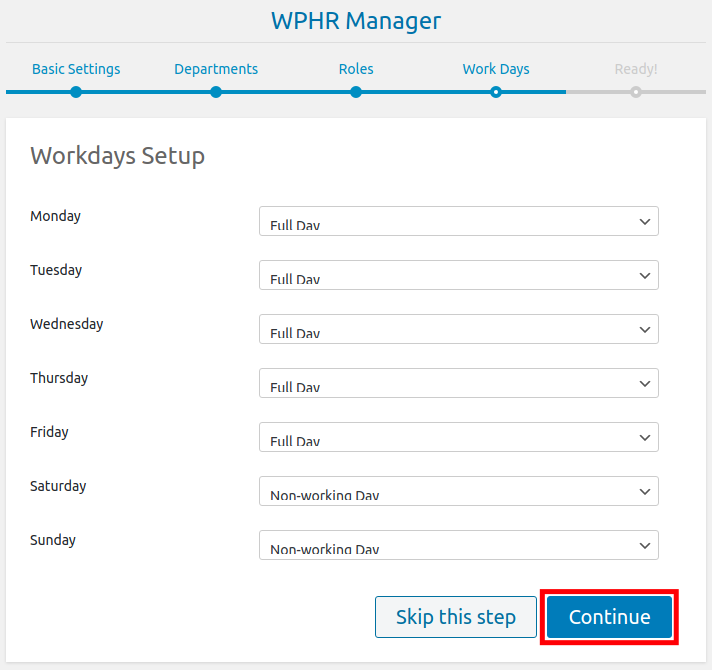
- Select your workdays from the drop-down menus. Options are Full Day, Half Day, and Non-working Day. Click the Continue button after setting the company’s workday schedules.

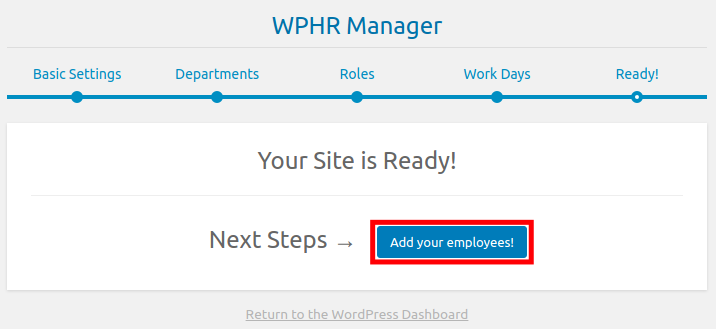
- You will then see a message stating “Your Site is Ready.” Click the Add your employees button. We will cover the full setup in the next section.

- Click the Complete “WP-HR Manager” Activation Now link on top.

- On the next screen, it will ask if you want to opt into notifications and diagnostic tracking. You can Skip this or click the Allow & Continue button to complete the setup.

Managing Employees
One of the most important aspects of managing human resources will be managing new employees. Any time someone is hired or changes position, you will have to make changes. This allows you to accurately track and manage their interactions with your company. Below we’ll show you how to add new employees, then we’ll walk you through modifying their role, department, and employment type.
Adding Employees
- In your WordPress Dashboard click WPHR Manager, then the Employees link.
- Click the Add New button on top.
- You can then upload an employee photo and fill in the employee information as needed. The required fields are: First Name, Last Name, Employee Type (such as full time, part-time, temporary, trainee), Date of Hire, Email address, Employee Status (such as active, terminated, etc).
- Click the Create Employee button.
Modifying Employees
- Click WPHR Manager then Employees in your WordPress Dashboard.
- You will see your employees listed. You can filter the list by Role, Department, or Employee type by clicking the dropdown menu on top then the Filter button.
- Click the User you want to modify.
- You can then make changes or update them as needed. There are more tabs on top available that provide additional options.
Leave Management
There are quite a few aspects to leave management that can be set up. They can all be accessed in the WPHR Leave section in your WordPress Dashboard. We’ll show you how to configure them in this section. The employee self-service (ESS) Attendance add-on is also available but must be purchased through WP-HR’s shop.
Creating Leave Policies
- Under WPHR Leave click the Policies link.
- Click the Add New button.
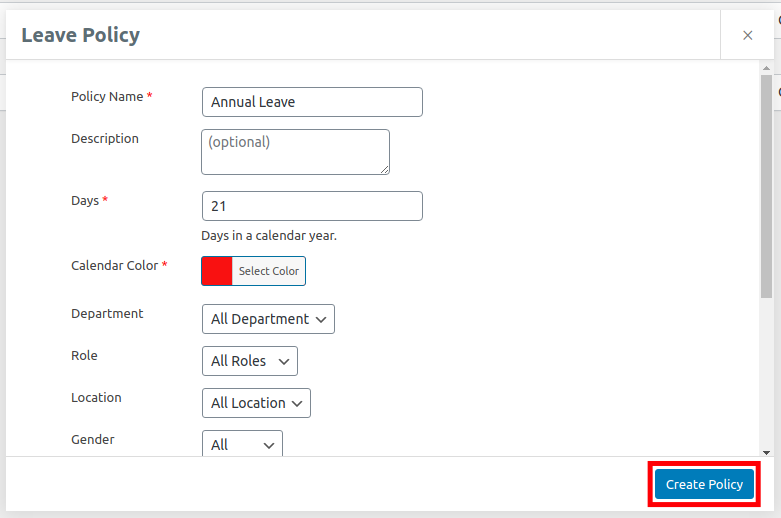
- You can then set up your leave policy as needed. Required fields are: Policy Name, Calendar Color, and Days. This would be how many days of leave per year an employee would have available.
- Click the Create Policy button after entering your settings.

Adding Holidays
- Click the Holidays link under WPHR Leave.
- Click the Add New button.
- Enter a Holiday Name and Start Date. You can also enter a date Range and Description but they are optional.
- Click the Create Holiday button.
How to Create Leave Entitlements
- Click Leave Entitlements under the WPHR Leave section.
- You will see any existing employees along with the leave they are entitled to. Click the Add New button.
- Choose the Leave Policy, Leave Period, and Employee you want to assign it to.
- You can also check the Assign to multiple employees box to assign it by location or department.
- Click the Assign Policies button.
Creating Leave Requests
- Under WPHR Leave, click the Requests link.
- Click the New Request button.
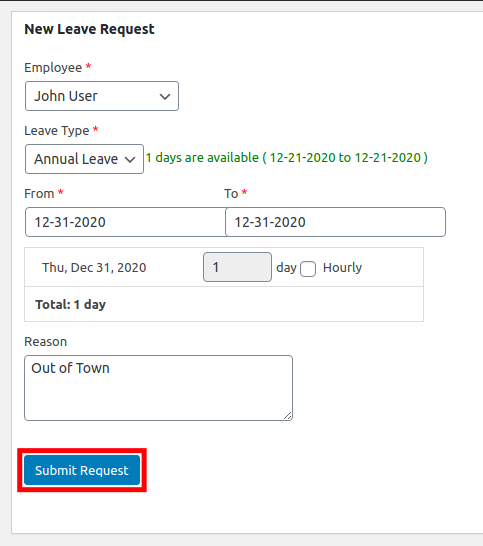
- Select the Employee from the drop-down menu.
- Choose a Leave Type from the drop-down list.
- Select the From and To dates for the leave.
- You can also check the Hourly box if it is not a full day.
- It is optional, but you can enter a Reason in the available field.
- Click the Submit Request button.

Approving/Reject Leave Requests
- In the WPHR Leave section, click the Requests link.
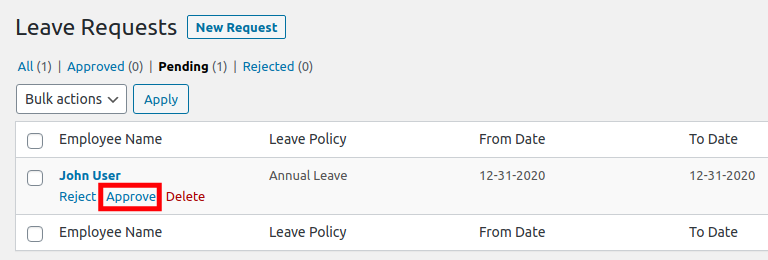
- Any requests will be listed with their current status. Roll your mouse over a pending request and click the Approve or Reject link.

Viewing the Leave Calendar
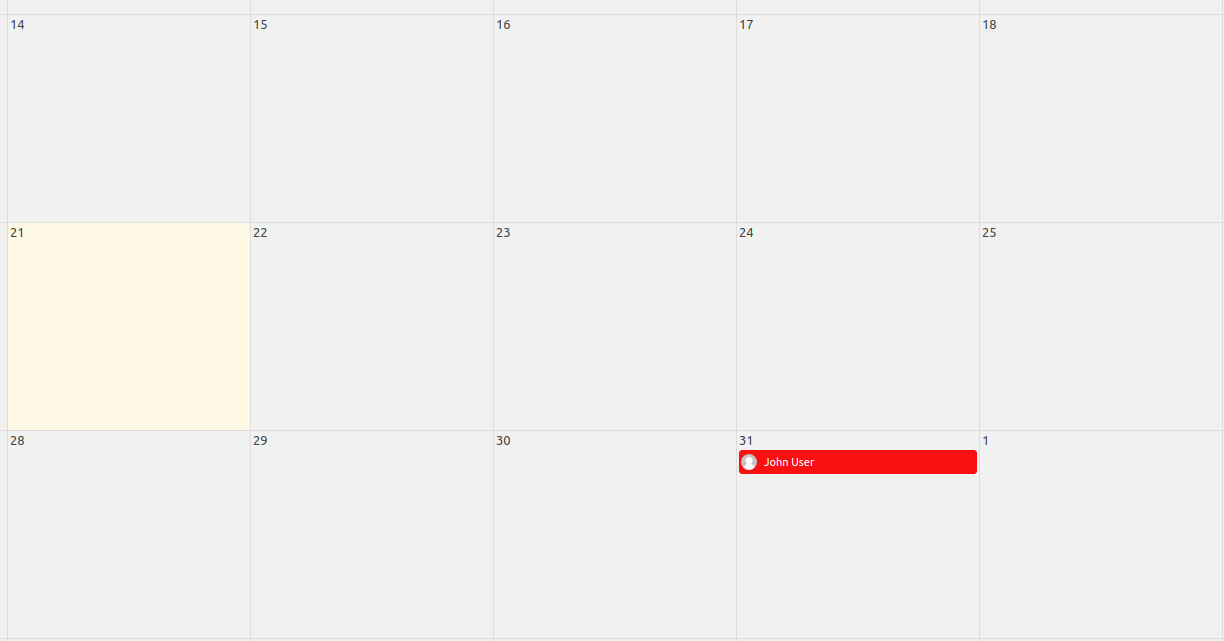
- Click Calendar under the WPHR Leave menu.
- You will then see any approved leave requests labeled with their policy color.

Congratulations, now you know how to use the WP-HR Manager for WordPress. Now you can manage employees online right from your WordPress Dashboard.
Looking for more guides? We have over 400 WordPress How To Articles to help you!
