If you’ve ever tried optimizing your WordPress site, then you already know the importance of image compression. A single high-quality image will often be larger than the rest of a simple WordPress site! Moreover, if most people view your site on a smartphone or standard definition monitor, all of those extra pixels are wasted.
There are many WordPress Plugins designed to help you compress images and speed up your site. Today we’re going to look at TinyPNG, one of the most popular, and see what makes it special.
Use the hardware on our optimized WordPress Hosting plan to help you design a fast loading site!
What Makes a Compression Plugin Useful?
The best image compression plugins do a few things well. First, they are able to handle a wide variety of image file formats. On top of that, the plugins should actually compress images enough to make a difference. Lastly, the plugin should seamlessly integrate with WordPress so that it is easy to use.
TinyPNG is named after the Portable Network Graphics (PNG) image format because, in the early days of image optimization, most compression tools struggled with PNG images. A plugin that could cleanly and reliably compress PNG images was itself cause for celebration. The plugin has a reputation for compressing PNGs by a sizable percentage while still maintaining image quality. On top of that, because the actual work of image compression is carried out by external servers, TinyPNG is easy to install on almost any platform.
How does TinyPNG Work?
TinyPNG uses external resources to compress images. The images are uploaded to TinyPNGs servers, optimized, compressed, and returned to you smaller and ready to post. The service is available on a variety of software platforms, including the WordPress plugin we’re looking at here.
TinyPNG allows users to run a certain number of image optimization operations free every month. For most people just trying to run their website, the service’s free tier should be more than enough to get started. After the monthly compression limit is reached, TinyPNG requires users to register their account for payment. Users are then charged a small fee for each image. Typically, it’s less than one cent per image (as of April 2020). An account is not charged a flat fee. Charges are based on the number of operations carried out. Even large businesses compressing hundreds of images a week can find room in their budget for the service.
How to Set Up TinyPNG
Install and Activate the Plugin
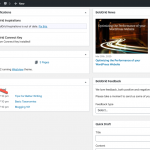
- Go to your WordPress dashboard and open the plugins section

- Click on ‘Add New’

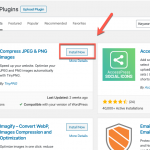
- Search for TinyPNG, click ‘Install Now’

- After installation, click ‘activate’
Note: the plugin will be listed as ‘Compress JPEG & PNG Images’ in your installed plugins list
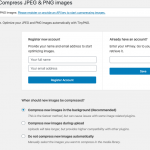
- Under ‘Settings,’ go to ‘Compress JPEG & PNG Images’

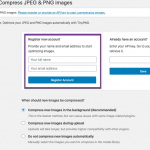
- Now, you can register an account with TinyPNG, allowing you to use the service

Get Started Compressing!
Now you can start making the most of the TinyPNG plugin! If you like, you can go ahead and set the plugin up to automatically compress all images as soon as they’re uploaded. If you’re concerned about running out of free images, you can leave things as-is and compress items individually.
Now, with your images compressed, you’re one step closer to having a fully optimized WordPress website!
To find many other helpful articles for your WordPress site, take a look at our WordPress Product Guide!


