When using the WYSIWYG editor in WordPress, you can expand the capabilities to allow more options. This expanded area is called the “Kitchen Sink“. Below will explain the steps to show the “Kitchen Sink” in WordPress.
Steps to use the Kitchen Sink
- Log into the WordPress Dashboard.

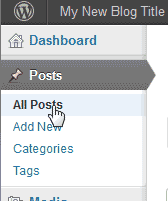
Go to Posts > All Posts.

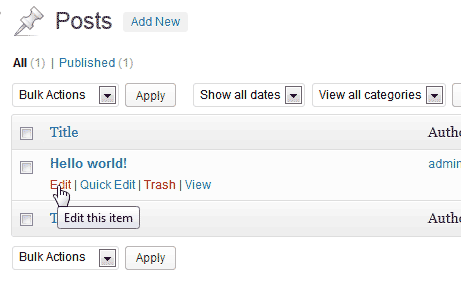
Click Edit on one of your posts.

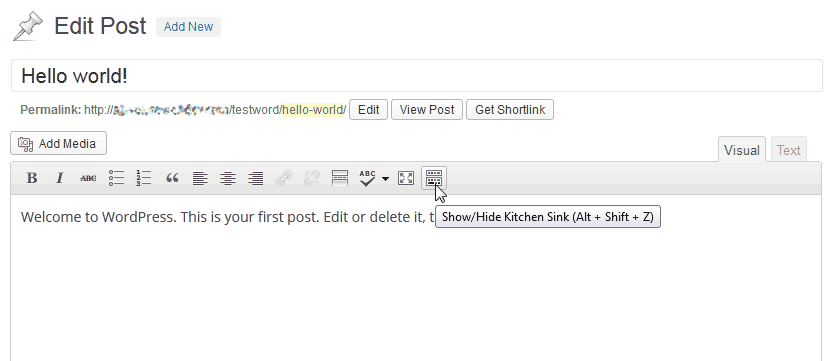
In the WYSIWYG editor, click the Kitchen Sink

icon.

You should see an extra row of options open when you click the Kitchen Sink icon. This extends the functionality of your WYSIWYG editor in your Dashboard. The following options will be available with the Kitchen Sink selected.
Kitchen Sink options Formatting This allows text to be formatted as Paragraph, Address, Preformatted, and Headers (H1 to H6) Underline Underlines text. Align Full Fully justify’s paragraph text. Text Color Changes text color. Paste Plain Text Allows formatting to be removed when pasting content. Paste from Microsoft Word Keeps the formatting from Microsoft Word. Remove Formatting Removes all text formatting. Insert Custom Character Allows non standard characters to be inserted and HTML entities. Indent Indents paragraphs. Undo / Redo Undo or Redo changes. Help This is the Rich editor help. You can find answers to questions about the WYSIWYG editor.


