Jetpack brings a ton of functionality to WordPress. Some of the useful features include blocks that you can use in your pages or posts. If you’re a Google user like many, then you may want to make use of the Google Calendar Block. Follow the directions below to learn how to enable and use the feature in your WordPress site.
Note that the following instructions require WordPress 5.0+ using the default editor. Additionally, you will need a Google Account in order to use the calendar.
How to Add the Calendar Block
When you’re editing posts or pages you should be logged into the WordPress Administrator Dashboard with the appropriate credentials.

- Create or edit a post or page.
- Click on the circled + sign to add a new block in the visual editor.
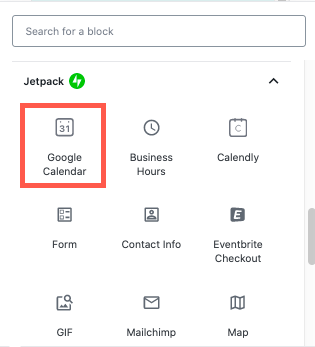
- When the block window opens scroll down to the Jetpack section and select the Google Calendar block to add it to your post or page.
Remember that there are a few steps that you need to take before you can add the calendar to your WordPress site.
Using the Google Calendar Block
Any calendar that you embed into your post or page must be set to public. You will need provide the permissions by following the provided directions in the link that you will see when you add the block.

Once you have the block opened make sure you use the provided directions to make the calendar public and to obtain the calendar embed code.
- When you have the embed code, copy and paste it into the provided field in the block.
- Click on the Embed button.
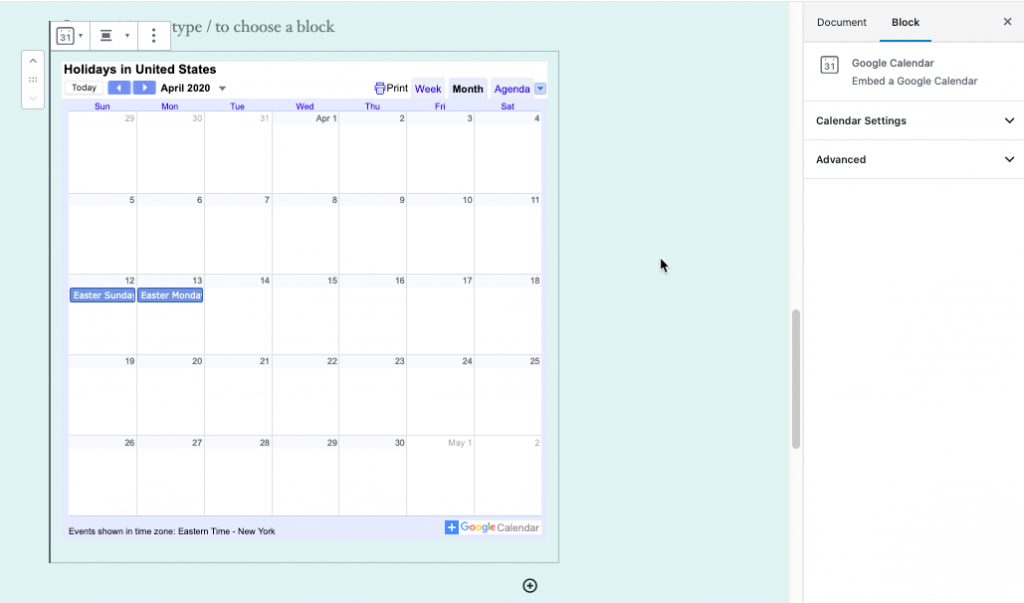
You will then see the Google Calendar embedded into our post or page! Check out the screenshot below to see how it might look:

Congratulations! You now know how to add and use the Google Calendar block in a post or page! For more tips, tricks, and tutorials, please see our WordPress Educational Channel.
