Table of Contents
In this article:
Once you create content in your WordPress site, you will want to keep your viewers coming back. There are a number of strategies that you can implement with your content, but a common step is to simply place related content at the bottom of your article for your viewers to see. Jetpack provides this option by letting you enable the feature in its settings. Learn how to enable the Related Content feature and its options by following the steps below.
Need a new home for your WordPress site? Check out InMotion’s WordPress Hosting solutions! Each plan comes with a corresponding Jetpack subscription!
How to Enable the Related Content Feature in JetPack
In order to make changes to the Jetpack settings, you will need to be logged into the WordPress Administrator Dashboard.
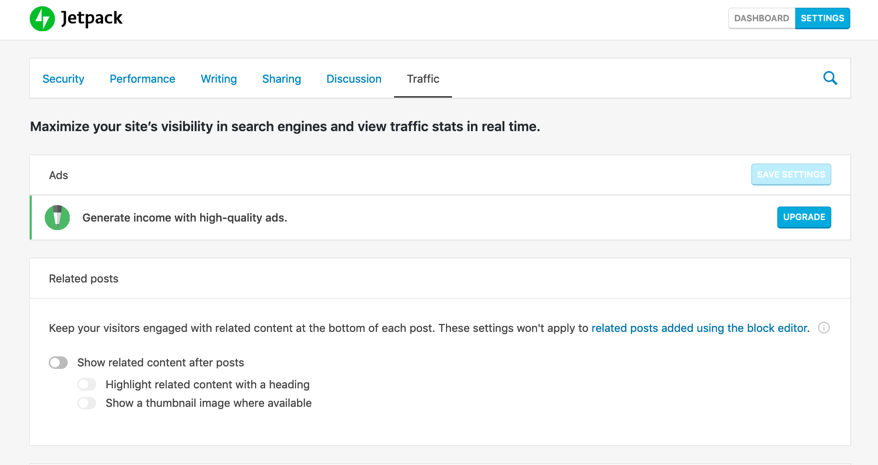
- Click on Jetpack, then click on Settings.
- In the menu at the top click on Traffic.
- Scroll down to the section labeled Related Content. Click on the slider labeled “Show related content after posts” to activate it.
- Once the option is enabled, you can also turn on: “Highlight related content with a heading” and/or “Show a thumbnail image where available.”
The last two options allow you to attract attention to the related content by highlighting related content text and/or showing a thumbnail image when it is possible.
Seeing an Example of Related Content
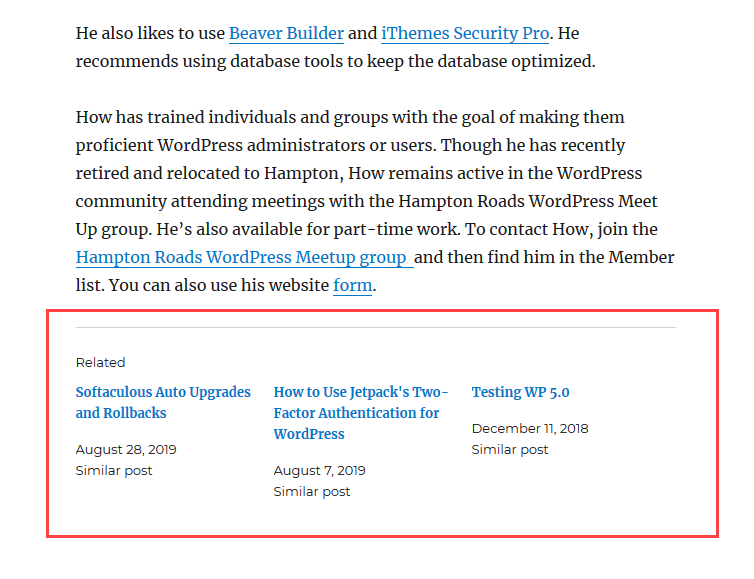
Here you can see an example of the related content option in action:
The last two options allows you to bring more attention to related content in other articles. The first option automatically highlights specific content by creating a header with related content listed underneath. The other option works when the article has an image that can be displayed as thumbnail. This helps to attract viewers to your other articles or at least alert them to other content that may pique their interest.
This completes the tutorial on using the Related Content feature from Jetpack. To learn more about keeping viewers coming back to your website, check out Using Subscriptions with Jetpack.


