Table of Contents
There are many essential types of WordPress plugins for the best performance needed by small and mid-size businesses (SMBs). Below we’ll focus on how to secure WordPress with the Wordfence security plugin. Wordfence has been one of most popular WordPress security plugins for years because of its long list of features:
- Brute-force protection against bad bots and automated cyber attacks
- WordPress login security options including multi-factor authentication
- Consoles with verbose server related information for easier debugging
- Malware scanning for the website and child directories within the website root directory
- Some security information and event management (SIEM) features such as live traffic monitoring
- And much more
Below we’ll cover some free functions of the Wordfence security plugin:
- Installing Wordfence
- Scan WordPress
- View Live Traffic
- Whois Lookup
- WordPress Diagnostics
- Wordfence Security Options
Need better WordPress performance? Check out InMotion’s WordPress Hosting.
Installing the Wordfence Plugin
You do not need to enter an API key for the free version.
Install from the Dashboard
- Log into your WordPress dashboard.
- Install the Wordfence plugin and activate it.
- On the left, select Wordfence to start hardening WordPress.
Install via WP-CLI
- Log into SSH.
- Install and activate Wordfence with WP-CLI using the following command:
Install Manually
- To install the plugin manually, download the plugin zip file from WordPress.org/plugins.
- Upload the zip file and extract the folder to the website’s
wp-content/pluginsfolder. - Log into your WordPress site or use the WP-CLI command to activate the plugin:
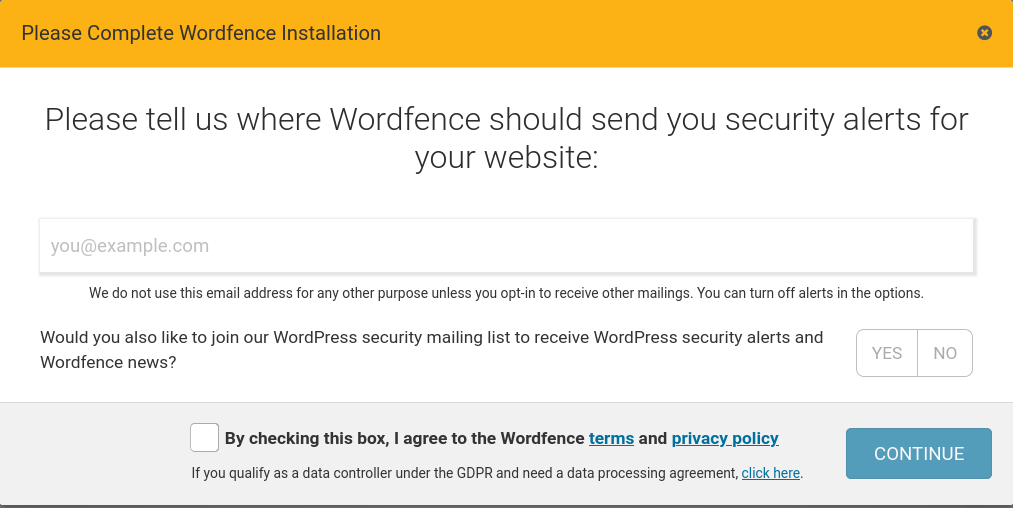
After activating Wordfence, you will be prompted with a message stating “You have successfully installed Wordfence.” Enter your preferred email address for Wordfence emails notifications, agree to the Wordfence terms, and Continue. If you don’t have Wordfence premium (paid) license, click No Thanks at the bottom.

When you first visit some Wordfence pages, you’ll be prompted with pop-ups explaining notable features.
Scan WordPress with Wordfence
We will now show you how to use Wordfence to scan your WordPress site for malware, weak passwords, and out-of-date plugins/themes, and more. Some scanning abilities require a premium Wordfence security license.
- Log into your WordPress dashboard.
- On the left, click Wordfence, then Scan.
- Select Scan Options and Scheduling on the right of the page to update your Wordfence scanner settings.
- Make any desired changes to your Wordfence scanner settings.
• Scan Scheduling – Toggle the option to let Wordfence choose when to scan or manually set the scan schedule (if you have a premium license)
• Basic Scan Type Options – Select a scan preset for the General Options section
• General Options – Specify what Wordfence scans and change the Basic Scan Type Options selection to Custom automatically
• Performance Options – Configure lower resource scanning settings such as increasing scan duration and limiting memory usage
• Advanced Scan Options – Exclude files from being scanned and add malware scan signatures in regex (one per line). - Select Save Changes in the top-right corner.
- Select Back to Scan in the upper-left corner.
- Select Start New Scan to start scanning your website. How long the scan takes depends on the size of your website. We recommend checking Wordfence every 30-60 minutes.
When the Wordfence scan finishes you will see a “Scan Complete” message with your results below. You can click the Show Log link to see details about the scan.

Get more information in your WordPress security scans for free with WPScan.
View Live Traffic in Wordfence
Viewing your live traffic can provide valuable insight into how, when, and why people visit your website. This is helpful when targeting ad campaigns, improving search engine optimization (SEO), or trying to troubleshoot some anomalies in your website performance without a separate web analytics application.
- Log into your WordPress dashboard.
- On the left, select Wordfence and Tools.
- You’ll be redirected to the Live Traffic logging visits to your site. It will include the traffic type (human, bot, warning, or blocked), location, page visited, time, IP, hostname, response, and view setting. Click one of the listings to see additional details.
- Toggle the Expand All Results switch to open all of the listings for viewing along with options to Block IP, Run WHOIS, or See Recent Traffic of the visitor.
- By default, Wordfence only logs security-related events (e.g. login attempts and blocked requests). This requires much less server resources. To log all traffic (not recommended for an extended period of time on Shared Hosting), select Live Traffic Options at the top of the screen and ALL TRAFFIC. Then Save Changes above.
- Here you can also specify WordPress usernames, IP addresses, and user-agents to ignore when logging and how much live traffic data to store for how long.
- If you make any updates, Save Changes.
- In the traffic results, you can click the filter drop-down menu to view traffic from a specific source. Available options are: All Hits, Humans, Registered Users, Crawlers, Google Crawlers, Pages Not Found, Logins and Logouts, Locked Out, Blocked, and Blocked By Firewall.
- Check the Show Advanced Filters option to filter traffic by date, group similar traffic, and use additional filters.

Whois Lookup in Wordfence
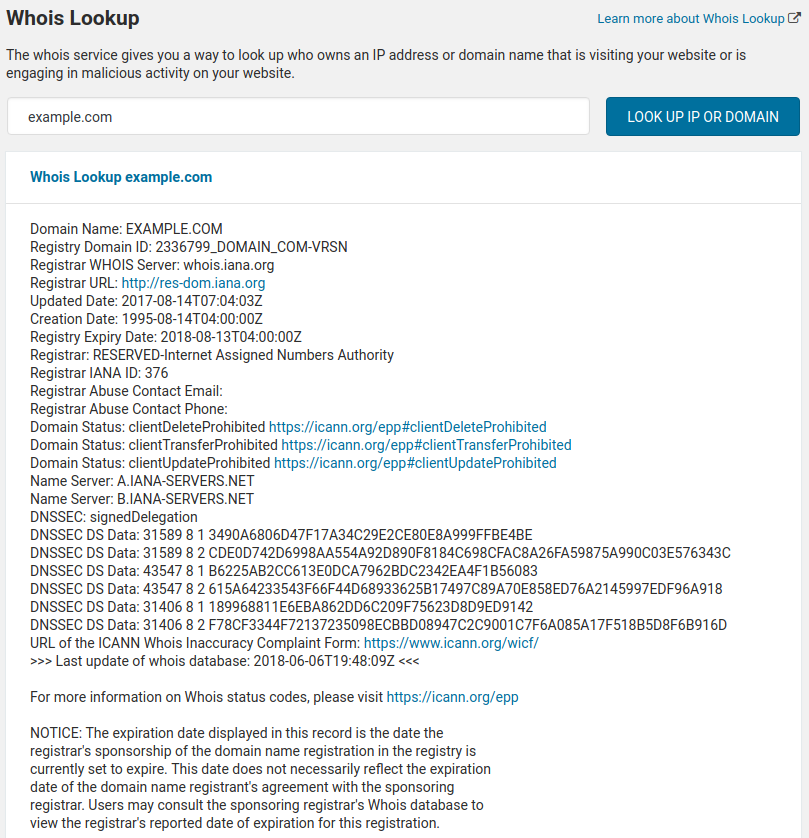
The Wordfence security plugin allows you to do a WHOIS lookup in WordPress without a network node being in your traffic log. The WHOIS record lets you view publicly displayed information about domains or IP addresses. This is helpful when trying to view details about the registrar, owner, authoritative nameservers, abuse contact address, etc.
- Log into your WordPress dashboard.
- On the left, select Wordfence, then Tools.
- Select the Whois Lookup tab.
- Enter the domain you want to look up and click LOOK UP IP OR DOMAIN.

View WordPress Diagnostics in Wordfence
Here you can see information about your server environment and installation of WordPress. This can be a helpful tool when troubleshooting issues with WordPress or the web server.
- In the navigation menu, click Wordfence, then Tools.
- Select the Diagnostics tab on the right.
- You will then see the Diagnostics report for your website, click the Expand All Stats button to open all the sections. Below is a description of the information included in each section of the report provided by Wordfence.
• Wordfence Status – General information about the Wordfence installation
• Filesystem – Ability to read/write various files
• Wordfence Config – Ability to save Wordfence settings to the database
• Wordfence Firewall – Current WAF configuration
• MySQL – Database version and privileges
• PHP Environment – PHP version, important PHP extensions, and process owner (e.g. cPanel username)
• Connectivity – Ability to connect to Wordfence, servers, your own site, and your server IP address
• Time – Server time accuracy and applied offsets
• IP Detection – Methods of detecting a visitor’s IP address
• WordPress Settings – WordPress version and internal settings/constants
• WordPress Plugins – Status of installed plugins
• Must-Use WordPress Plugins – WordPress “mu-plugins” that are always active, including those provided by hosts
• Drop-In WordPress Plugins – WordPress “drop-in” plugins (which replace WordPress functionality) that are active
• Themes – Status of installed themes
• Cron Jobs – List of WordPress cron jobs scheduled by WordPress, plugins, or themes
• Database Tables – Database table names, sizes, timestamps, and other metadata
• Log Files – PHP error logs generated by your site, if enabled by your host
• Other Tests – System configuration, memory test, send test email from this server (e.g. phpinfo page)
• Debugging Options – Toggle WordPress debugging options for your site - At the bottom, Save Changes.
- At the top, click Send Report by Email to email the report to Wordfence support or others.
Wordfence Security Options
The Wordfence All Options page includes all available configurations within the plugin. This can be easier for experienced users to configure everything without bouncing around menu options.
- Log into your WordPress dashboard.
- On the left, select Wordfence, then All Options. Below is an outline of the available Wordfence security options.
| Wordfence Global Options | |
|---|---|
| Wordfence License | View your free license or enter a premium license to upgrade. |
| View Customization | Choose if you want to display menu items for All Options, Blocking, or Live Traffic. These will show up in the main dashboard menu under “Wordfence”. |
| General Wordfence Options | Set if you want Wordfence to update automatically, view/change your email address for alerts, choose how Wordfence gets IP addresses, hide your WordPress version, disable Wordfence cookies, pause live updates when window loses focus, set update interval, bypass the LiteSpeed “noabort” check, and delete Wordfence tables and data on deactivation. |
| Dashboard Notification Options | Choose if you want to receive dashboard notifications for updates and scan status. |
| Email Alert Preferences | Specify preferred email alerts from the options list. |
| Activity Report | Set if you want to receive a regular email summary or enable an activity report widget in the dashboard. |
| Firewall Options | |
| Basic Firewall Options | Set your firewall status and protection level. |
| Advanced Firewall Options | Delay IP/Country blocking, whitelist IP’s, block IP’s that access specific URL’s, or ignore IP’s. |
| Brute Force Protection | Set your brute force protection rules here such as lock out options. |
| Rate Limiting | Choose your rate-limiting settings here, for example you can set rules for bots or throttle specific visitors by behavior. |
| Whitelisted URLs | Whitelist known safe URL’s that are sending requests to your site. |
| Blocking Options | |
| Advanced Country Blocking Options | Block specific countries here, this is a premium Wordfence feature. |
| Scan Options | |
| Scan Scheduling | Choose if you want to let Wordfence choose when to scan, or manually set the scan schedule if you have a premium license. |
| Basic Scan Type Options | Set if you want to perform a Limited, Standard, High, or Custom scan. |
| General Options | Choose what you want Wordfence to specifically scan for here. |
| Performance Options | Set if you want to use low resource scanning, or manually limit the scan options. |
| Advanced Scan Options | Exclude files from being scanned here, or add specific scan signatures. |
| Tool Options | |
| Live Traffic Options | Enable live traffic logging, set how much live traffic data to store, and ignore specific users, IP addresses, or user agents. |
| Import/Export Options | Import or Export your Wordfence settings. |
| Login Security Options | Go to the Login security options page |
The Filter Comment Spam feature has been removed from the Wordfence security plugin.
Wordfence is a great WordPress security suite. However, there are other aspects to hardening WordPress. To compliment your security posture, install the BBQ: Block Bad Queries and HTTP Headers security plugins.
Become a master of WordPress plugins! Protect, optimize, secure, and expand the functionality of your website easily with the help of WordPress plugins!

