Table of Contents
In this article:
Some WordPress updates require more proactive work than others. Security plugins require detailed customization per your environment and usually provide activity logs for reactive changes. Accessibility improvements require user testing to ensure it improves user experience.
WordPress search engine optimization (SEO) requires time and research. A plugin like All in One SEO or Yoast SEO helps. But simply updating your WordPress permalinks from the longer day and name or month and name formats to a more concise option makes your URL’s easier to read and improves SEO immediately. Doing this correctly requires handling potential 404 – File Not Found errors as older links become invalid if not redirected somehow.
An .htaccess 301 redirect can suffice for new websites with only a few pages. However, seasoned WordPress sites would benefit from a plugin to manage these changes automatically with logs to help fix related issues.
Below we cover how to use the Redirection plugin to redirect WordPress posts after changing permalinks.
Get better performance without additional plugins with our Nginx-powered WordPress Hosting.
Install Redirection
There are multiple ways to install the Redirection plugin. You can install the plugin manually or via WP-CLI (plugin slug redirection). Below we’ll use the WordPress dashboard.
- Log in to your WordPress dashboard.
- Install the Redirection plugin.
- Activate the plugin.
Setup
- Hover over Tools and click Redirection.
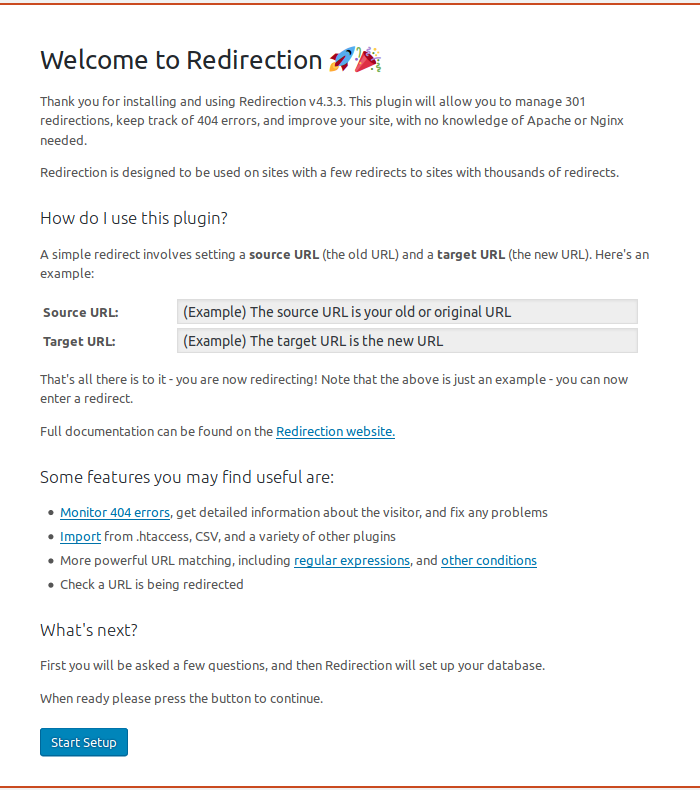
- Read the Getting Started page and click Start Setup.
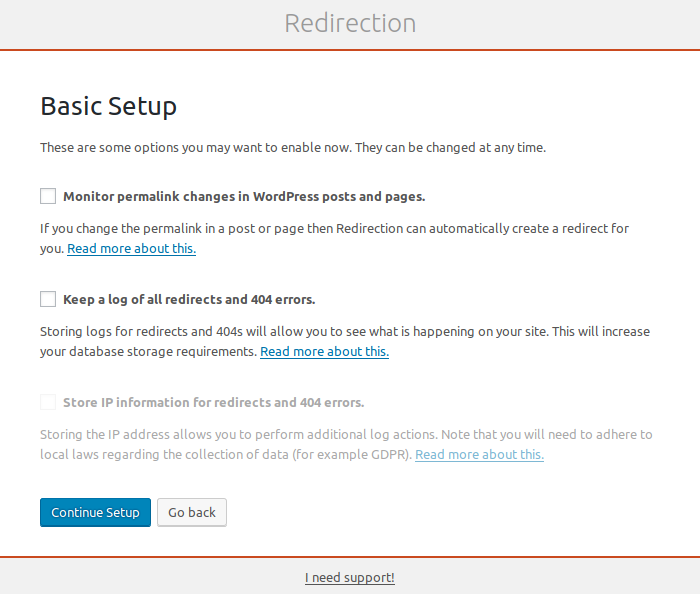
- (Optional) Select Monitor permalink changes in WordPress posts and pages. You can change these settings at any time.
- Click Continue Setup.
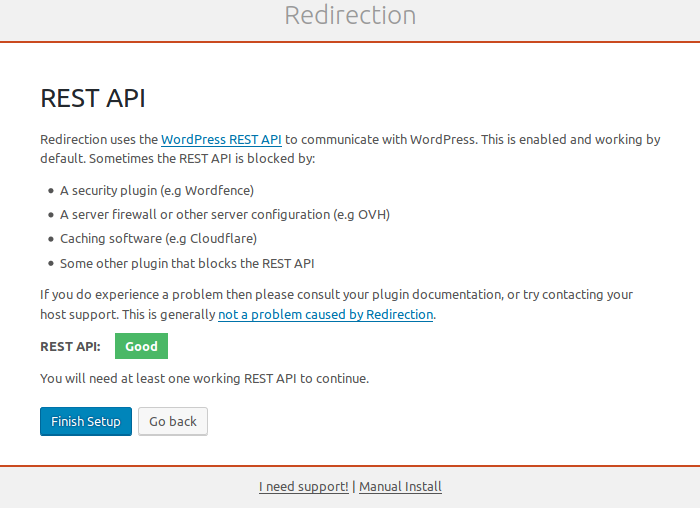
- If the REST API check is Good, click Finish Setup.
- Click Finished.
Create Redirects
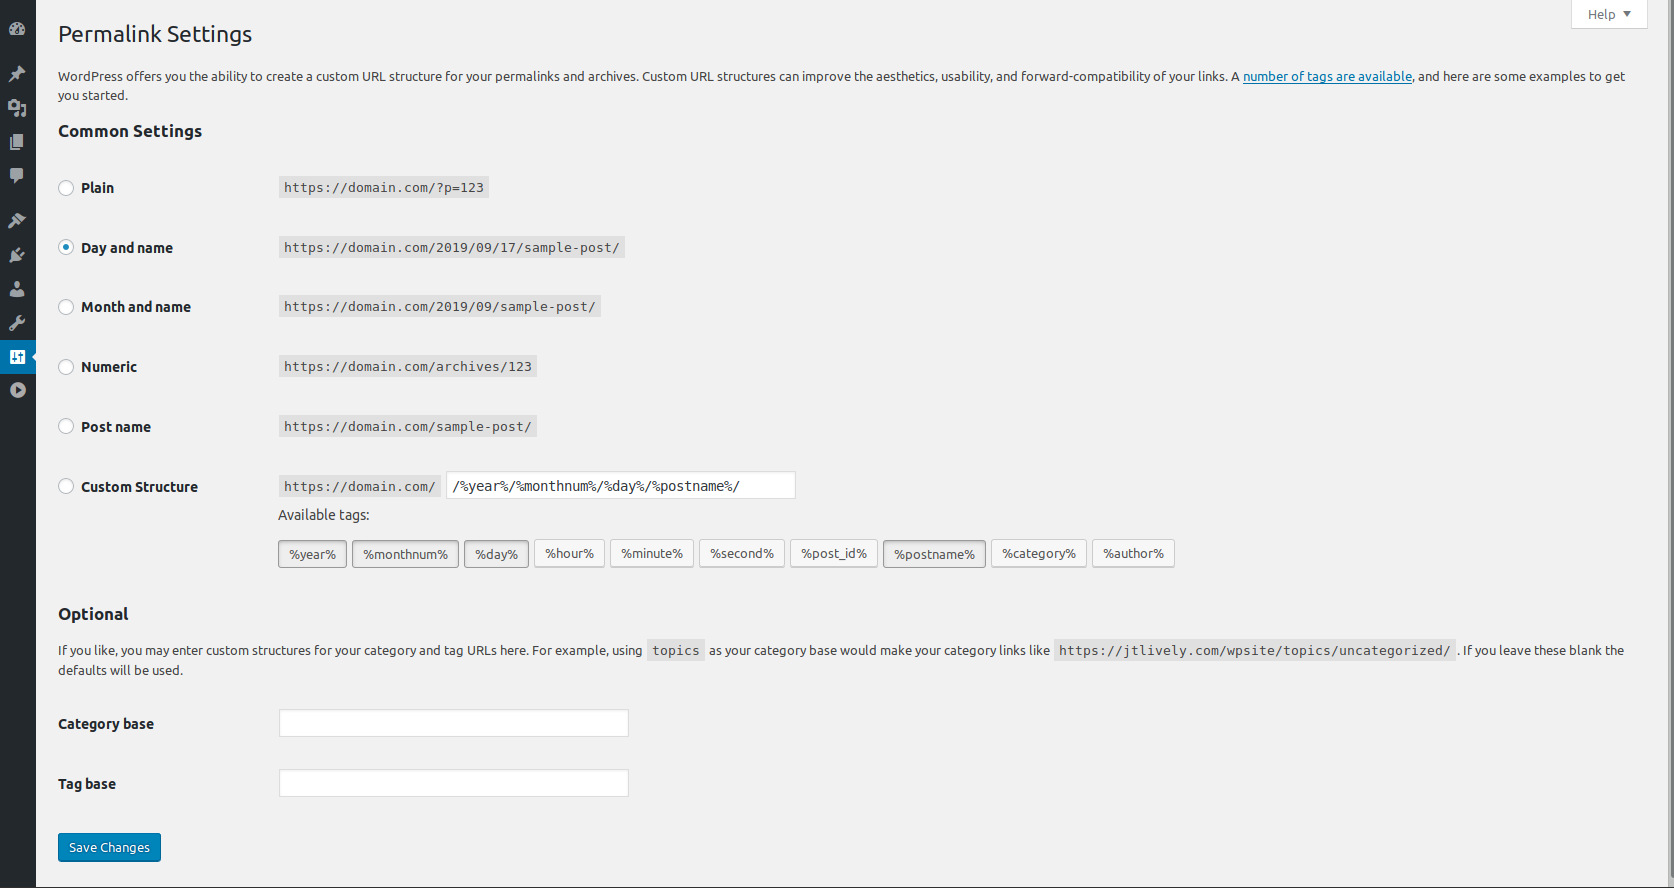
- Do NOT make any changes, yet. Decide your preferred permalinks but do NOT Save Changes. You’re looking at the permalinks to see how your WordPress site is creating a URL for its links.
- Once you have determined your permalink settings, you need to find the correct Regular Expression (regex) input for your redirect settings. Below are some common changes:
Day and Name to Post name:
Source:/^/\d{4}/\d{2}/\d{2}/(.*)
Target:https://domain.com/$1/
Example: https://domain.com/2019/09/20/about
Becomes https://domain.com/about
Domain to/blogexcept URLs with/blog:
Source:/^/(?!blog)(.*)
Target:/blog/$1
Example: https://domain.com/about
Becomes https://domain.com/blog/about
Old domain to new domain:
Source:/(.*)
Target: https://newsite.com/$1/
Example: https://domain.com
Becomes https://domain.net - (Optional) Read more about Regex options on the developer’s website – Redirection.me.
- Configure your permalinks and Save Changes.
- On the left, hover over Tools and click Redirection.
- Under Add new redirection, add your Source URL regex and select Regex from the URL options / Regex drop-down on the right.
- Type your Target URL and click Add Redirect.
- Test your redirect.
Improve your SEO by checking the Redirection logs.


Great article, worked like a charm.
Just one thing – In step #2 the sources don’t need the / at the beginning. In fact the redirect plugin will complain about that.
Hello Rodolfo! Thanks for your note about the /. I will have the code reviewed to double-check your comment. Typically, when I use this option, I am not using it in WP-CLI and I used a complete URL for the source. Once it’s verified, we will amend the article per your comment. Thanks for letting us know!