Table of Contents
One of the best functions of WordPress is the ability to create and manage different user roles. The WordPress user roles create many different levels of engagement, from additional admins to contributors to customers.
Learning and understanding user roles in WordPress will ease your workflow and help you manage your website. Continue reading to learn how to:
- How to Add WordPress Users
- How to Change WordPress User Roles
- Customizing User Roles with the User Role Editor
- Managing User Roles Using WP-CLI
How to Add WordPress Users
The Types of User Roles
WordPress allows you to assign five different roles to users interacting with your website. Varying in access levels, each role gives the user needed permissions to complete their tasks.
For example, you may have a user who only does editorial work or a writer who contributes to your blog. You can assign each the Editor and Contributor role respectively to allow them to complete their tasks without giving them full access to the dashboard.
Below outlines the default WordPress user roles available:
| Role | Description |
| Administrator | Somebody with access to all the administration features within a single site |
| Editor | A user who can publish and manage posts including the posts of other users |
| Author | A user who can publish and manage their own posts |
| Contributor | A user who can write and manage their own posts but cannot publish them |
| Subscriber | A user who can only manage their profile |
Adding a User in WordPress
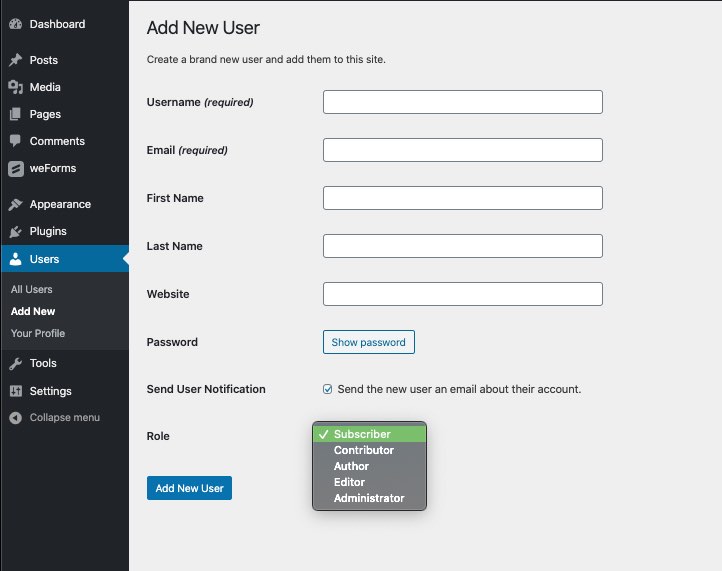
Added WordPress users can help you manage, create, edit, and moderate your site operations and content. You can also have WordPress users who simply view and subscribe to your website. To add a new user, follow these steps:
- Log in to the WordPress Administrator Dashboard.
- Navigate to User > Add New.
- Fill in the required User Name and Email fields. The First Name, Last Name, and Website fields are optional.
- Under Role, choose the role you would like the user to have.
- WordPress can automatically generate a strong password for you. If you use this option, make sure the Send User Notification option is checked. This will send an email to your new user on how to log in. Otherwise, you will need to send the new user their login credentials through a method of your choice.
- Click Add New User to save the user.
How to Change WordPress User Roles
Modifying roles in WordPress is a quick and easy task. You can do so easily by following the instructions below:
- Log in to the WordPress Dashboard.
- Navigate to User > Add New.
- Click on or hover over the user name, then click Edit.
- Scroll down Role, then click on the drop-down to view the available roles.
- Select the new role for your user.
- Scroll down and click Update User to save your changes.
Customizing User Roles with the User Editor
If the default WordPress user roles aren’t sufficient to run your website, with the User Role Editor plugin, you can create and manage custom user roles to your liking.
A practical example for customizing a user’s role, would be to provide limited access to a Webmaster. They would be able to manage your comments, posts, and pages. However, they would not have access to change the site’s theme, plugins, and users. This is because of the custom capabilities granted per their assigned role.
To get started, follow the instructions below.
Installing the User Role Editor Plugin
- Log in to the WordPress Dashboard.
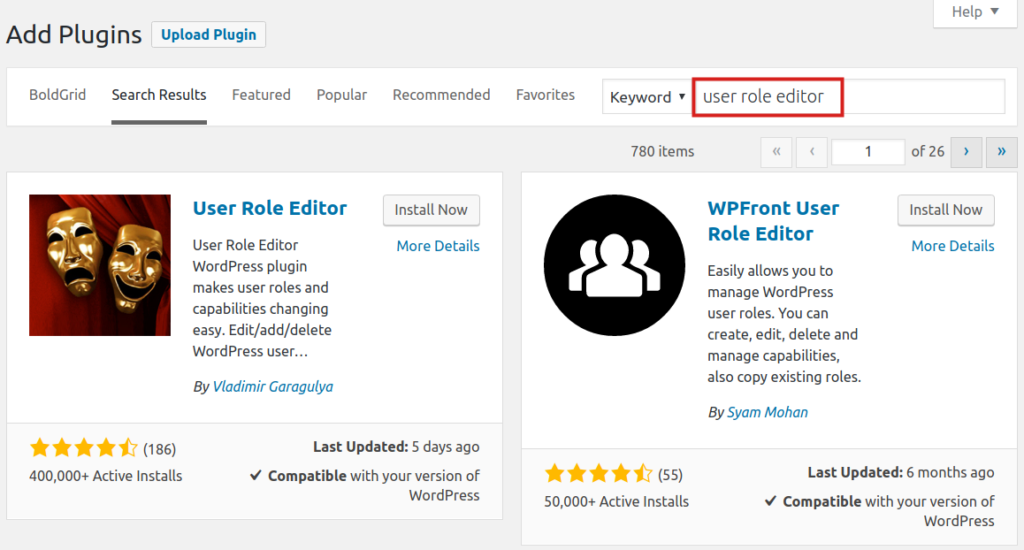
- Navigate to Plugins > Add New.
- In the search field, type “user role editor“.
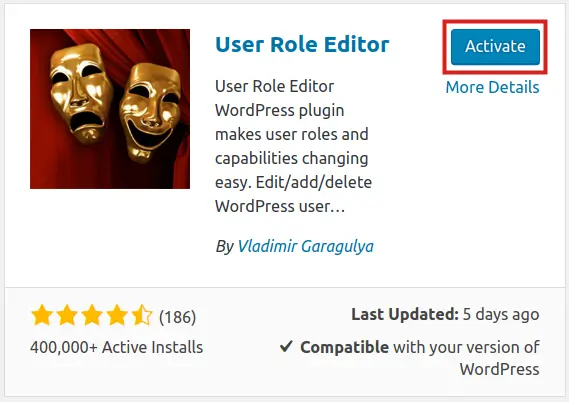
- Click the Install Now > Activate.
Using the User Role Editor Plugin
- Navigate to Users > User Role Editor.
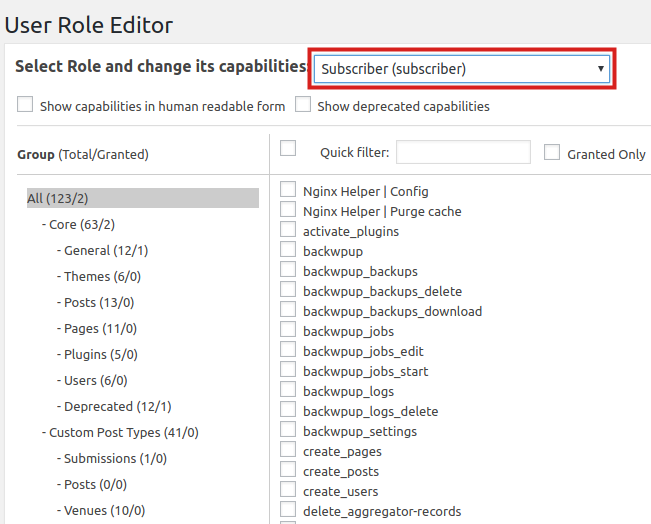
- Click on the Select Role and change its capabilities drop-down box and choose the Role you want to change.
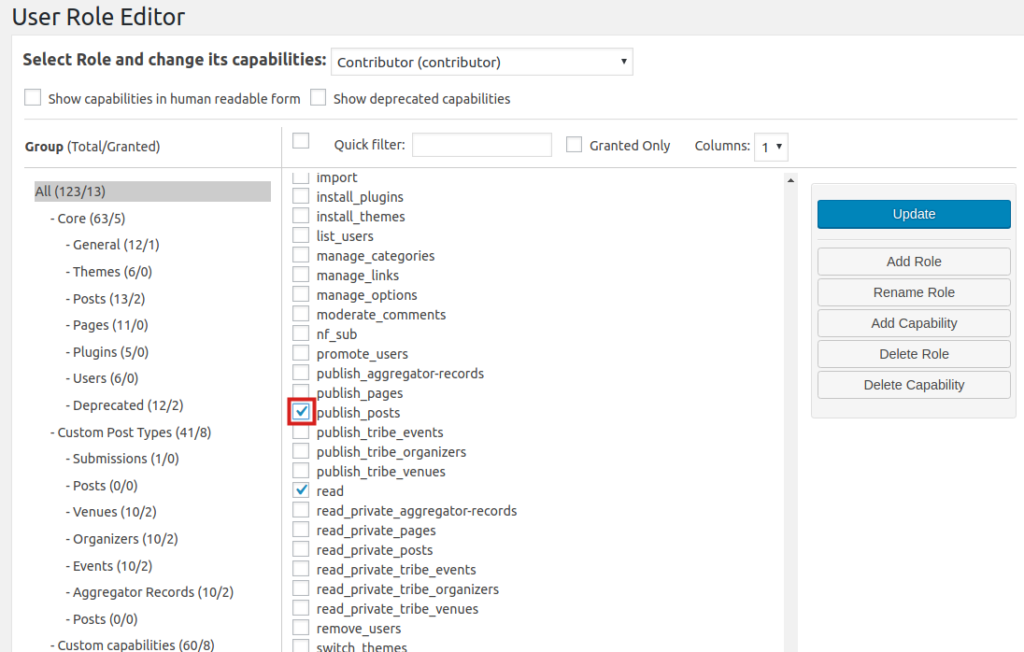
- Check the boxes to add additional capabilities to that role. In this example, we’re allowing Contributors to publish posts.
- You can select the Show capabilities in human readable form if you need help understanding the options.
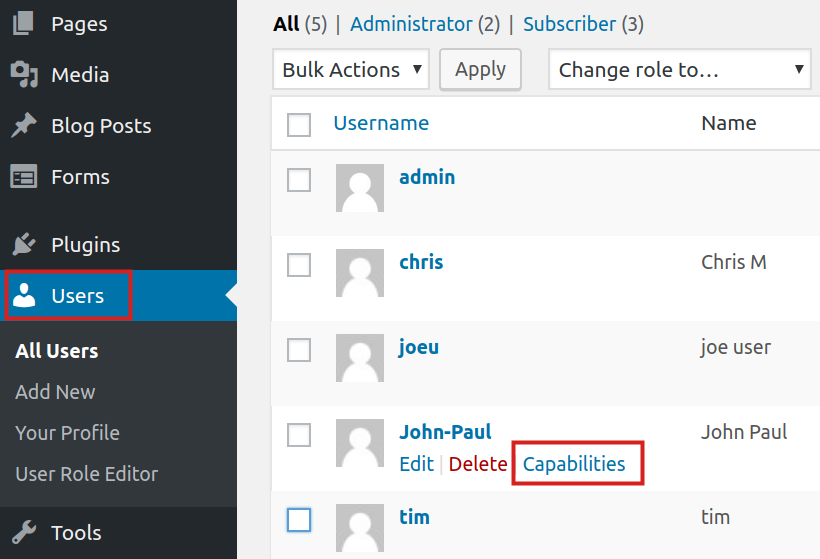
- Once complete, to give capabilities to a specific person, click All Users, hover over the user, then click Capabilities.
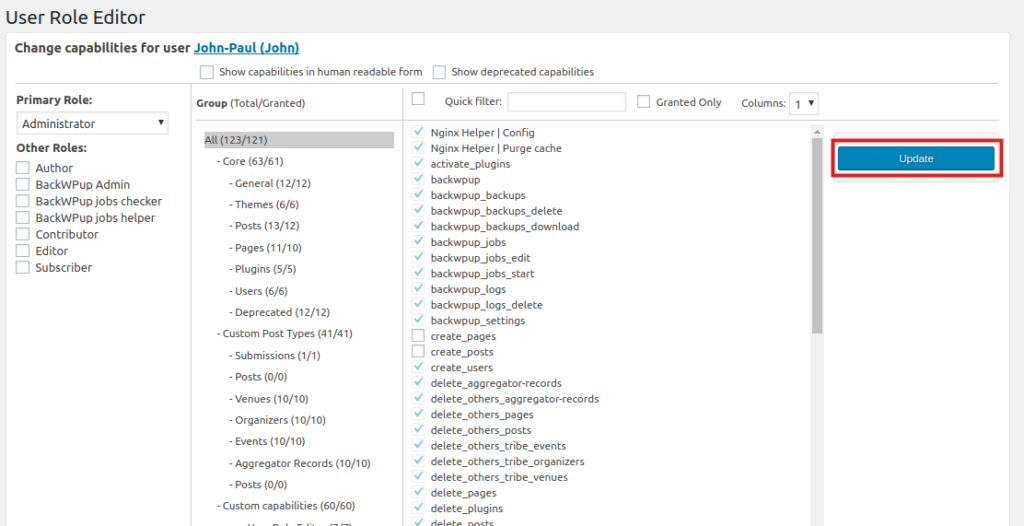
- Once you have set your custom user roles, click Update to save them.
Managing User Roles Using WP-CLI
If you’re comfortable with the WordPress Command Line Interface (WP-CLI), then you can use the tool to create, customize, and manage your WordPress user roles without logging into WordPress.
Learn how to use WP-CLI to create and manage WordPress user roles below.
Create a Custom Role
- SSH into your server as the cPanel user that owns the website.
- Use the cd command to switch into the document root directory of your website.
Example:
NOTE: Be sure to replace public_html/my_website with the actual path to the document root directory of your website. - Run the following command:
Be sure to replace $role-key and $role-name with your own custom values. When the command completes running, a success message appears, as in the example output below:
Add Role Capabilities
- SSH into your server as the cPanel user that owns the website.
- Use the cd command to switch into the document root directory of your website.
Example:NOTE: Be sure to replace public_html/my_website with the actual path to the document root directory of your website.
- Run the following command:
Be sure to replace $role and $cap with the capabilities (separated by a space) you want to allow for any user assigned that role. When the command completes running you should see a successful message, as in the example output below:
Assign a Role
Assigning a user role while creating a new user:
- SSH into your server as the cPanel user that owns the website.
- Use the cd command to switch into the document root directory of your website.
Example:
NOTE: Be sure to replace public_html/my_website with the actual path to the document root directory of your website. - Run the following command:
Refer to the table below for example values to respond with when prompted:
| Field | Description | Value |
| 1/10 <user-login>: | Enter the username the new user will login with. | wpadmin |
| 2/10 <user-email>: | Enter the email address to assign to the new user. | wpadmin@example.com |
| 3/10 [–role=<role>]: | Enter the role to assign to the new user. | moderator |
| 4/10 [–user_pass=<password>]: | Enter the password the new user will login with. | @DMIN-p@s$w0rd123! |
| 5/10 [–user_registered=<yyyy-mm-dd>]: | Enter the date to set for the new user’s date of registration. | 2017-12-18 |
| 6/10 [–display_name=<name>]: | Enter the new user’s name, as it should appear on the website. | WP Admin |
| 7/10 [–first_name=<first_name>]: | Enter the new user’s first name. | WP |
| 8/10 [–last_name=<last_name>]: | Enter the new user’s last name. | Admin |
| 9/10 [–send-email] (Y/n): | Enter Y to send the new user details of the account via email or enter n to skip. | n |
| 10/10 [–porcelain] (Y/n): | Enter Y to output just the new user id or enter n to skip | n |
Once you have responded to all the prompts, the user will be created and you will see a successful message, like in the example below:
Assigning a user role while updating a user:
- SSH into your server as the cPanel user that owns the website.
- Use the cd command to switch into the document root directory of your website.
Example:
NOTE: Be sure to replace public_html/my_website with the actual path to the document root directory of your website. - Run the following command:
Be sure to replace $user and $role with your actual user and your custom role. Once the user is set, you will see a successful message, like in the example below:
In the next guide, we’ll show you How to Create an Admin Account in WordPress via MySQL. Learn more WordPress tips and tricks on our WordPress Education Channel!



NO! It says nothing about how users keep appearing in my user list and why I can’t delete them!!!!!!!!!!!!!!!!!!!!!!!!
Hello John,
Thank you for your comment. Generally speaking, users should not appear in your user list unless you or another user with proper permissions adds a new user. If new users are being added automatically, it may be due to a plugin or it may be the result of malware on your site. I recommend reviewing your plugin list for any software that might potentially create users.
Best Regards,
Alyssa K.