Table of Contents
Caching is often required when trying to optimize your WordPress site. Performance grading tools like Google’s PageSpeed or Gtmetrix often recommend the use of caching in order to speed up the performance of your website. The plugins that are available are often quite complex, but surprisingly, WP Fastest Cache has a fairly simple interface in comparison. This tutorial will walk you through the installation of the plugin and then options often used in optimizing your WordPress website.
How to Install WP Fastest Cache
- Login to the WordPress Administrator.
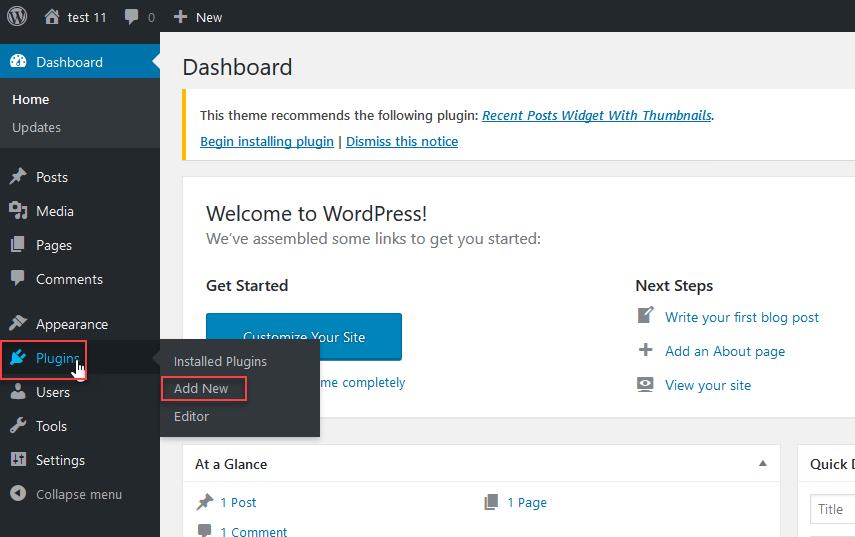 Click on Plugins, then click on Add New.
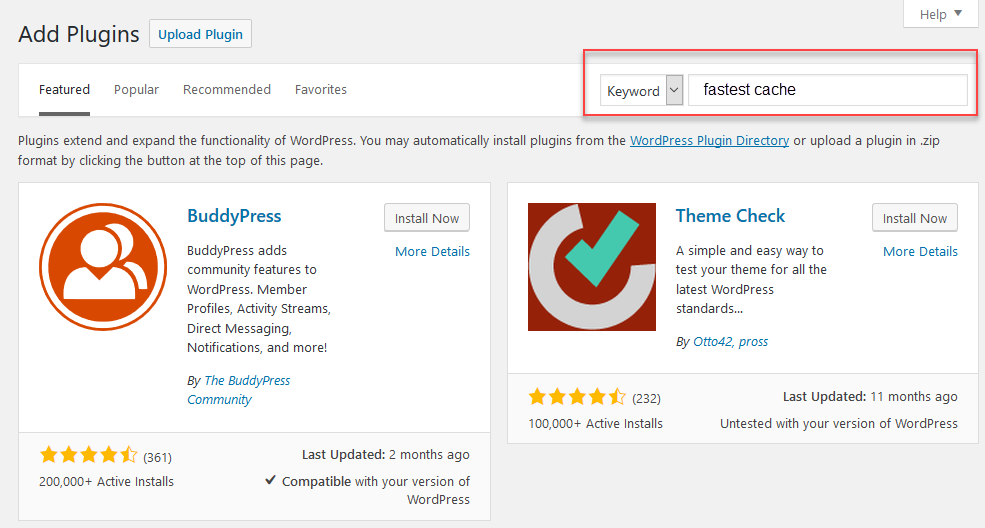 In the search bar, make sure it is set to “keyword” then type in “fastest cache.”
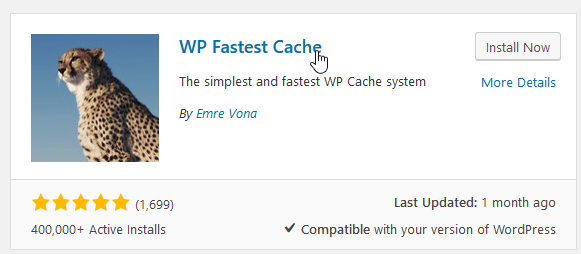
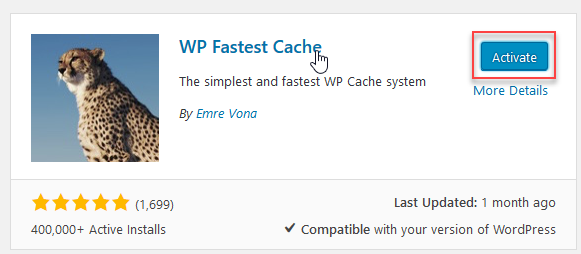
 This should bring up the plugin with the title WP Fastest Cache. Click on the Install Now button. This will add the plugin to your WordPress installation.
 Click on the button now labeled Activate in order to make the plugin active. Note that this completes the installation steps, but does not enable caching as yet.
How to enable WP Fastest Cache
Make sure to make a backup of your site before enabling caching so that you can recover your site should anything unexpected happen.
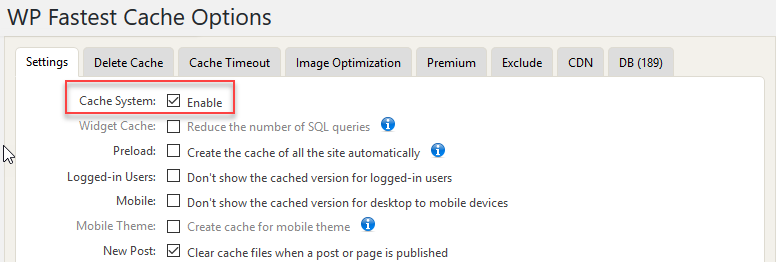
Once you have completed the installation and activated the WP Fastest Cache plugin you will need to enable caching. Caching will not be enabled until you have selected the Enable option on the Settings tab and you have clicked on the Submit button.
- Login to the WordPress Administrator if you are not there already.
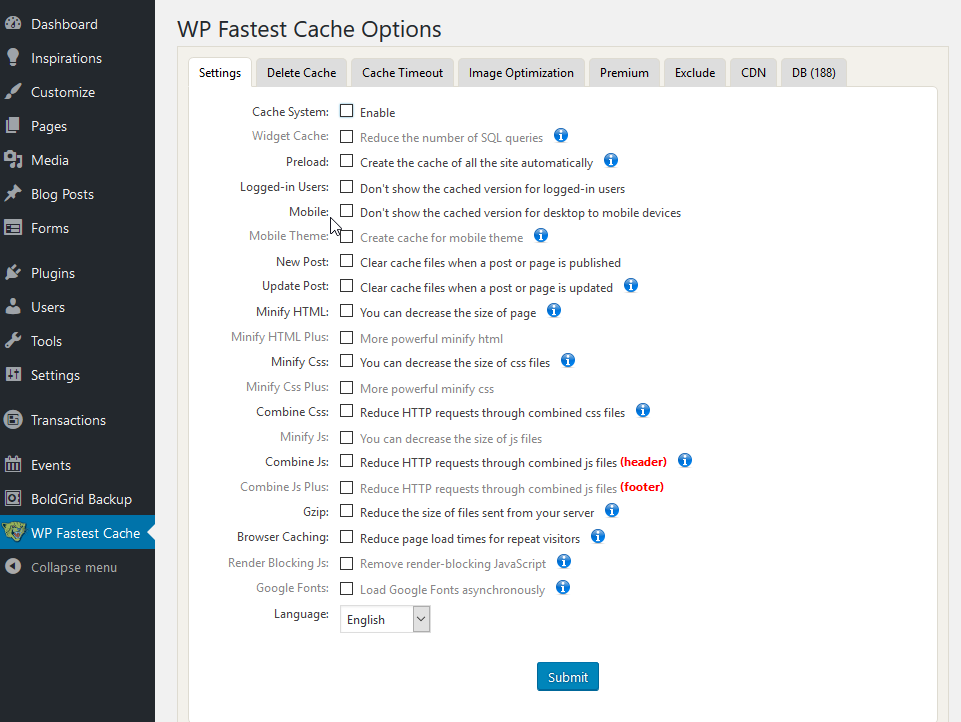
 Click on the WP Fastest Cache option in the menu at left.
 Click on the checkbox next to Enable in the Settings tab.
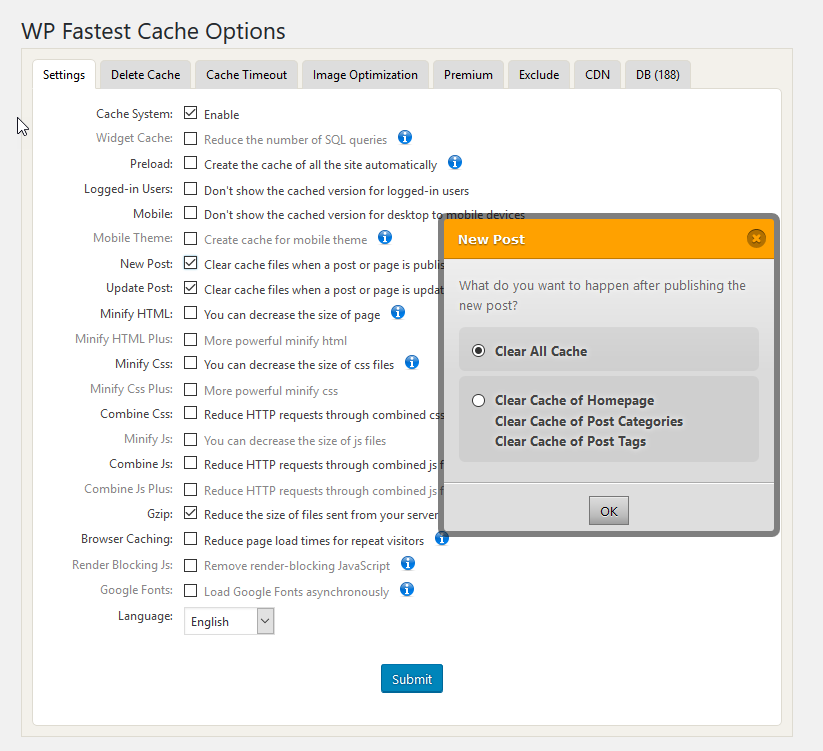
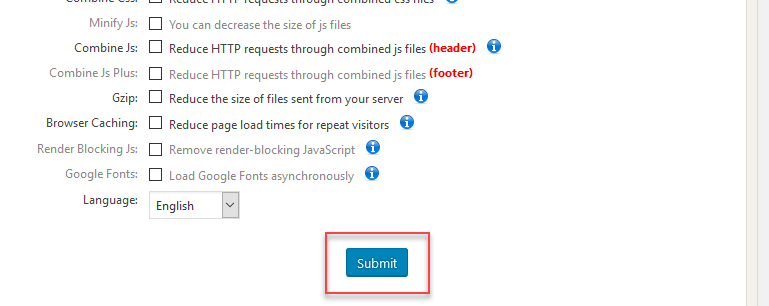
 You can also choose the options that WP Fastest Cache provides. Depending on the option that you select, you may get a pop-up window that asks for you to specify how the option will operate. Common recommendations in website performance tools like Google’s PageSpeed suggest the use of the minify option for HTML/CSS, Gzip compression, and browser caching. Some options like Image optimization are only available in the premium version. If you see a grayed-out option in the list then it is only available in the premium version of the application. For more information, click on the blue “i” and it will bring you to their documentation of the feature.
 Once you have completed clicking on the options that you want to use, click on Submit at the bottom of the page.
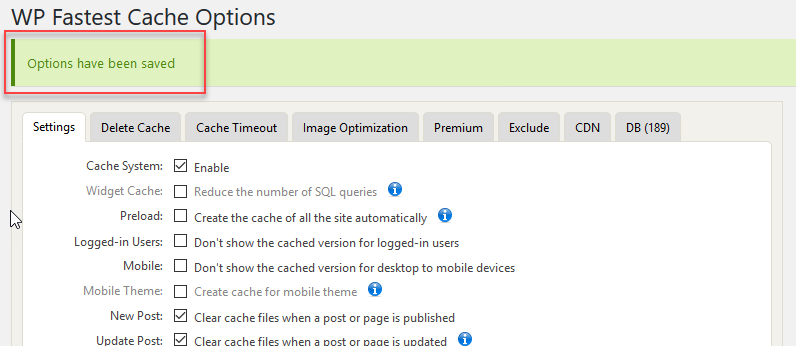 After you have clicked on the Submit button, you will see a confirmation at the top of the page in green indicating that options were saved. Reload your website and then you should see a notable difference in loading the pages. For more information on optimizing WordPress see How to Optimize WordPress.
Congratulations, you have enabled WP Fastest Cache to help optimize your WordPress site!

Thank you for the great explaination
Is it recommended to run wp fastest cache together with the cache manager on cpanel for better speed and performance? Or would it be better just to use one over the other? Thanks in advance!
Hello and thanks for contacting us. This would depend on your preferred caching settings for the other websites within the cPanel account or any special configurations you may want to do with one or more websites. Using Cache Manager instead of a plugin also reduces the amount of potential vulnerabilities related to your WordPress website. I recommend you contact our Live Support for further recommendations, but consider using Cache Manager only.
Thank you for the great explaination
You’re welcome. Thanks for the feedback.