Installing and configuring Loginizer to protect against WordPress Brute Force Attacks will help you to maintain better security of your WordPress Administrative login. For example, you can allow/deny login attempts if you simply add an IP address to the Whitelist/Blacklist using Loginizer.
Loginizer also includes a failed login attempts log that you can monitor IP addresses and other details recorded when a failed login attempt occurs. In this guide, you will learn how to read the failed login attempts logs, add your IP address to the whitelist, and add a range of IP addresses to the blacklist.
Failed Login Attempts Logs
The Failed Login Attempts Logs includes the IP and username, along with the last failed attempt timestamp, and the number of failed attempts and lockouts. These details can be used to more effectively secure your login page. Follow the instructions below to navigate to the logs and review the examples provided.
- Log into your WordPress Dashboard.
- Hover over Loginizer Security from the menu to the left and click to select Brute Force.

- In the example logs below, the IP address 216.54.31.82 attempted and failed to login 2 times. No lockout occured because the attempts stopped (either due to a successful login, the IP was added to the whitelist, or due to the brute force attack ceasing).

- In the following example, the IP address 216.54.31.81 attempted to login with the username bgadmin and failed 3 times and thus was locked out 1 time:

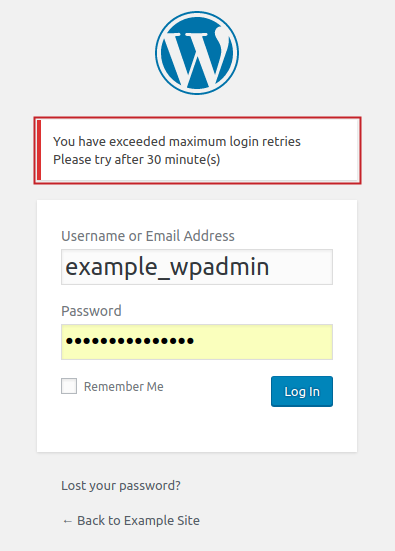
- This is confirmed when the next attempt to login is made from the IP address, this message is displayed:

Add IP to Whitelist
Whitelisting your IP is the best way to ensure that your access is never disrupted by accidentally locking yourself out. Below are the steps you can take to find and whitelist your own IP.
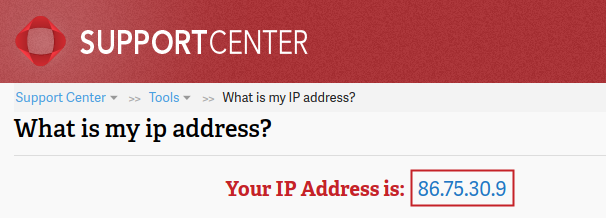
- Use our IP Identifier Tool to locate your IP address to whitelist. This tool will display the IP address you are connecting with for you to copy and use in the following steps.

- Highlight the IP address with your mouse then right-click and select Copy. You can also highlight the IP address and press Ctrl + C, on Windows/Linux (Command + C, on MacOS) on your keyboard, to copy the text.
- Log into your WordPress Dashboard.
- Hover over Loginizer Security from the menu to the left and click to select Brute Force.

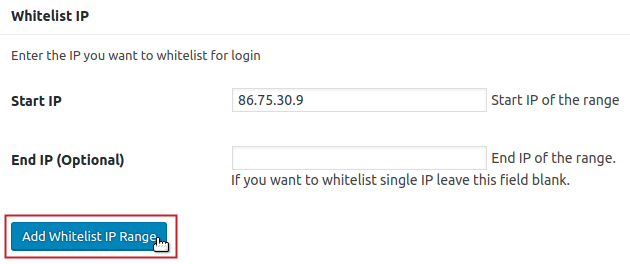
- From the Brute Force settings page, scroll down to the Whitelist IP section. Enter the IP address (copied from step 2) into the Start IP field.

- Do NOT enter a value for the End IP field. Simply click on the Add Whitelist IP Range button to finalize whitelisting your IP address.

Now your IP address appears in the list of whitelisted IP addresses. This allows your IP access to login, regardless of the amount of failed login attempts made from it.
Add Range of IPs to Blacklist
Blacklisting an IP address helps to persistently block access for logging in. If a particular range of IP addresses are identified in the logs consistently, blacklisting the range can prevent these attempts without having to tighten your Brute Force Settings.
Blacklisting a single IP is the same process as Whitelisting a single IP (as described in the section above) in the Blacklist IP section. The steps below will explain how to blacklist a range of IPs.
- Log into your WordPress Dashboard.
- Hover over Loginizer Security from the menu to the left and click to select Brute Force.

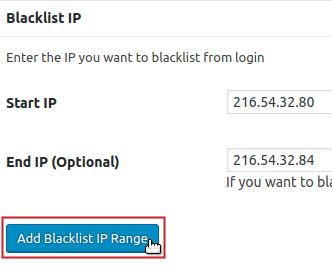
- In our example the logs display activity from a range of IP addresses starting at 216.54.32.80 (to 216.54.32.84). Since we have already identified the range, scroll down to the Blacklist IP section and enter the first IP address in the range in the Start IP field.

- Enter the last IP address in the range in the End IP (Optional) field.

- Click the Add Blacklist IP Range button to finalize blacklisting that range of IP addresses.

Now that you have blacklisted the IP range any IPs that attempt to login from within that range, will receive the message:
“Your IP has been blacklisted”
If you would like to customize this message, follow the steps in our guide on Using Loginizer to Protect Against WordPress Brute Force Attacks.


How to add bulk blacklisted ip range on Loginizer? Since i want to block whole ip range from Digital Ocean?
The article explains that you define a range of IP addresses with a start and end IP address. If you’re not familiar with how to determine your IP address range, then you may need to submit a ticket, or speak with the live technical support team that is providing you the IP addresses. Comments and questions in the Support center website are public domain and may not provide the privacy that you need for your issue. You can go to the bottom of this article to find the information to contact our Support team.