Table of Contents
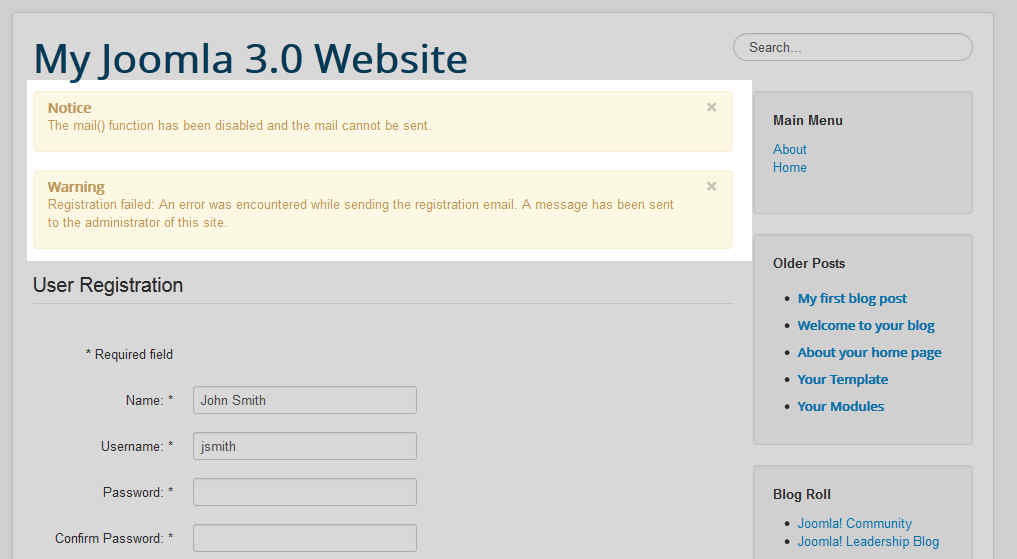
If your Joomla server does not support the php mail() function and Joomla attempts to send an email (such as a new user registration email), any of the following message may appear:
- Could not instantiate mail function.
- The mail() function has been disabled and the mail cannot be sent.
- Registration failed: An error was encountered while sending the registration email. A message has been sent to the administrator of this site.
Not all servers support the php mail function, and if your Joomla hosting provider does not, you’re still in luck. To prevent the above error and to setup Joomla to be able to send email successfully, we have to adjust Joomla’s email settings. Besides the php mail function, Joomla 3.0 can use Sendmail or SMTP. In this tutorial, we are going to walk you through the steps for setting up SMTP with Joomla 3.0
Configuring Joomla 3.0 to send emails using SMTP:
- Configure your sending email account
When emailing using SMTP, we are also going to setup SMTP Authentication. What this means is that we are going to setup Joomla to log into the server using a username and password, and then send email as that user. SMTP Authentication is much like using Microsoft Outlook or Mozilla Thunderbird: you enter your email settings, a password, and then you can use that email account.
Creating email accounts is not the same on each hosting provider. If you use InMotion Hosting or use cPanel, click here to learn how to create an email address. Otherwise, you should contact your hosting provider for more help with setting up a new email account.
Be sure to keep track of the email account and password that you use. In our testing, we created do-not-reply@bradm.rubelix.com.
- Log into your Joomla 3.0 admin dashboard
- In the left menu, click the Global Configuration link
- In the tabs at the top of the page, click the Server tab
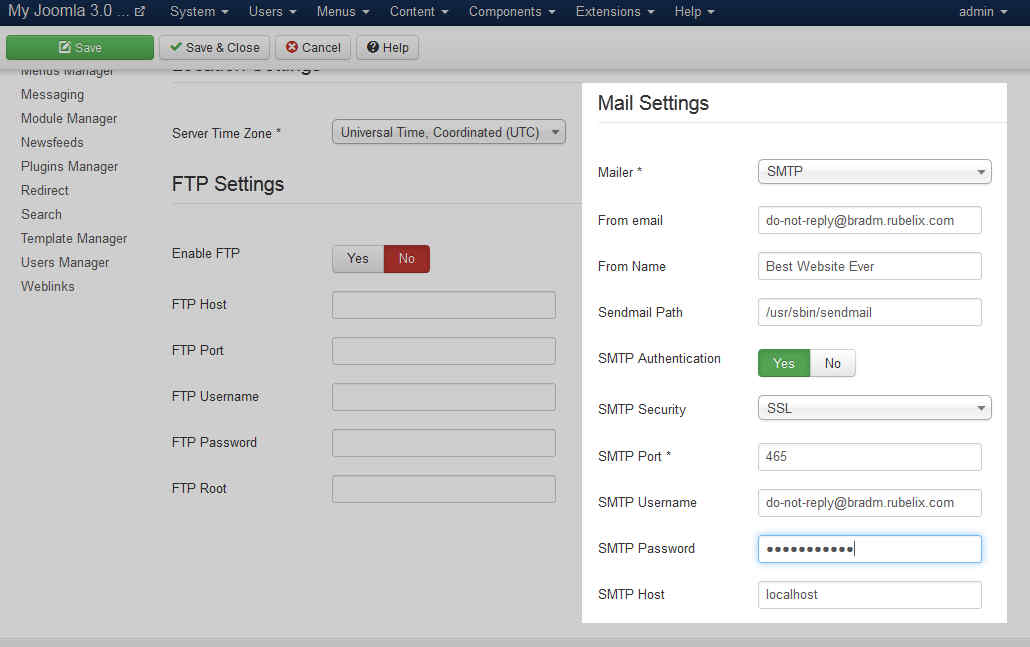
- In the right column, find the Mail Settings. Update the settings as we describe below, and then click the Save button in the top left of the page.
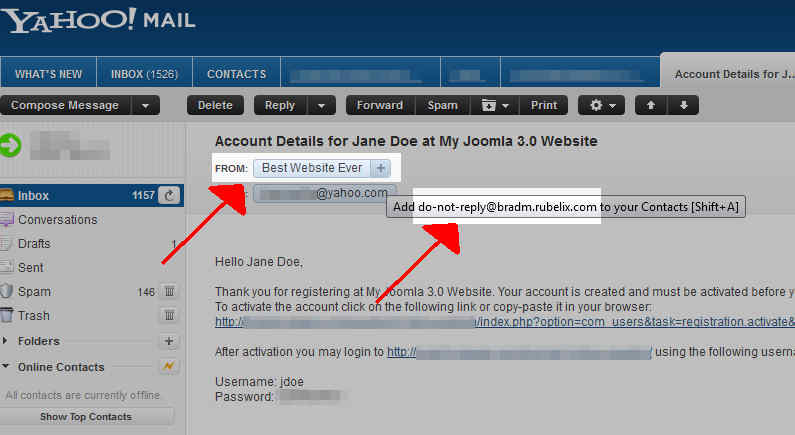
Mailer Select SMTP From Email Enter the email address you created in step 1 above. In our testing, we entered do-not-reply@bradm.rubelix.com From Name Enter your name or the name of your website. In our testing, we entered Best Website Ever SendMail path Generally you can leave this setting alone SMTP Authentication Set SMTP Authentication to Yes SMTP Security If you want to send email, you may need to contact your hosting provider for the necessary settings. In our testing, set Security to SSL. SMTP Port As we are using SSL (see the setting above), we are setting the port to 465. Again, you may need to contact your joomla host for the correct settings. SMTP Username Enter the username of the email address you created in step 1. SMTP Password Enter the password of the email address you created in step 1. SMTP Host Most often, your STMP Host will be localhost. If you have any doubts, be sure you contact your joomla hosting provider for clarification. You can see in the screenshot below how the settings looked when we saved them in Joomla 3.0. We then signed up as a new user within our Joomla 3.0 website, and you can see how some of the SMTP settings we configured (such as From email and From Name) show up in our email client.
SMTP Settings Within Joomla 3.0 An email sent by Joomla with our new SMTP Settings 


