Table of Contents
You can create and manage folders in RoundCube to help better organize your e-mails stored on the server. In this tutorial we will show you how to create a new folder in RoundCube.
Creating a RoundCube Folder
- Log into RoundCube.
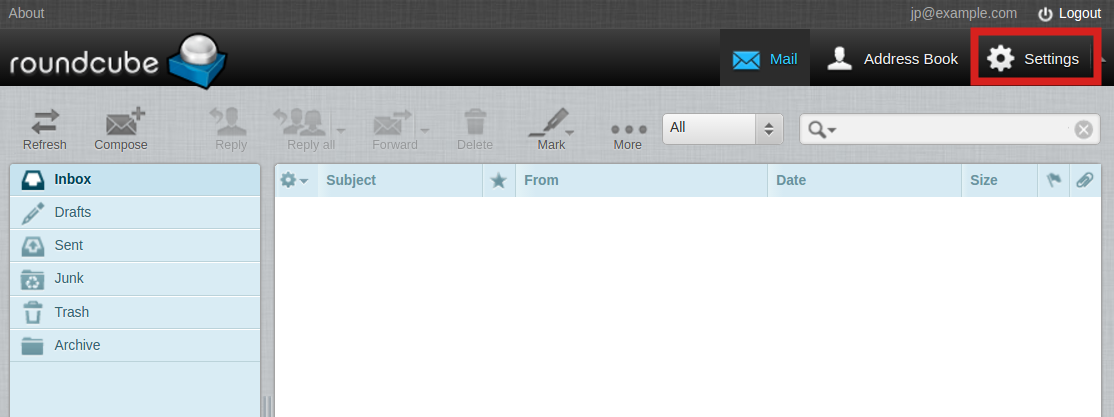
Click the Settings link.
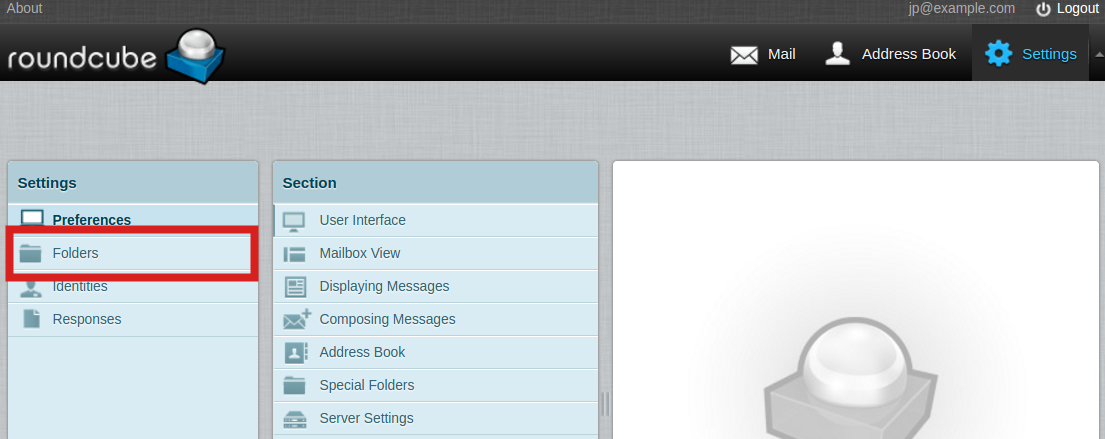
Click the Folders link.

In the Folders section click the plus (+) sign.

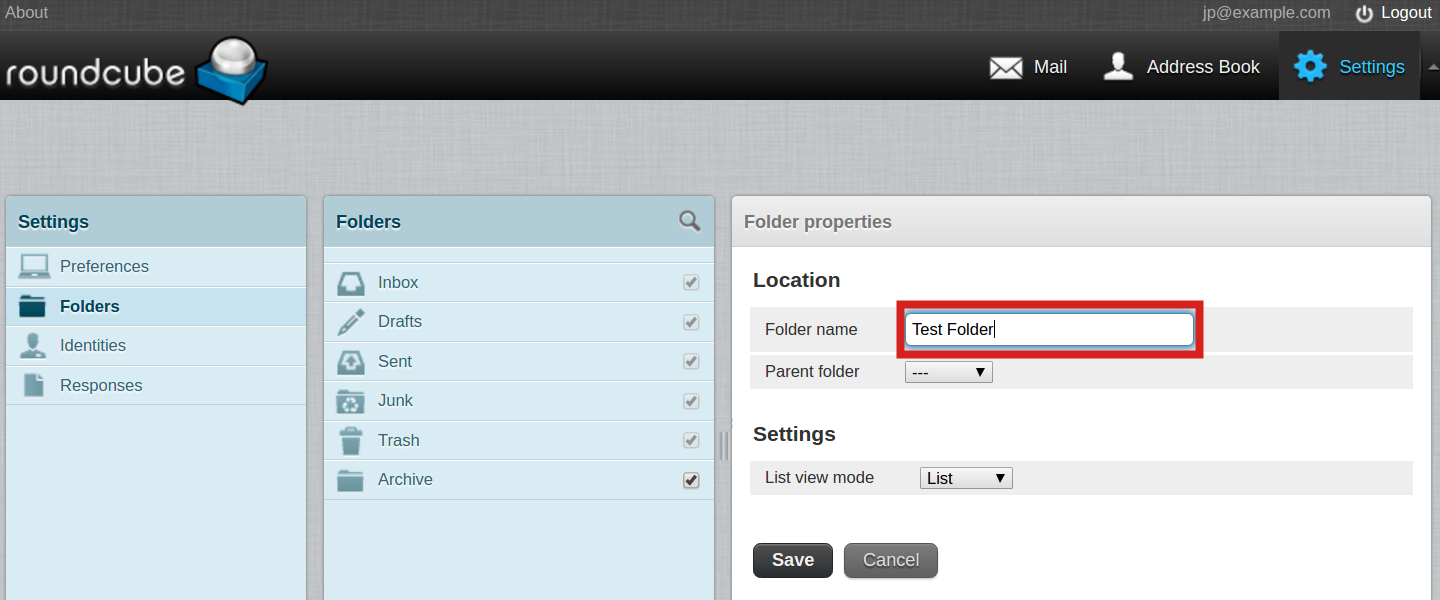
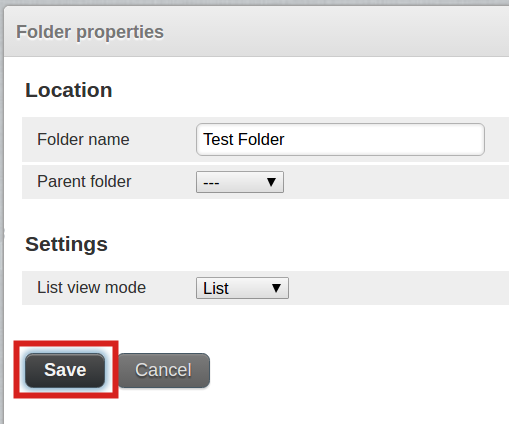
You will then see the Folder properties section. Enter a folder name in the available field.
- Choose if you want a Parent folder from drop down menu. The new folder is created inside of it, if you choose a parent folder.

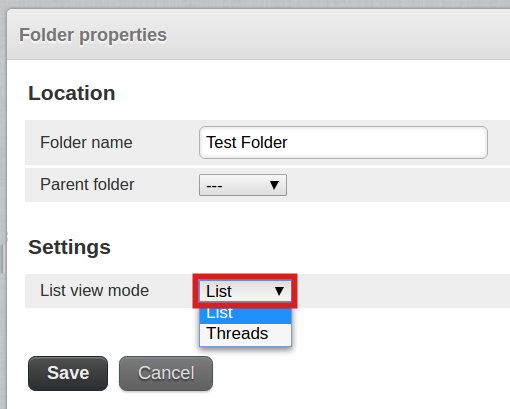
Click the drop-down next to List view mode to choose if you want the folder to list the emails, or display as a thread. “Instead of sorting messages by their date or subject, conversations spawning multiple messages can be grouped together as “Threads”. Use the switch buttons on the left in the message list footer to toggle between List or Threads view. When in thread mode, groups of messages can be collapsed or expanded using the arrow icons in the leftmost column of the message list.(source)”

Click the Save button to create your new folder. You will then see the new folder listed with your other folders.
Congratulations, now you know how to create a new folder in RoundCube Webmail!

Does this compress the amount of storage by allowing more emails to come in the server?
Great question, Gabrielle! Following this tutorial will help you organize the emails, but unfortunately this does not compress them. If you are a cPanel administrator on an account with variable email storage space, though, you can follow our tutorial on changing allocated email storage space. Hope that helps!