Table of Contents
The following article shows how to set up an email account on your Kindle Fire tablet. Each tablet can be set up to view a single or multiple email accounts using the POP3 or IMAP protocol available with your InMotion Hosting account. Like any good email client, you can use either secure or non-secure settings. The tutorial will explain these settings and display the options that you can select.
Setting up email for Kindle Fire Tablets
-

Power on your Kindle, then go to your apps and look for the Email icon. Click on the email icon (which looks like an envelope with a letter sticking out of it) to start the set up process.
-

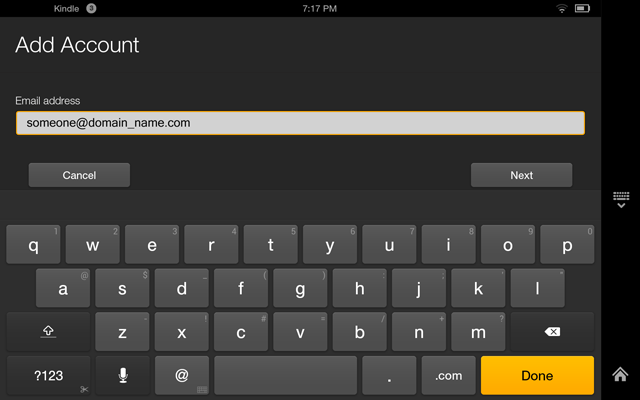
If you are setting it up for the first time, then you will be requested to type in the email address of the account you’re trying to set up. If there is an account already setup, then you will be launching the email application. Type in the email address, then click on the NEXT button or DONE button.
-
You will then need to type in the email password. Click NEXT to proceed.
-

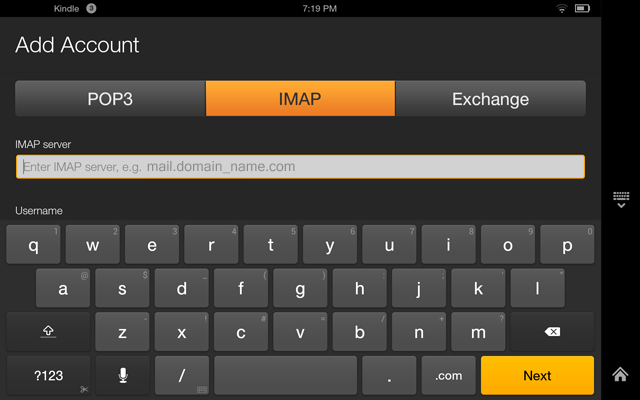
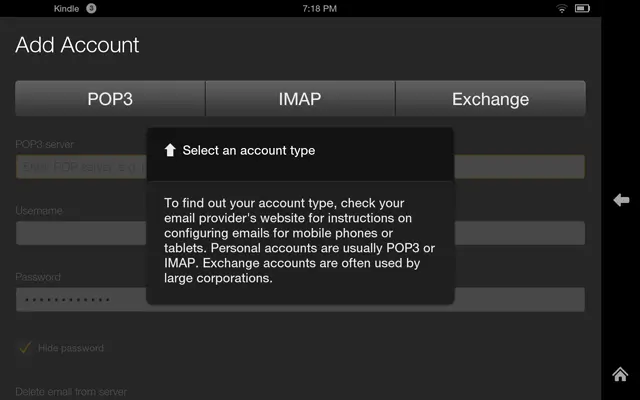
The next step in adding an account will require you to determine if you’re using a POP3, IMAP or Exchange account. If you’re using email from your InMotion Hosting account then you should only choose either POP3 or IMAP. To learn more about the difference between POP3 and IMAP please go to How email works. Click on the email protocol that you wish to use.
-

Immediately below where you have chosen either POP3 or IMAP you will see the blank field for the name of the server. Type in the name of the incoming mail server. If you need help finding this setting, please go to how to find your email settings. By default, typical server accounts for InMotion Hosting servers usually follow this format: mail.domain_name.com . You would replace “domain_name.com” with the name of the domain where your email is set up.
-

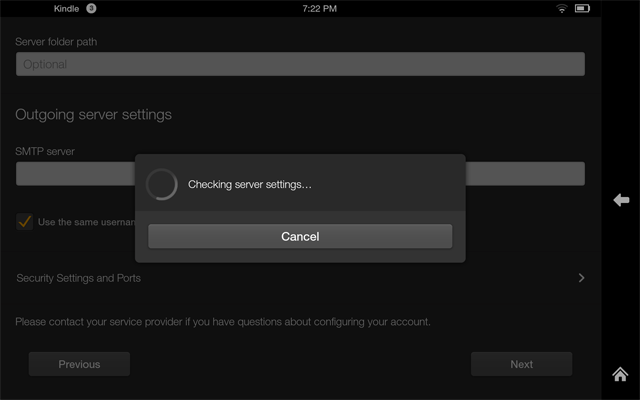
Click NEXT in order to proceed. Note that you may see a screen that shows a message that states “Checking server settings…”. You can click on the CANCEL button to cancel the check at this point.
-

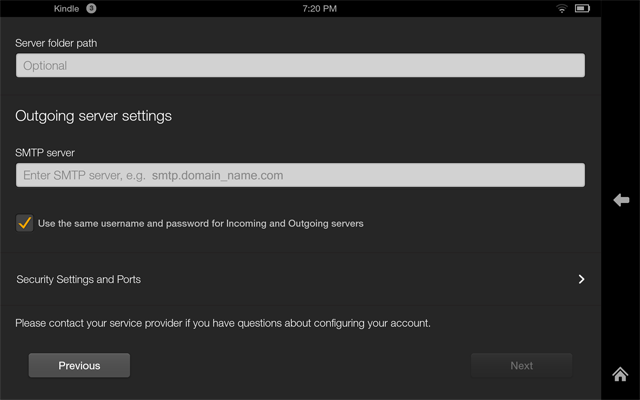
Click on NEXT to advance through the different settings for the email account. The next blank is SERVER FOLDER. You can leave this entry blank. If you click NEXT again, you will be filling in the SMTP server setting under Outgoing Server settings. The typical format for the outgoing server/SMTP server name will look exactly like the incoming server name:
mail.domain_name.com
For more information on determining your email server settings, please go to How to find your email settings.
-

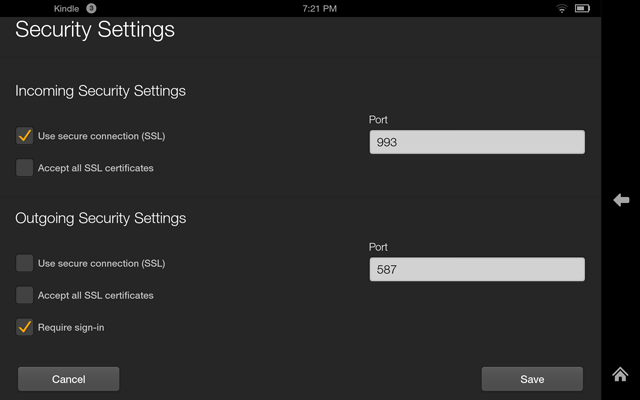
When you are on the Outgoing Server Settings screen, there is a section labeled Security Settings and Ports. Click on this section to open the screen. Email settings generally come in two forms – secured and non-secured. By default, the secure settings are checked.
Here are examples of server names used by InMotion Hosting accounts:
biz##.inmotionhosting.com
ecbiz##.inmotionhosting.com
Note:To find your server name, please see Viewing your Account Technical Information in AMP.
Here’s a list of typical email port settings:
Secure Non-Secure Incoming
IMAP port = 993
POP3 port = 995
Incoming
IMAP port = 143
POP3 port = 110
Outgoing
SMTP port = 465
Outgoing
SMTP port= 587
If you check the “Use secure connection (SSL)”, then the port will change to 465. Select the settings you wish to use.
- When you have completed choosing your Security settings, click on SAVE.

Hello, I am able to set up my email on my Kindle Fire 8 and it works fine when I am home. But if I try to use it at as my other wifi location, it tells me it cannot connect to the server.
Any suggestions?
Hello Kathryn Lake – Sorry for the issues with using your email on your Kindle. We need a little clarification on the issue you’re seeing. When you use it on your other wifi location (not “as your other wifi location” – there’s a big difference), are you able to see if you can get general connectivity to the internet in a browser? I own a Kindle myself (same generation), and I can use it at home with my wifi, and if I go to somewhere like Starbucks or Paneras, I connect to their wifi, then I can still access the internet and email. Also, if you’re looking at email with an email client (not in a browser), then you should make sure to close it and start a new session with your other WIFI connection. If you’re opening a session that was using your other internet connection, it may not clear it, and try re-connecting to a different WIFI unless you restart it.
To whom it may concern,
I use HD8 tablet and it is a fine tablet. Only issue I have is I can read and write emails but I cannot find the “send” button to send the email.
Please help me resolve this issue.
Thank you so much,
Thang Nguyen
Hello. It appears that the Send button is displayed above the email being composed.
I have tried many times, but it says that my email address and username do not match. So frustrating.
That means your credentials are invalid or you are using the incorrect settings. I would recommend verifying your username and password by logging into your webmail. If you are still having issues after that you may want to reinstall the mail app on your tablet to insure it is functioning properly and that you have the correct settings.