Table of Contents
When you create estimates with Sprout Invoices you give your customer or potential customer a quote on the cost of your services or product that you wish for them to purchase. It is easy to quickly create estimates with Sprout Invoices. It includes the option to add all of your costs in detail along with any notes concerning the project.
You can also add specific details like the terms of service or payment terms. Sprout Invoices is flexible in that you can add as much information as you want and also include an online link to accept the estimate.
This article will show you how to create an estimate and describe the interface that Sprout Invoices provides.
- Learning the Interface for Estimates with Sprout Invoices
- Adding Estimates with Sprout Invoices
- Managing Estimates with Sprout Invoices
NOTE: In order to create an estimate you will need to purchase at least the most basic license for Sprout Invoices.
Learning the Interface for Estimates with Sprout Invoices
Sprout Invoices provides a very flexible interface for creating your estimates. It provides major sections normally found within any project estimate. And you can add as much information as you want or minimize the detail that you provide with the estimate. Use the following screenshots and descriptions of each section to familiarize yourself with the Estimate interface before creating a new one.
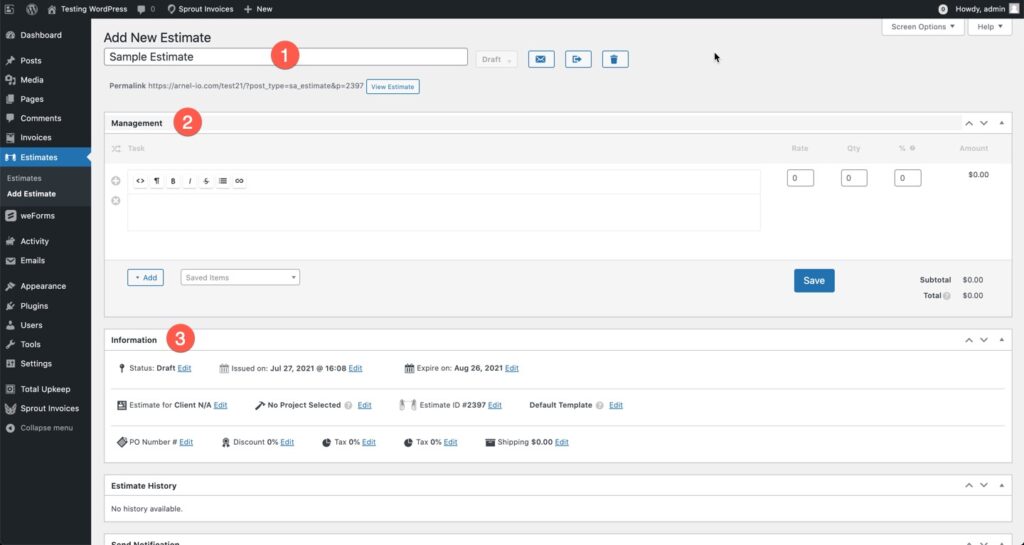
Each numbered section is described below:
- Estimate Title – Each estimate is automatically numbered when it is created. However, you can replace the number with a title for the estimate that would be more descriptive to you, your employees, or your customers.
- Management – This is the area where you can add a description and cost of a task, product, or materials for your estimate. By default, it starts with a task, but you can click on the Add button to add a task, service, or product. The + and x buttons to the left of the item allow you to easily add or remove items that are listed.
- Information – This section includes important information that is typically part of any estimate or invoice. This include includes status (of the estimate), Issue date, expiration date, client information (if saved to Sprout), project (if created in Sprout), estimate ID#, template ID, PO #, discount percentage, 2 tax settings, and shipping costs.
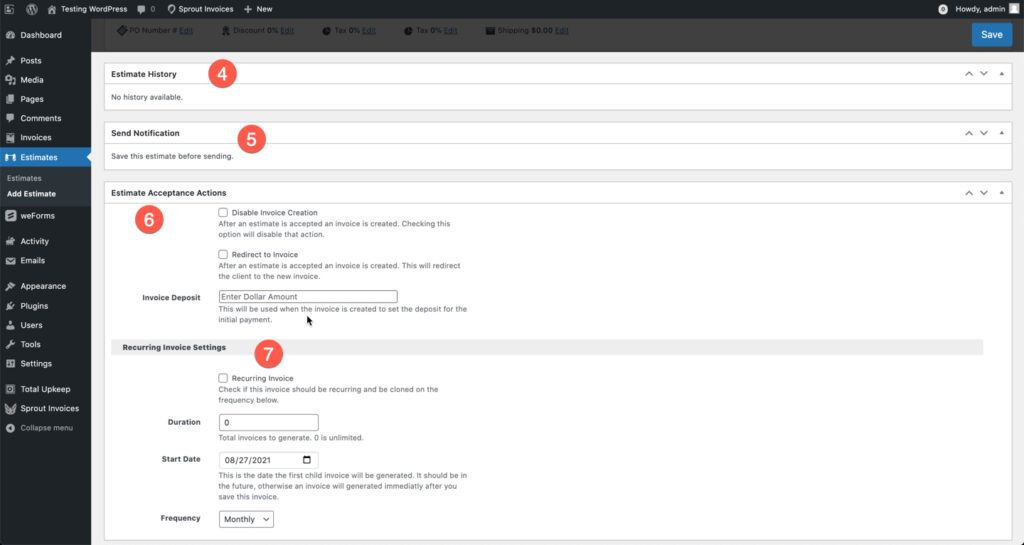
- Estimate History – If you save the estimate, or if it has been in the system for a period of time, then it will develop a history. This section will provide information on the estimate so that you can determine how and when it has changed.
- Send Notification – If the estimate has yet to be saved/completed, then you will see a message saying “Save this estimate before sending.” If you have previously saved any part of the estimate, then you will get a dialog that will allow you to send a notification of the estimate to a client. Note that you should complete the estimate before notifying a customer in order to prevent any misunderstandings.
- Estimate Acceptance Actions – You can set options to disable the creation of an invoice if it has been accepted. You can also select to redirect to the invoice once it has been accepted. Upon acceptance, an invoice is automatically created and the link to it is provided to the client.
- Recurring Invoice Settings – In some cases, an estimate might be required to recur to spread a task or payment over a period of time. This option allows you to indicate that the created invoice (from the accepted estimate) will be recurring. You can then set the total number of invoices created, their start date, and the frequency for which it will be recurring.
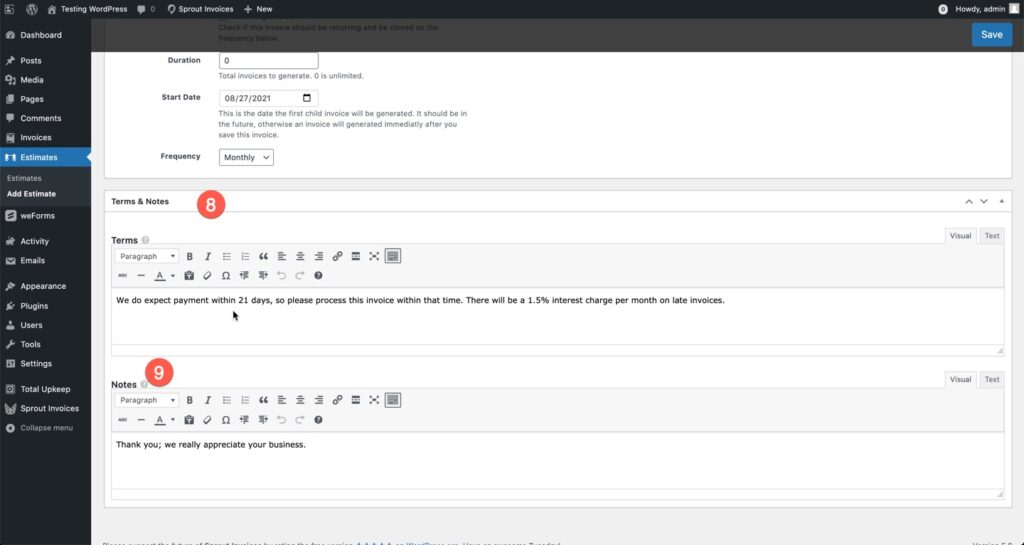
- Terms and Notes – The final section of the estimate includes the areas for the Terms and Notes. Sections 8 and 9 are simply text sections similar to a WordPress post. There is filler text in each section to give you an idea of what should be in each area. Each section can be added to, but bear in mind that long sections can lead to the printed estimate being longer than one page.
Adding Estimates with Sprout Invoices
When you install Sprout Invoices, the Estimates section will automatically be included in your main WordPress menu. Follow the steps below to create an estimate:
- Log in to the WordPress Administrator Dashboard.
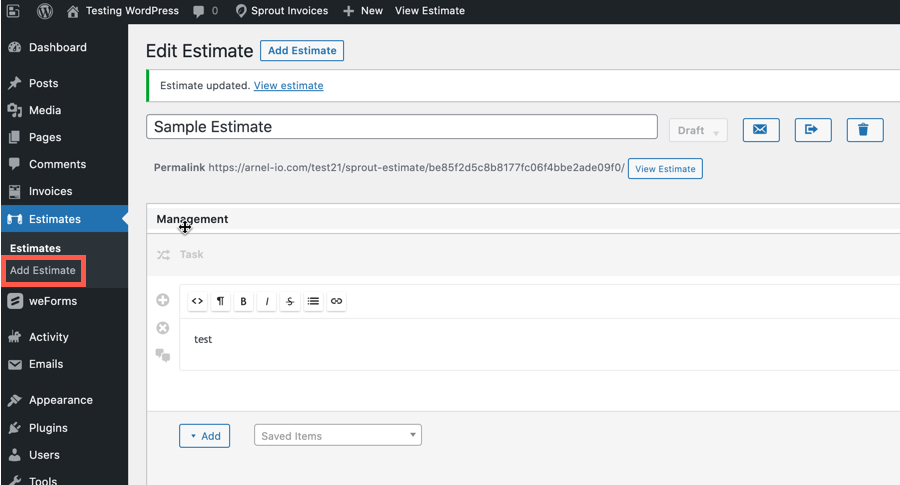
- In the main menu in the left-hand column click on Estimates.
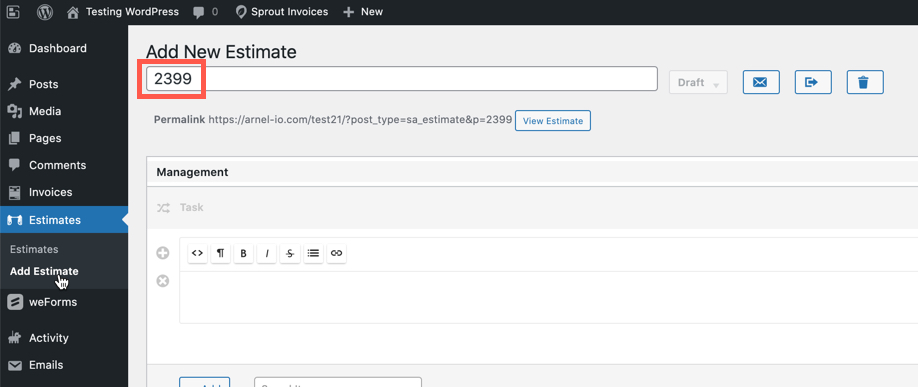
- Then, click on Add Estimate in the menu that opens.

- When you create a new estimate Sprout Invoices automatically numbers it. Click on the title (where the number is) and name it to something that corresponds with your client or the project you’re creating the estimate for.

- The estimate form that you will see starts with the title. Estimates can automatically be sent to clients to review online and can be accepted by the client automatically creating an invoice.
- Once you have completed adding all the necessary information for your estimate, make sure to click on the blue Save button that will appear in the top right corner of the page.
If you are satisfied with the estimate, you can then use the notification options in the estimate to send it to the client or organization that will review the estimate. The estimate will be created as an online form. Additionally, if a printed copy is required, then a licensed version of Sprout Invoices would be required. It will allow you to print or save to PDF. This option is bundled with all licensed versions of the plugin.
Managing Estimates with Sprout Invoices
When you have your estimates created, you can view them in a list view in WordPress. It will look like this:
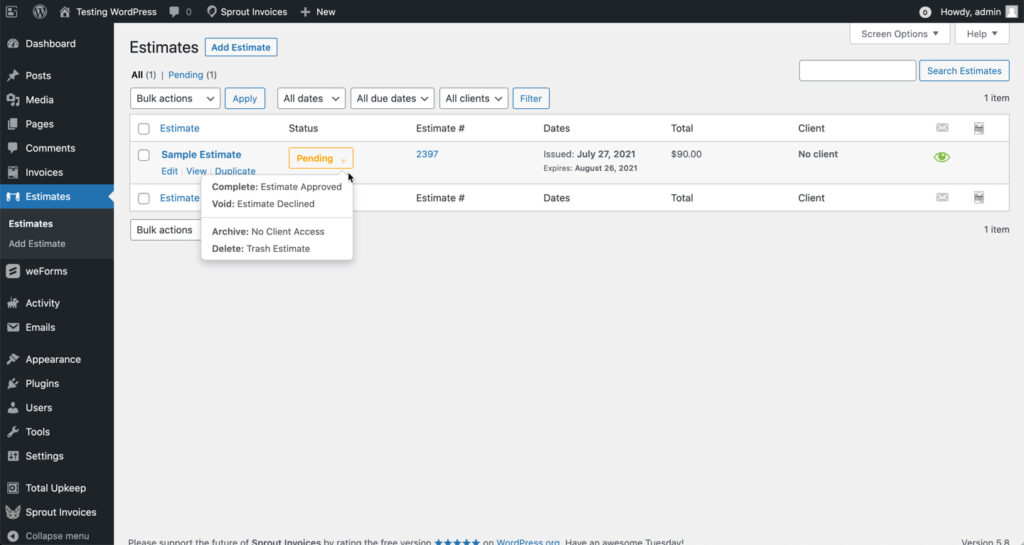
Each estimate will have the following options: Edit, View, and Duplicate. You can also change the status of each estimate by clicking the drop-down menu as seen in the screenshot above.
When you have a lot of estimates in the table, you can filter them by the client, due dates, or the actual date of the estimate.
The Duplicate option lets you clone existing estimates, making creating estimates for repetitive or similar jobs a quick and easy task.
The icon of the green eye at the right end of the table gives you a quick indication that the estimate has been sent and delivered.
This completes our tutorial on creating estimates with Sprout Invoices! To learn more about using Sprout Invoices please see our Product Guide for Sprout Invoices for a list of other useful articles.

If you’re having trouble with your WordPress host, then check out InMotion’s WordPress Hosting. We provide secure, optimized servers that are priced to meet your budget needs!
Free Domain
Free SSLs
Unlimited Bandwidth
