Table of Contents
One of the most useful tools you can add to your weForms is the Google Analytics module. With the module enabled you can then track and analyze website traffic and campaigns associated with your forms. Follow the tutorial below to learn how to activate the Google Analytics module in weForms.
In order to use these instructions you will need to have the weForms Professional version installed. You also need to have a Google Analytics account created for your website before enabling the module in weForms.
How to Activate the Google Analytics Module in weForms
- Login to the WordPress Administrator
- Click on weForms
- Click on Modules
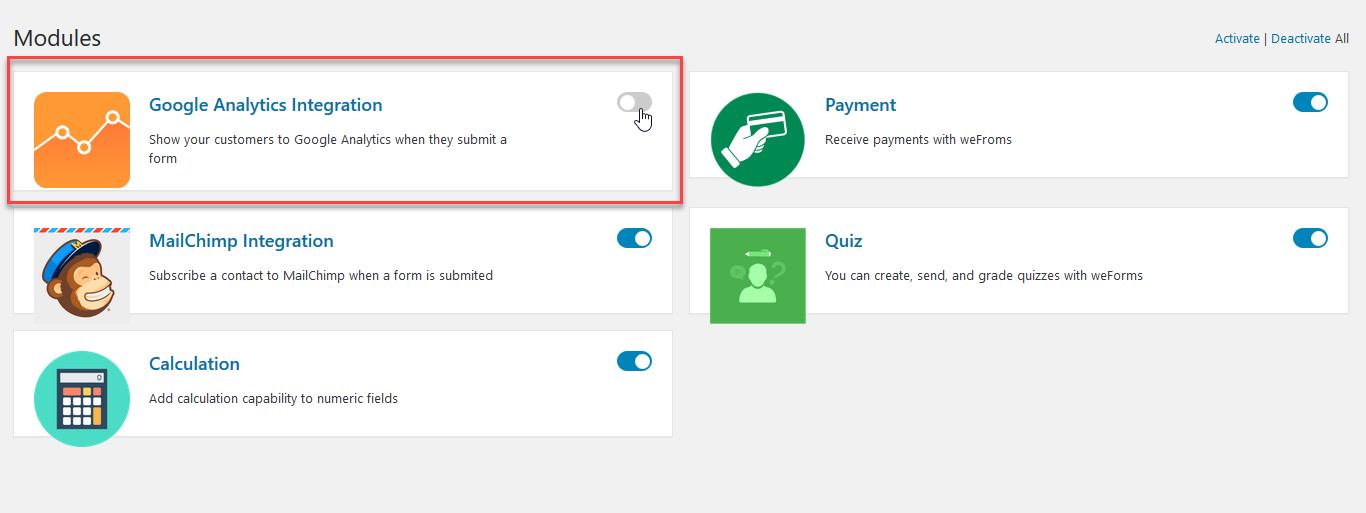
- Find the Google Analytics Integration module and then click on the slider to enable it
Once you have enabled the module, the WordPress site will display a green box notification to confirm the activation, and then it automatically saves the change. You can see the module and slider in the screenshot below:

If you’re searching secure, optimized server for your WordPress site, then check out InMotion’s WordPress Hosting.
Configuring the Google Analytics module for weForms
When the module is enabled you will still need to add the tracking ID and then activate the module on the form. Follow the instructions below to complete the necessary configuration for Google Analytics to track your form.
Add the Google Analytics Tracking ID
In order to add the tracking ID you will need to have a Google Analytics account. To create one, you can go to Google’s Analytics Help page (the page is also linked in the Google Analytics tab). They have explicit directions on how to set up your account and get your tracking ID.
- Get you Tracking ID from Google
- Log in to the WordPress Administrator Dashboard
- Click on weForms, then click on Settings
- Click on the Google Analytics tab
- Add the Tracking ID that you copied in step 1
- Click on the Save Changes button

Your next step is to activate the form or forms that you are tracking with Google ID.
Activating Google Analytics on a Specific Form
- Login to the WordPress Administrator (if you’re not already in it)
- Click on weForms
- Click on All Forms
- Select the form(s) that you want Google Analytics to track. Click on the form title or click on the Edit link in order to edit the form
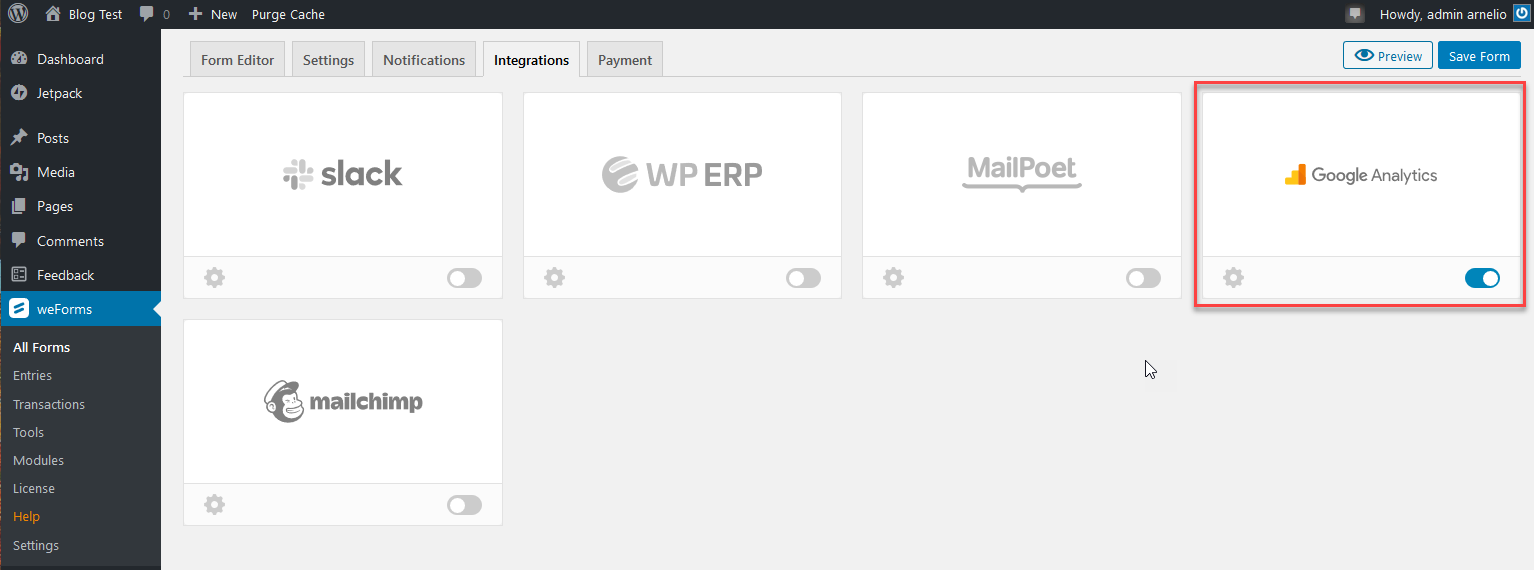
- At the top of the form, you’ll see the Integrations tab. Click on this tab
- Find the Google Analytics module, then click on the toggle to activate it
- Click on the Save Form button in the top right corner to save your changes
This completes the configuration steps needed to enable the tracking of your form using Google Analytics. The screenshot below shows the Integrations tab in the form with the Google Analytics module activated.

Congratulations! You’ve completed our tutorial on adding Google Analytics tracking to your weForms form. To learn more about weForms, please go to the weForms Product Guide.