Table of Contents

When you have a live server associated with a project, InMotion Central makes it easy to manage it. For example, you may want to connect with SSH keys, view your server’s hostname, or stop/restart the server. Once connected via SSH you have full control as the root user to modify your server as needed. This guide will show you how to manage your server with Central.
How to Manage Your Server
The first step in administering your server is accessing the Manage Server menu of Central. Keep in mind that this option is only available for environments with sites that have been published to a server.
- Login to InMotion Central.
- Roll your mouse over the project you want to manage and click on its tile.
- Click Manage in your production environment.
- Click Overview in the navigation menu. You will then see your server information, it will include the following:
Hostname This is the hostname that will resolve directly to your server. Click the copy link to copy it to your clipboard. IP Address The unique IP address for your server will be listed here, you can click copy to copy to your clipboard. Performance Level The type of package that is installed on your server will be listed here. Server Status View the current status of your server here, it should be “Running” unless you have stopped or restarted it.
Now that you know how to access them, we will now go over the server management options available with Central.
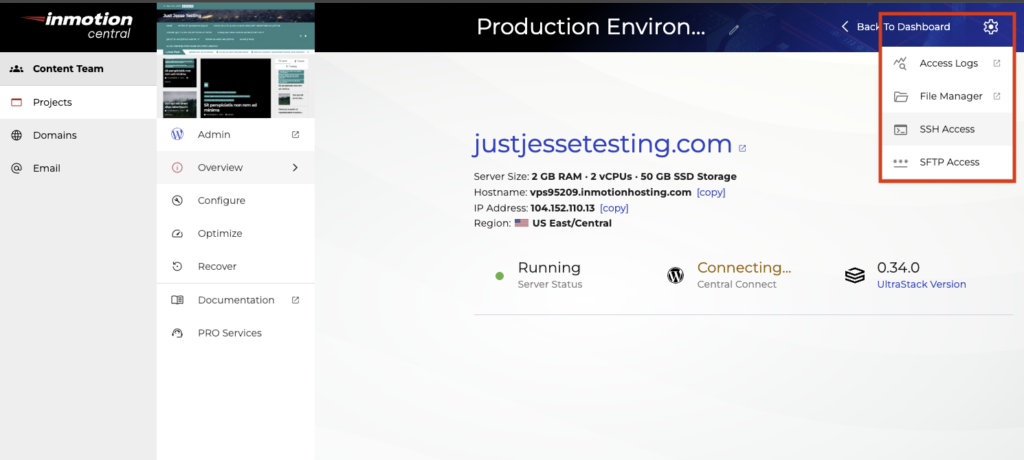
Generate & Add SSH Key
SSH Keys are used to securely authenticate with the server so you can connect via the command-line interface (CLI). This is a preferred method for advanced users to manage their servers since you can quickly make changes without having to navigate through a graphical user interface (GUI).
Generate SSH Key
If you don’t have an SSH key that you want to use already available on your computer, you can create a new one with these steps.
- Open a terminal on your local computer and generate an ssh key with the following command.
- Press Enter again when you see a prompt to “Enter file in which to save the key“. You may be asked to overwrite an existing file, you can also enter a different file name if you want at this point.
- When prompted, type a secure passphrase, then press Enter.
- When prompted type the secure passphrase again to confirm, then press Enter. This will generate a public and private key.
- Open the public key (/home/username/.ssh/id_rsa.pub) and copy the entire text.
Add SSH Key
Now that you have copied your public SSH Key, we’ll show you how to add the SSH key to your server with Central.
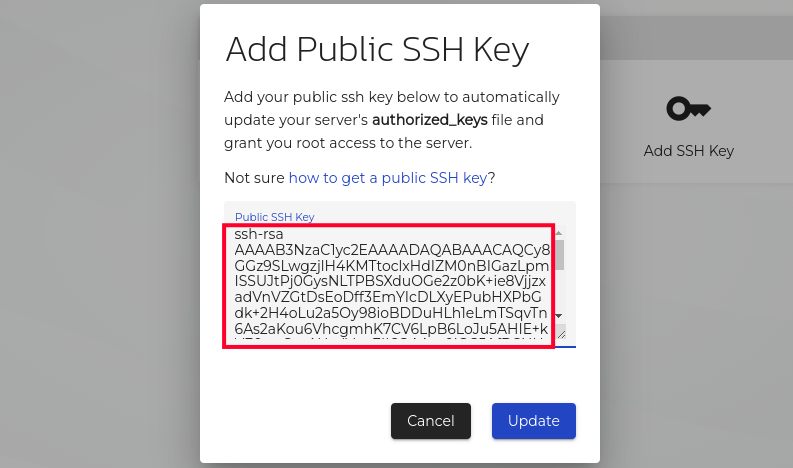
- Click Add SSH Key on the Manage Server section of Central.
- Paste your public key into the available field.

- Click the Update button. You are finished when you see a message stating “Public SSH key successfully added to server!” You can click the Dismiss link to remove the message.
Connect Via SSH
Now that you’ve added your SSH key to the server, we’ll show you how to connect with SSH using the command-line interface. You will be connecting as the “root” user which has the highest level of access available on the server, allowing you to modify any software aspects or permissions.
- There are several ways to connect to your server. You can use a hostname, IP Address, or a domain name as long as it resolves to your server. Here are some examples below:
Hostname:
Domain Name:
IP Address: - You will see a message stating “Are you sure you want to continue connecting (yes/no/[fingerprint])?” Type yes then click Enter.
- A pop-up will ask you to enter the password that was created when you generated the SSH Key. Type your password then click Enter. You will then be connected to your server via SSH as the root user.
Connect via sFTP
If you prefer to use an FTP client like FileZilla or an IDE like VS Code, you may choose to use the sFTP Login option rather than use SSH.
- Click sFTP Login.
- Click [reset] next to Password.
- Copy the password to a safe location, it will not be displayed again after this step.
- Open your FTP client. In these examples, we’re using FileZilla, a popular, free, cross-platform FTP client.
- In the Quick Connect bar near the top, paste your credentials.
• Host – your VPS hostname, for example vps123456.inmotionhosting.com
• User – your username will bewordpress
• Password – the password copied in step 3
• Port – 22 - Click QuickConnect

Choose NGINX Settings
Managed WordPress includes pre-configured NGINX profiles that are custom-made for specific website needs. Here are the steps to easily select the one that best suits the type of site you are building.
For more detailed information on cache management, including SSH options, see our full guide on UltraStack Utilities With Managed WordPress.
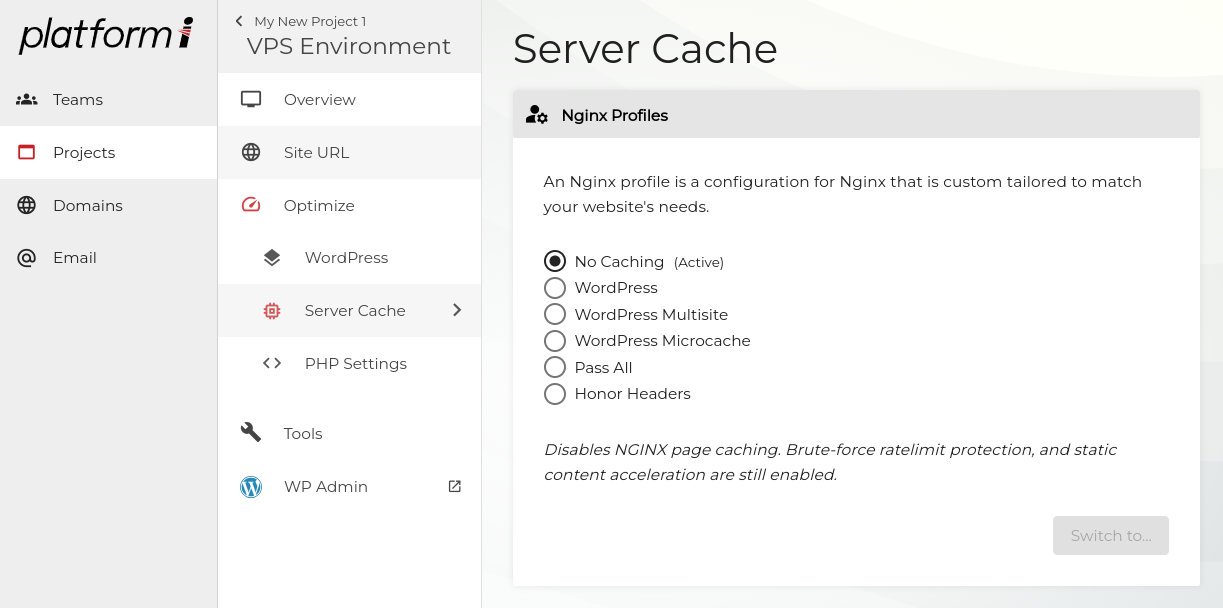
- Click Optimize > Server Cache.

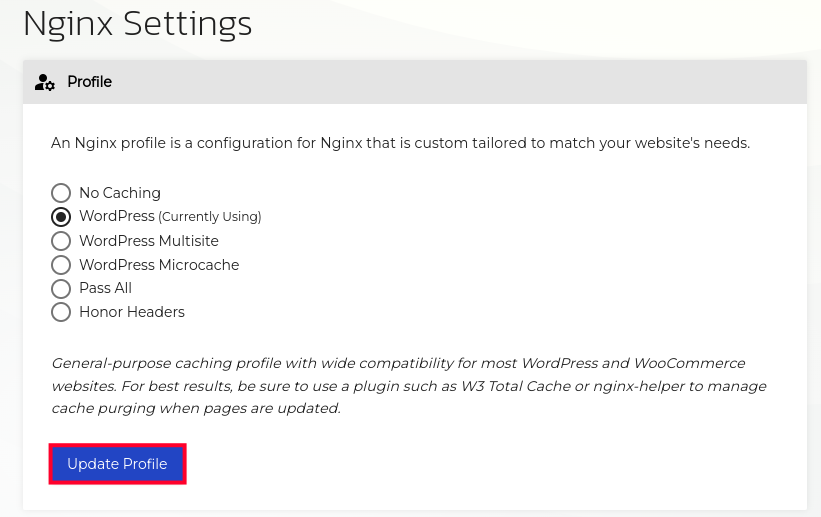
- You will then see a list of the available NGINX profiles, select the one you want to use then click the Update Profile button. Below is an outline of the options.
Profile Description No Caching Turns caching off but you will still have static content acceleration and brute force rate-limit protection running. WordPress General-purpose profile compatible with most WordPress and WooCommerce site, but it is recommended to use a cache-control plugin such as W3 Total Cache to handle purging (clearing) the cache when content is updated. WordPress Microcache Recommended for sites where full page caching is not a good option due to the dynamic nature. This can help neutralize high increases in traffic to your site. Pass All Select this to pass all traffic to Apache in case you do not want to utilize any caching, ratelimit protection, or optimizations. We recommend using the No Caching profile instead if you want to disable caching. Honor Headers This profile “Honors the Cache, Expires, and X-Accel-Expires headers set by the application. If not set, a default 60 second expiration time is used. All other values match the WordPress/Generic profile.“ - Click the Update Profile button to save your NGINX settings. The playbook will then run and setup the new NGINX profile for your server.

Select PHP Version
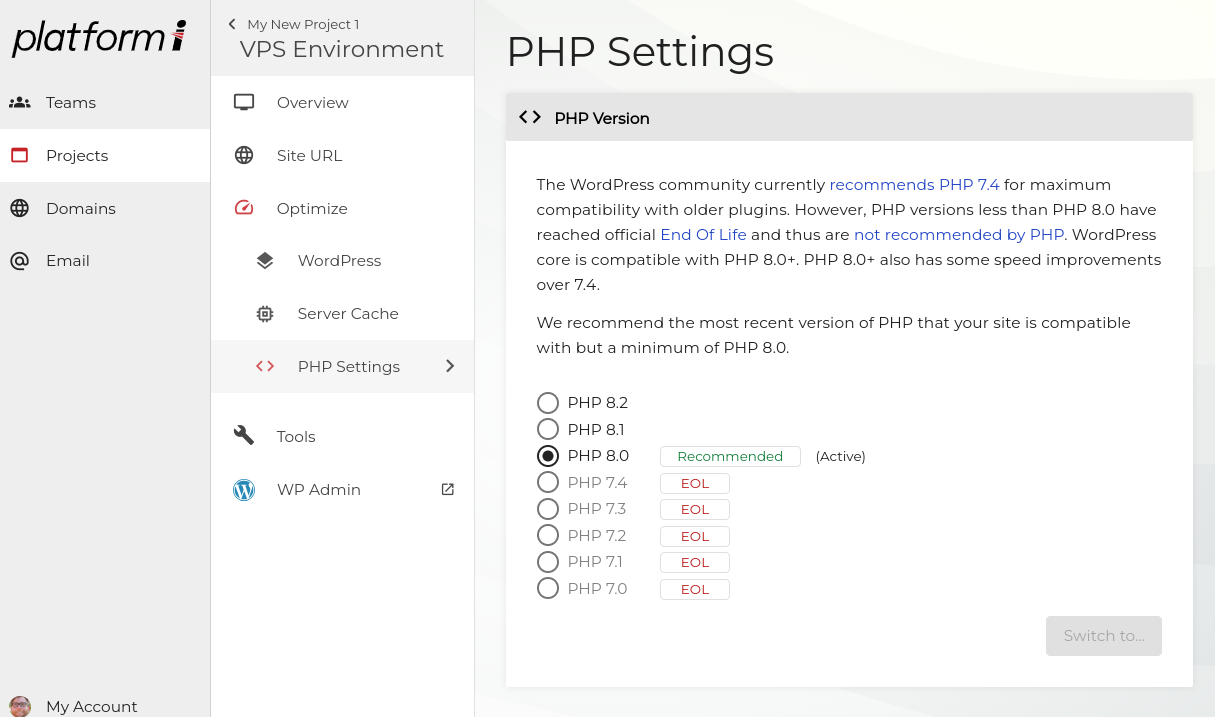
- Click Optimize > PHP Settings.
- You can then select the PHP Version you want to use for your website. The version you are currently using will also be listed.

- Click the Update button.
- You will then see a warning stating that “Changing PHP versions will cause your site to be unavailable for several minutes while your server is being updated!” Click the Continue button.
You are finished when you see a message stating that “Your PHP settings have successfully been updated!“
Using Server Snapshots
Snapshots can be used to save the state of your databases, server files, and configuration. They can then be used to restore your environment to a previous state. You can find your snapshots in the Recover menu.
