Table of Contents
When you are running a website or server, SSH can save you time by allowing you to directly view, manage, and edit files from the command line interface (CLI). In this guide, we will show you how to use SSH with your UltraStack WordPress VPS hosted with Platform i.
- Connect to Your Server via SSH
- Using Your Key for SFTP
- Managing Services
- Using WP-CLI
- Connecting Your IDE/Code Editor
Connect to Your Server via SSH
- Generate an SSH Key & Add it to your server.
- Login to Platform i, open your Project, then click Manage.
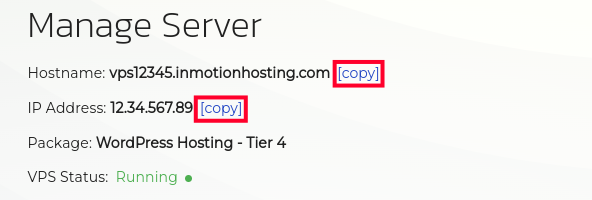
- You can then copy your Hostname or IP Address to use for connecting.

- Here are some examples of how you can connect.
Connect with Hostname:
Connect with IP Address:
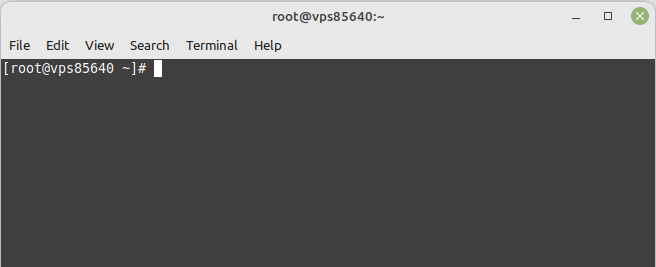
You will then be connected to your Cloud VPS via SSH.
Using Your Key for SFTP
Once you’ve Generated an SSH Key & Added it to your server, you can also use it for connecting via SFTP. Here are the settings you should use.
| Option | SFTP Setting |
|---|---|
| Host | You can use your Hostname or IP address. You can view this in your project under the Overview section. |
| Username | root |
| Password | Password for the SSH Key you generated. In most cases, you should be able to leave this blank. This is due to using the public/private keys. |
| Port | 22 |
For more information, see our full guide on Connecting With SCP and SFTP.
Managing Services
In this section, we will go over the log locations and specific commands for managing services on your Cloud VPS with Platform i.
NGINX
Log Files
- Access: /var/log/nginx/access.log
- Error: /var/log/nginx/error.log
Start/Stop/Restart
- systemctl (start|stop|restart|status|reload) nginx
Examples:
Start:
Stop:
Restart:
View Status:
Reload:
Main Config
- /etc/nginx/nginx.conf
Site Config
Below is the location of your site’s NGINX configuration file. Be sure to replace vps#### with your actual VPS server number.
- /etc/nginx/conf.d/vps####.inmotionhosting.com.conf
Apache
Below is the location of your site’s Apache log files. Be sure to replace vps#### with your actual VPS server number.
Log Files
- Access: /var/log/httpd/ssl-vps####.inmotionhosting.com-access.log
- Error: /var/log/httpd/ssl-vps####.inmotionhosting.com-error.log
Start/Stop/Restart
- systemctl (start|stop|restart|status|reload) httpd
Start:
Stop:
Restart:
View Status:
Reload:
Main Config
- /etc/httpd/conf/httpd.conf
Site Config
Below is the location of your site’s Apache configuration file. Be sure to replace vps#### with your actual VPS server number.
- /etc/httpd/conf.d/vps####.inmotionhosting.com.conf
MySQL
- systemctl (start|stop|restart|status) mysql
Start:
Stop:
Restart:
View Status:
Reload:
Main Config
- /etc/my.cnf
Extra Config
- /etc/my.cnf.d/server.cnf
PHP
Log Files
- Error: /var/log/php-fpm/wordpress-error.log
- Slow: /var/log/php-fpm/wordpress-slow.log
Start/Stop/Restart
- systemctl (start|stop|restart|status) php-fpm
Start:
Stop:
Restart:
View Status:
Main Config
- /etc/php-fpm.conf
Site Config
Below is the location of your site’s PHP configuration file. Be sure to replace vps#### with your actual VPS server number.
- /etc/php-fpm.d/vps####.inmotionhosting.com.conf
Redis
Log Files
- /var/log/redis/redis.log
Start/Stop/Restart
- systemctl (start|stop|restart|status) redis
Start:
Stop:
Restart:
Main Config
- /etc/redis.conf
Monit
Monit is an open source tool that is installed to assist in monitoring and maintaining your server.
Log Files
- /var/log/monit.log
Start/Stop/Restart
- systemctl (start|stop|restart|status) monit
Start:
Stop:
Restart:
Status:
Main Config
- /etc/monit.d/monitrc
Extra Service Config
- /etc/monit.d/{httpd,mariadb,nginx,php-fpm,redis}
Extra Service Commands
- monit (status|summary|report|validate)
View Status:
View Summary:
View REport:
Validate:
Using WP-CLI
Before you can execute any WP-CLI command, you must switch to the WordPress user with the following steps.
- Connect to your server via SSH.
- Run the following command:
- You can then use WP-CLI to manage and troubleshoot your site. More information on the available commands can be found at: https://developer.wordpress.org/cli/commands/
Logging in as the WordPress User Instead of Root
You may not wish to log in as the root user, either to provide your developer with access to your site or simply for safety’s sake. Follow these steps to set up a new key for logging in directly as the wordpress user.
- Once you’re logged in as
root, enter the following command:su - wordpress - Enter the following command, which will create the
.sshdirectory and create a new key:mkdir -p ~/.ssh && cd ~/.ssh/ && ssh-keygen - Follow the interactive prompts to set up your new key, then enter the following command to copy it to your
authorized_keysfile and set the correct permissions (if you chose a different name for your key, replaceid_rsain the following command with your key file):cat id_rsa.pub >> authorized_keys && chmod 600 authorized_keys - Copy the private key onto your local machine, and use the following command to log in as
wordpressin the future, replacing the path to the private key, filename, and VPS hostname:ssh -i /path/to/key/id_rsa wordpress@vps#####.inmotionhosting.com
Connecting Your IDE/Code Editor
We will now show you how to connect to your Cloud VPS using an integrated development environment (IDE) and code editor. For this guide, we are covering Visual Studio Code (VS Code) and Sublime Text.
Using Visual Studio Code
You will need to download and install Visual Studio Code before following this section of the guide.
- Open Visual Studio Code. If you are running in “Restricted Mode” when you first open VS Code, you can click Manage on top then Trust to enable all features.
- Click View then Command Palette. You can also click Ctrl+Shift+P to open the command palette.

- Type “remote” in the search box then click the Remote: Install Remote Development Extensions option.

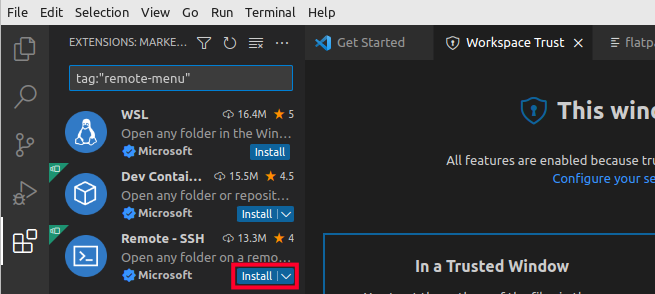
- You will then see the “Remote – SSH” option listed, click the Install button.

- Click View then Command Palette again and type remote in the search box then click Remote-SSH: Connect to Host…

- Enter your SSH login info as described above in the section on how to Connect to Your Server via SSH. Then click the Enter key.

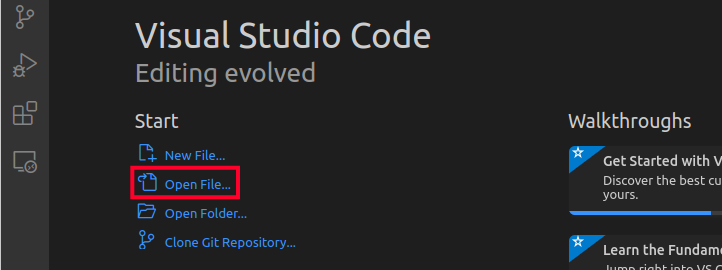
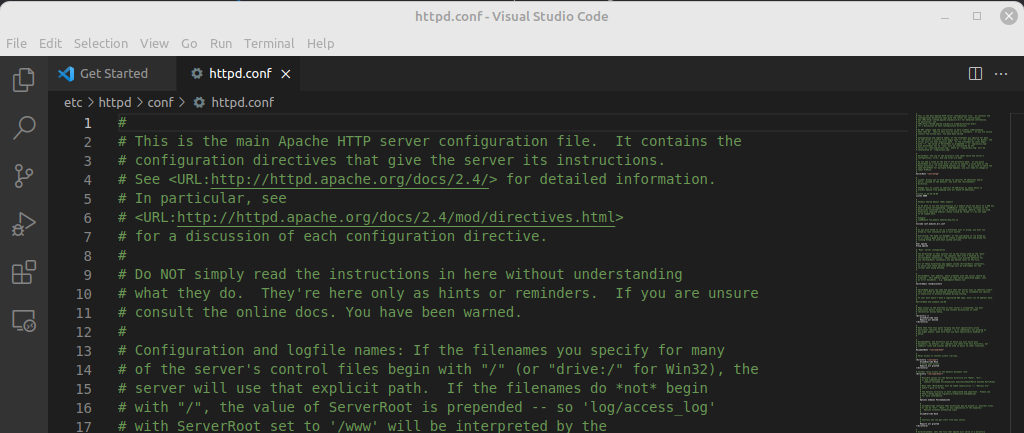
Visual Studio Code will open a new window that is connected to your server. From there you can create a new file, open a file, open a folder, or clone a Git repository. - In this example, we are going to click Open File to access an Apache configuration file.

- Now I’m going to enter the path to the file I want to open then click OK.

The file will then be open and you can view or edit it as needed.
Using Sublime Text
You will need to download and install Sublime Text before following this section of the guide.
- Open Sublime Text and click Tools, then Command Palette. You could also click Ctrl+Shift+P to open the Command Palette.
- Type install in the search box then click Install Package Control.

- You will then see a message stating “Package Control was successfully installed”. Click the OK button.

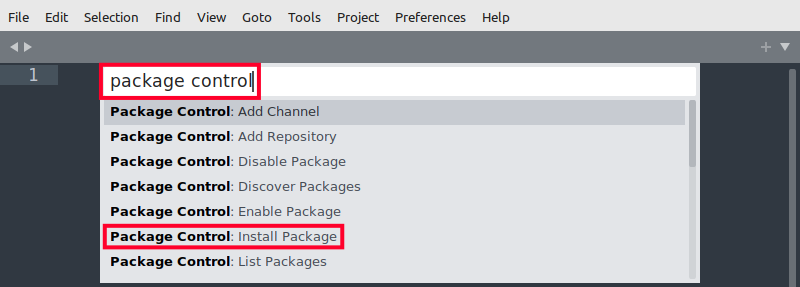
- Now go to Tools then Command Palette and type “package control” then click the Install Package option.

- Enter “remotesubl” in the search field then click RemoteSubl from the list. It will be installed automatically once clicked.

- Run the following commands:
- Logout and back into SSH and include the port, for example:
Important: You must have Sublime Text open for the next step to work. - You can then open a file by using the sublime command. For example, I can open the NGINX access log with Sublime text by using the following command:
Congratulations, now you know how to use SSH to access your UltraStack WordPress VPS from Platform i!
