Table of Contents
The Apache web server software can be customized to suit your needs with many third party modules. One of the most popular Apache security modules is ModSecurity. It operates as a signature-based firewall, capable of blocking cross-site scripting (XSS), brute force attacks, and known code injection attacks for dynamic websites that depend on SQL and PHP. Some even use ModSecurity for PCI compliance.
Instead of siphoning sensitive data, attempted cyber attackers will be blocked by ModSecurity with a 403 error.
ModSecurity can process events as a host-based intrusion detection system (HIDS) or intrusion prevention system (IPS) application depending on how you configure it.
ModSecurity is pre-configured on our cPanel server hosting so you don’t need to when securing your dedicated server or VPS. Many cPanel administrators rarely modify ModSecurity unless they need to temporarily disable it for a system administration task. Meanwhile, non-cPanel servers may not include ModSecurity, especially if you have to install Apache manually on CentOS or Debian/Ubuntu. This provides flexibility with how you secure your cloud server.
Although not covered in this article, ModSecurity is also natively available for NGINX web server.
SSH into your server. Then we’ll cover:
- Installing ModSecurity
- Configuring ModSecurity
- OWASP Core Rule Set (CRS) for ModSecurity
- Test ModSecurity Configuration
Installing ModSecurity
CentOS
- Update software repositories:
- Download and install the ModSecurity Apache module:
- Type y.
- Restart the Apache service:
- Ensure the installed software version is at least 2.9:
Debian
- Update software repos:
- Download and install the ModSecurity Apache module:
- Type Y.
- Restart the Apache service:
- Ensure the installed software version is at least 2.9:
This command will grep for 2 things at once
Ubuntu
- Update software repos:
- Download and install the ModSecurity Apache module:
- Type Y.
- Restart the Apache service:
- Ensure the installed software version is at least 2.9:
Configure ModSecurity
ModSecurity is set to detect and log suspicious events only by default. Below we’ll configure it to detect and block suspicious activity.
- Copy the default ModSecurity configuration file to a new file:
- Edit the ModSecurity configuration file with Vi, Vim, Emacs, or Nano.
- Near the top of the file, you’ll see
SecRuleEngine DetectionOnly. ChangeDetectionOnlytoOn. - Save changes.
- Restart Apache:
Download OWASP Core Rule Set
To ensure you have the latest ModSecurity rules, you can download the latest ModSecurity Core Rule Set (CRS) from Open Web Application Security Project (OWASP) at CoreRuleSet.org.
- While logged into your server, download the latest CRS from CoreRuleSet.org/installation, replacing the GitHub URL as needed:
- Verify the checksum (Windows, MacOS, *nix) of your downloaded file against the provided message digest, replacing “vFileName” with the actual file name (e.g. v3.3.0.zip). For example:
Windows:
Mac:
*nix: - If the checksums differ, troubleshoot why the checksums don’t match before continuing to ensure you don’t execute a corrupted or malicious file.
- Unzip the file:
- Move the CRS setup file from the new directory into your ModSecurity directory:
- (Optional but recommended) Move the rules directory from the new directory to your ModSecurity directory:
- Edit your Apache security2.conf file to ensure it’ll load ModSecurity rules:
- Ensure both the default ModSecurity and new CRS configuration files are listed. The first line conf file path may already be included. The second file path should be wherever you moved the /rules directory.
- Restart Apache:
Can’t Restart Apache
- If Apache fails to restart, check the status for error information:
- For this example, I received the error:
AH00526: Syntax error on line 845 of /etc/modsecurity/crs/crs-setup.conf. To resolve this error, edit the Apache security configuration file again: - Comment out this file path by adding a
#in the beginning of the line:# IncludeOptional /usr/share/modsecurity-crs/owasp-crs.load. - Save changes.
- Apache should now restart successful:
If you continue to have issues, contact Live Support directly.
Test ModSecurity Configuration
Afterwards, you should test your ModSecurity setup to ensure it blocks suspicious network traffic. Below we’ll create a test blocking rule and check if we receive a 403 error and a ModSecurity log entry.
- Edit your default Apache configuration file:
- At the bottom of the file, above
</VirtualHost>, add the following custom ModSecurity rule: Change theidnumber and message (msg) as desired. - Save changes.
- Restart Apache:
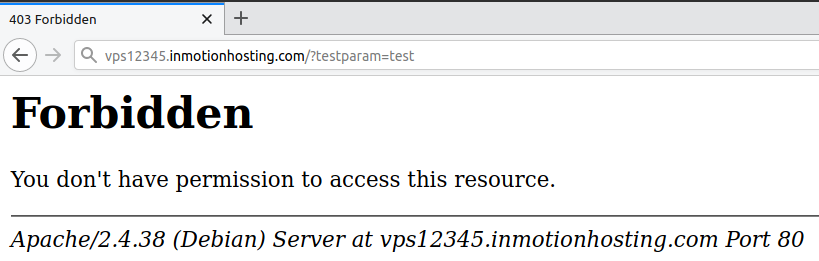
- In your browser, attempt to access a URL on that server with
?testparam=teston the end (e.g. domain.com/?testparam=test. - You should receive a 403 Forbidden error.
- You can confirm this by searching your Apache error log for ModSecurity errors using your error message (“Test Successful”) or id number (999):
You can remove the rule afterwards if you wish.
ModSecurity is capable of so much more. However, it’s still not a complete security solution regardless of how many rule sets you integrate with it. You still need other types of security controls to secure your business data including:
- Scheduled anti-virus scanning to protect file integrity (we recommend ClamAV or Imunify)
- Server firewalls for port managment (e.g. CSF, Firewalld, and UFW) and software firewalls for web applications including the WordPress content management systems (CMS)
- Recent, verified backups for disaster recovery
- Website analytics for auditing the effectiveness of the aforementioned technical controls
Protect your website from denial-of-service (DoS) attacks and boost website performance with the Sucuri web application firewall (WAF).
Do you have a security information and event management (SIEM) solution for your network? Learn more about how to get the most out of your ModSecurity application by integrating your ModSecurity logs into the Splunk Enterprise (SIEM) suite.
Hello,
h
Thank you very much for the instructions How to Install the ModSecurity.
It works very well.
My question:
What do I have to do to be updated with the rules?
Thanks
Hartmut Fiss
No action is required on your part. Once it’s installed, cPanel should deliver periodic updates on its own.