Table of Contents
After installing osCommerce, one of the first things you will want to do is add a product, which can be accomplished in the Admin panel of osCommerce.
In this guide we will walk you through adding a product to your osCommerce store.
Adding a Product:
- Login to the Admin Section of osCommerce.
- Click the Catalog link in the navigation menu, then click the Categories/Products link.
- To enter the product within a category, click the folder next to it, then click the New Product button.
- You will then see a New Product menu, fill in the fields as needed. Below is a brief description of the options:
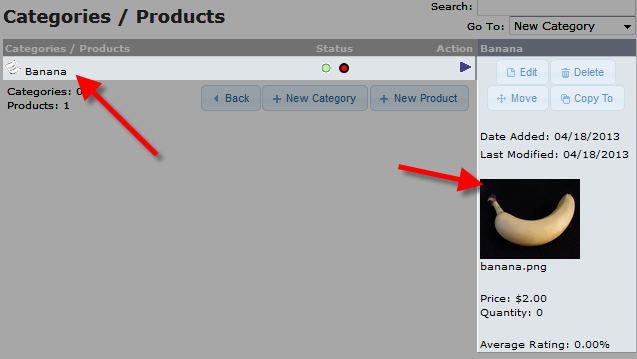
Option Description Product Status: Choose from “In Stock” or “Out of Stock” Date Available: You can set a date here for when the product will be able to purchase this product. Products Manufacturer: Choose a manufacturer here from the drop down menu. Products Name: Enter a product name here. Tax Class: Select “none,” if you do not want to charge tax for this product or “Taxable Goods” to charge tax. Products Price (Net): Enter the dollar amount you make after deducting additional cost. Products Price (Gross): Enter the total dollar amount you make before deducting any other additional cost. Products Description: Enter detailed information about the product here. Products Quantity: Enter a numeric value for how many products you have available. Products Model: You can provide a model number here for your product. Products Image: Click the browse button to upload an image of your new product. Products URL: You can enter a website URL for your product here, be sure to leave out the: https:// Products Weight: Enter the weight of your product here. - After entering your preferred information, click the Save button. In my tests I added a banana.
You will then see your product listed under Categories/Products.

Congratulations, now you know how to add a product to your osCommerce website!

