Table of Contents
You will need to have a Paypal account before you can use the instructions to create a button. The account may need to be verified by Paypal before it can be used for business or charity purposes. Please see Paypal’s documentation for more detail.
Paypal allows you to add buttons to your account that you can use for payments and donations. You can also customize these buttons and then add them to your website. You can create graphics of similar size, or simply use a small one to replace the default button. The size of the custom image can vary and mainly depends on your design intent. Step through the following tutorial to learn how to use a custom image when using a button in Paypal.
Check out InMotion’s WordPress Hosting solutions for a secure, optimized home for your WordPress site.
Selecting the Paypal Button
In order to follow these directions, you will need to be logged into your Paypal account. Additionally, if you’re not going to use the default graphic for the button, then you will need to use or create an image for the button that meets your site needs. Remember that credit card logos do have rules for their use. You can go to each respective card’s site to get their specific logos and see their requirements for use on your website.
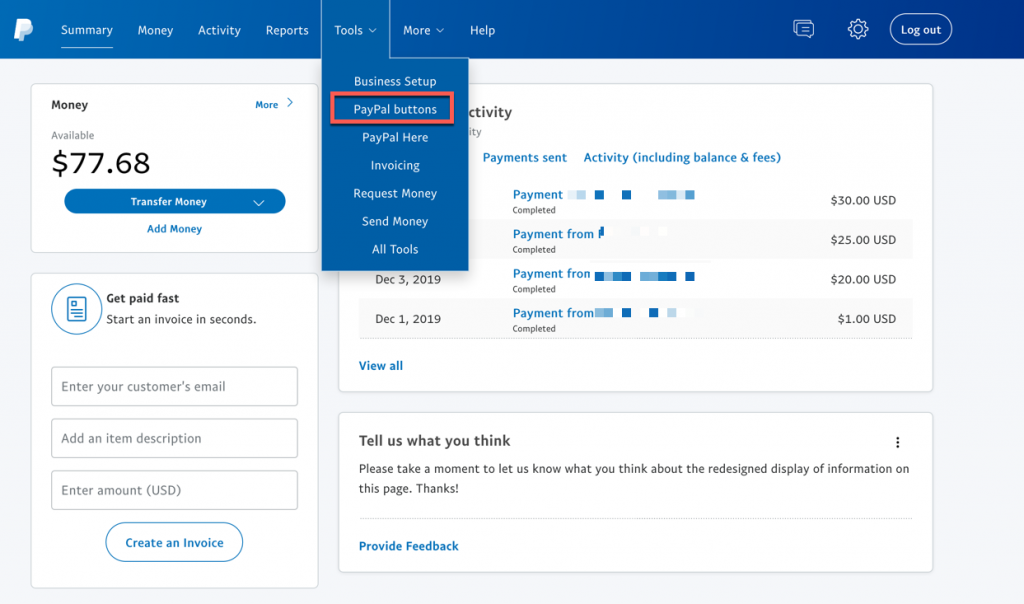
- In the Paypal menu, click on Tools
- When the drop-down menu appears, click on Paypal buttons.
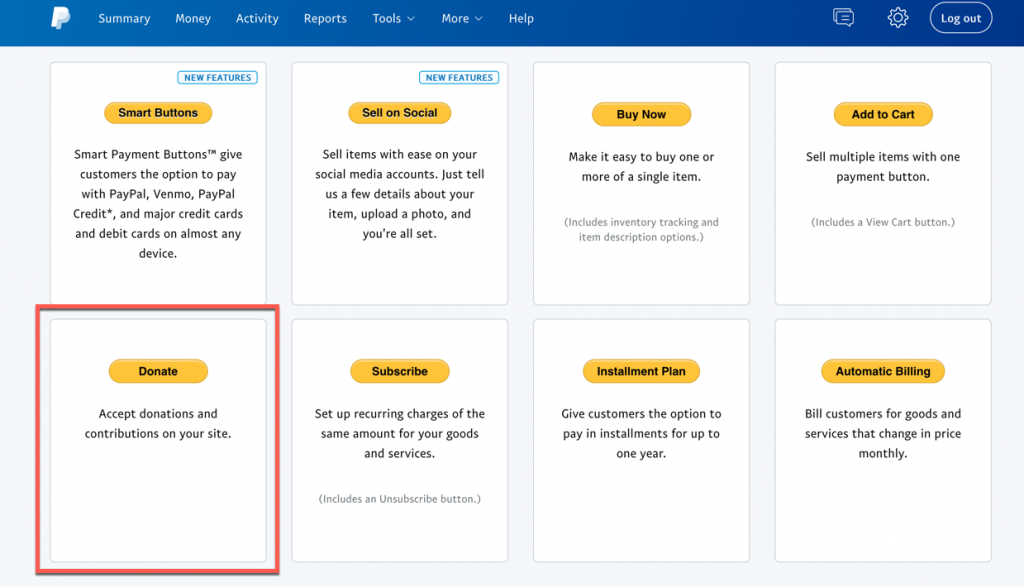
- Select a button.
Customizing the button
After you selected the button that you want to create you will see a dialog from Paypal allowing you to chose how the button appears. You can elect to use the default image, or you can use a custom image of your own. Here’s the screen provided by Paypal:
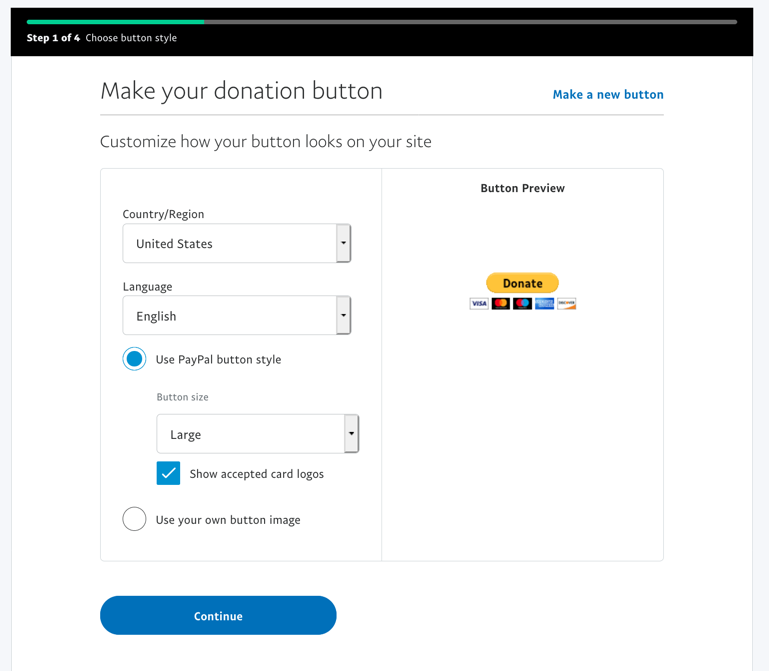
It may slightly differ based on the button that you select, but Paypal does allow you to select the country, language, and graphic used for the button. If you’re using the default graphic, you will see it displayed to the right. Additionally, you can select the size for it. By default, it is set to Large. Click on Use your own button image. To use a different image.
If you’re going to use your own image, keep a few things in mind:
- This graphic should fit where you’re trying to use it. If you’re not sure, use the default, then download the image to get the exact dimensions. You can also work with a web designer to get precise graphic measurements.
- Your graphic should also include the types of payment that you’re going to allow. Credit card companies do have rules for the use of their logos. You can find information on how to use their logo through the following links (these are the cards shown in the default Paypal button):
Visa Branding
Master Card Branding
Maestro
American Express
Discover Branding
Interestingly, Paypal’s button is actually a little out of date. However, thousands (if not millions) currently use it, so it should be okay to use it. - Don’t make your graphic so large that your user’s page experience is affected by the time to load the button.
Here’s an example button:

You can use pretty much anything. Just remember that any graphic that you use, you will need to be accessible through a URL So, you will need to upload the graphic into your website or to some online service where you can use a URL to link the customized button graphic. If you upload it to a WordPress site, then you can simply go to the Media Library, click on the graphic, then copy the image URL.
Once you have the URL you will be able to use it for your button by adding it in the field that is displayed when you click to use a custom graphic. Here’s an example:
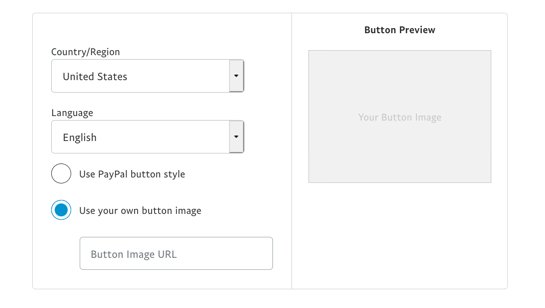
Note that the button preview may not always display the button graphic depending on the size that you use. Always make sure to test the button in order to verify that its image is correct.
That completes our tutorial on creating a custom button for through Paypal for your WordPress site. Need more information on WordPress? Check out the tutorials in our WordPress Product Guide!
Thanks for this great post its so helpful
thanks so much. have been trying to do this and
couldn’t but with this steps its so easy