Telnet can be used to test different connections and ports on your hosting server. It is not always enabled by default on Windows machines (Vista, 7, 8), however. When attempting to use Telnet you may get an error like ‘telnet’ is not recognized as an internal or external command, operable program or batch file.This means that your machine does not have telnet currently enabled. Follow the guide below to learn how to enable telnet for your computer.
How to enable telnet in Windows (Vista, 7)
- Click on the windows icon in the lower left hand corner of yrou desktop and then select Control Panel.

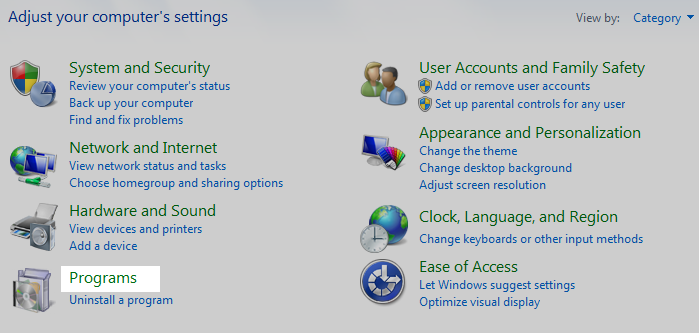
- From there, click on the Programs category title.

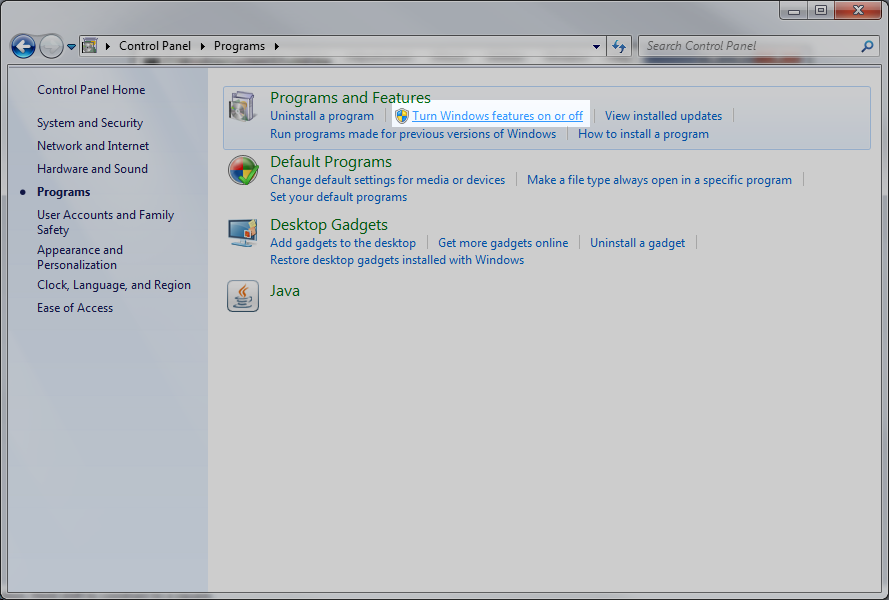
- This brings you to the various options for programs. Find and click on the Turn Windows features on and off link found in the Programs and Features category.

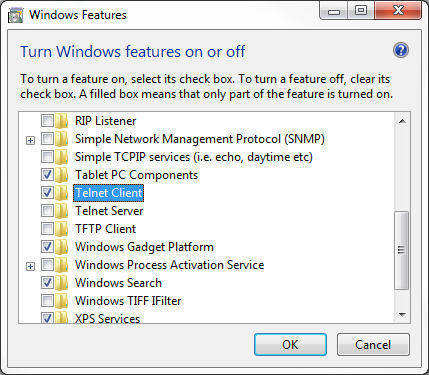
- You will see a popup with a list of all the available features to enable or disable. Scroll down until you see the Telnet Client option. Check the box next to it and click the OK button at the bottom. This will enable the telnet feature for your computer.

Enabling telnet in Windows 8
- Click Control Panel from the available options listed on the screen.
- On the next window click More Settings found on the left hand sidebar.
- On the appeared window click Programs category and then click Turn Windows features on or off sub category under Programs and Features on the next window that appears.
- From the features popup box, select the Telnet Client checkbox and click the OK button.


Merci beaucoup por le renseignement!