Table of Contents
If you are having problems using FileZilla, the logs may provide clues into what is causing the issue. By default logging is disabled, so it has to be turned on. In this tutorial, we will show you how to enable logging in FileZilla. You can then review the log file to help troubleshoot your FTP problem.
If you are just getting started with FileZilla, see our FileZilla Setup guide.
Enabling FileZilla Logging
- Open the FileZilla program.
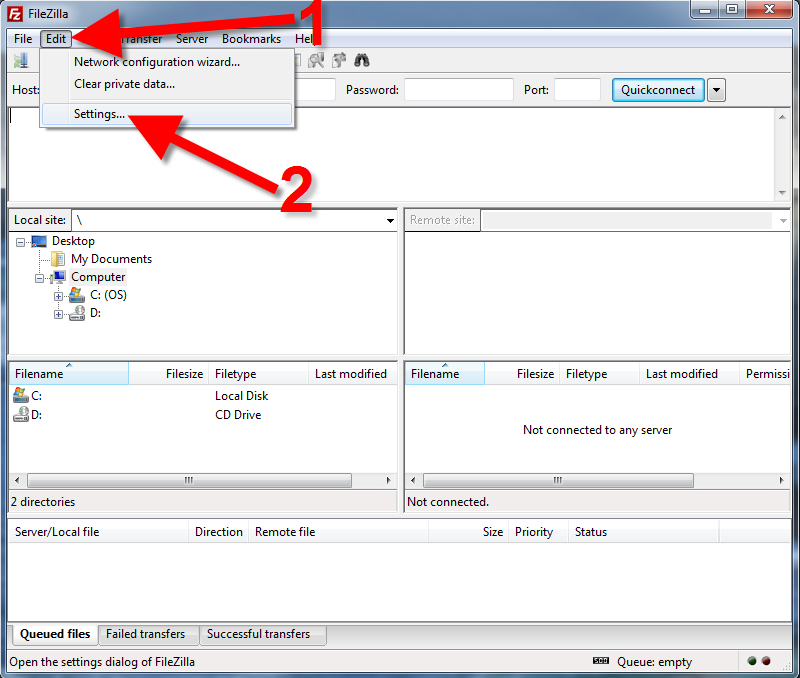
- Click Edit, then Settings.

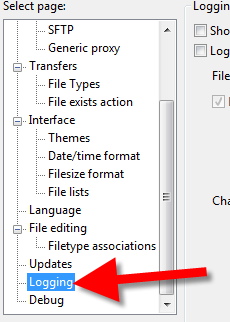
- On the left menu, click the Logging page.

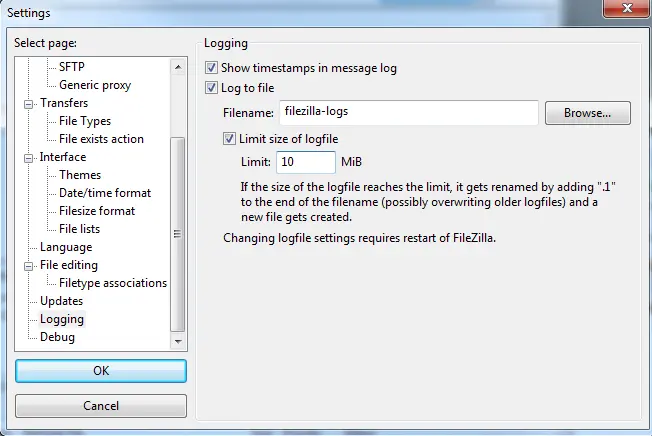
- The Logging page will look like this:

Choose your options as needed. Below is a brief description of the available settings.
Setting Description Show timestamps in message log Check this box to include the time, with the logged error. Log to file You must check this box in order to enable logging. Filename Enter a name for your logs. For example: “filezilla-logs” (without the quotation marks). Limit size of logfile Check this box to limit the amount of space a log file can use. Limit You can enter a max file size for your log file here in Megabytes. - Click the OK button to save your changes, then restart FileZilla
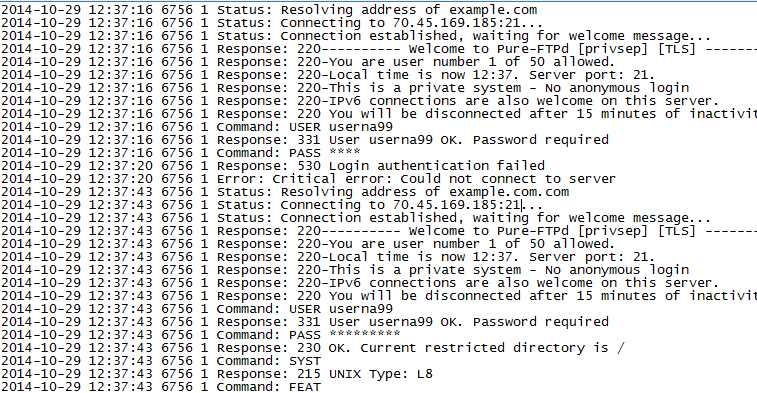
Now when you use FileZilla, it will log information including your connections, errors, and use.
Congratulations, now you know how to Enable Logging in FileZilla! Next time you have an FTP issue, you can review the log for problems or errors such as “Connection Attempt Failed“.


I cannot get into Filezilla. I’ve changed the password and tried all manner of combinations to no avail.
Please fill these gaps for me –
Host:
Username:
My site is **********.com.
Thanks for your help, regards Kath
Typically the settings will look like this:
Host: example.com
Username: Use your cPanel username such as ‘userna99’
You can view your cPanel username in AMP at any time. For more information see our full FTP getting started guide. Since this is a public forum I have marked out your identifying information.
Thank you,
John-Paul