Table of Contents
At this point, you should have created a Google Account and activated the service for Analytics. Google provides you with a code snippet to insert into every webpage you wish to track. This is important. You must have the code on every page you wish to track or you will not see results for pages the code is not inserted into.
If you are managing multiple domains in Google Analytics you must get a different code for each website. At any time you need to get your Analytics code snippet, you can log into your Google Analytics account and retrieve it.
- Accessing Your Google Tag
- Add Google Analytics to Website (PHP or HTML)
- Adding Google Analytics to a WordPress Website
- Verifying that Google Analytics is Installed Correctly
Accessing Your Google Tag
The location of your Google tag code can differ based on the type of account you have, Google Analytics 4 (GA4), or Universal Analytics (UA).
Access GA4 Tag
- Login to Google Analytics.
- Click the gear cog on the bottom left of the screen to access the Admin section.
- Under the Property section, you may have to click the drop-down box to select the correct property.
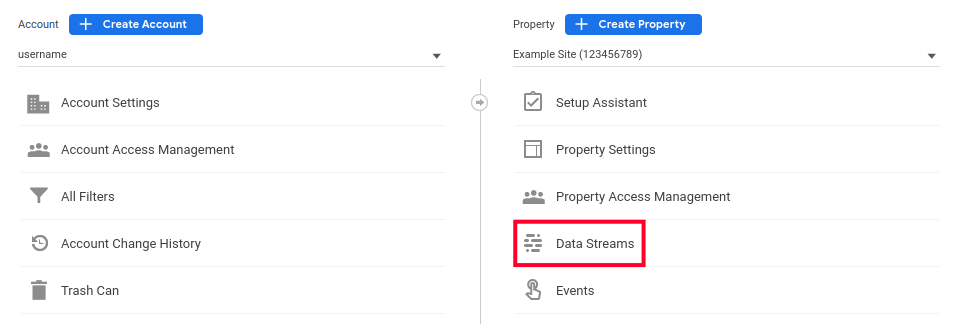
- Click the Data Streams option under your property.
- Click your site that should be listed.

- Scroll down and click the View tag instructions link under Google tag.
- Click the Install manually option.

- You will then see your Google tag listed and can copy it to insert into your site’s code.
Access UA Google Tag
- Login to Google Analytics.
- Click the Admin link on the bottom left of the screen. It looks like a gear cog.
- Under the Property section, you may have to click the drop-down box to select the correct property.
- Click the Tracking Info link under the one you are setting up.
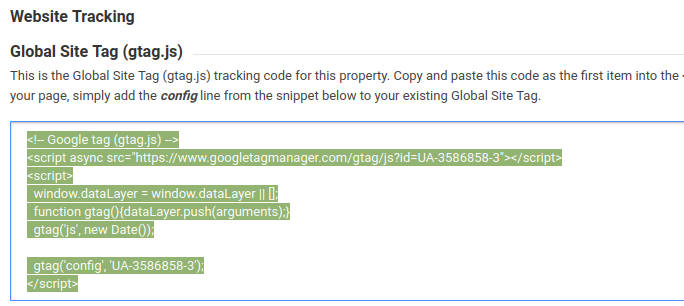
- Click the Tracking Code link and you will see your Global Site Tag displayed.
- Click inside the tracking code box and it will automatically select all the text. You can then click Ctrl+C or right-click and select Copy.

Add Google Analytics to Website (PHP or HTML)
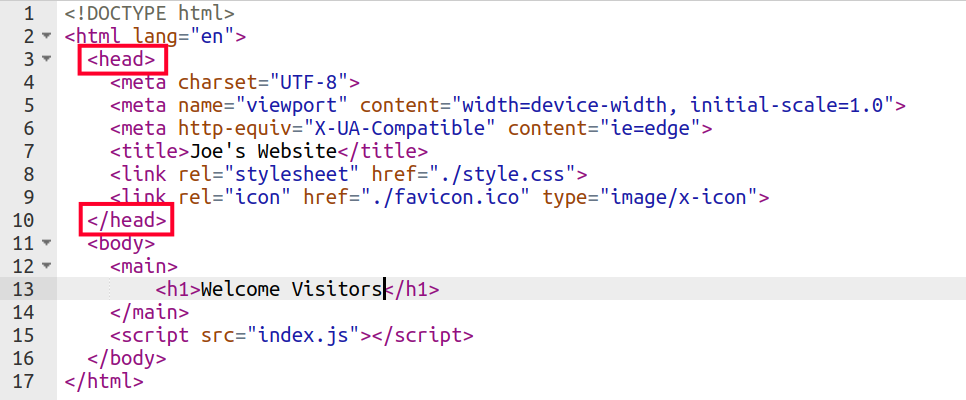
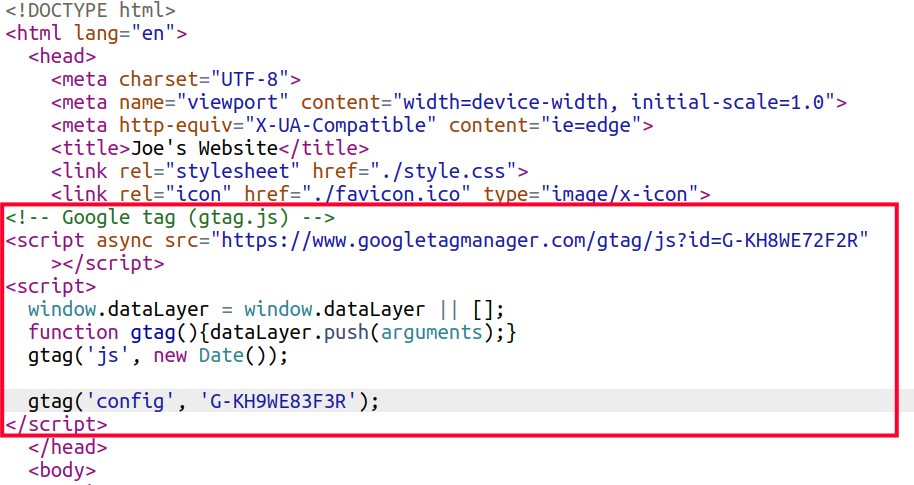
In the next step, you need to paste the code into the webpage. Depending on how your website is built will determine how you insert the code. You will insert the code snippet between the <head> and the </head> tags whether or not your website is built with PHP or HTML.
If your website is built with PHP and you are dynamically building the headers with a separate file, you will need to insert the code into that file.

Open your HTML document in an editor (there’s one included in file manager of cPanel). For more information on using file manager in cPanel please read our article. Once the file is opened, find the closing </head> tag. Insert the code snippet BEFORE the closing </head> tag.

Save the page and upload it if you are editing it on your local computer. If you are using file manager you do not need to do anything besides saving the changes.
Adding Google Analytics to a WordPress Website
There are 3 ways to install Google analytics in WordPress. All of which are relatively easy to do. We’ll go over each one. If you are uncomfortable with editing the HTML or PHP code directly, we recommend using the plugin method.
Add Google Analytics with a Plugin
There are tons of plugins available to add Google Analytics to your site. Here are guides for some of the plugins we recommend:
- Connecting with Google Analytics in Jetpack
- How to Set up Google Analytics in All in One SEO Pack
- How to Install Google Analytics for WordPress by MonsterInsights
Direct Paste Method
Copy the code that you received from Google, and paste it in your theme’s footer.php right above the </body> tag.
Functions.php Method
Add the following code in your theme’s functions.php file and don’t forget to paste your Google Analytics code here.
Add to the WordPress Theme’s Header
Another option is to add the google tracking code to the WordPress themes header via the WordPress Dashboard. This option is covered in-depth in our full guide:
Add Google Analytics to Forms
You can also track and review data for forms on your website.
Verifying that Google Analytics is Installed Correctly
After setting up Google Analytics with your website, you can verify it is connected successfully by checking if your data stream is working.
- Login to Google Analytics with the account that is associated with your site.
- Click the Admin gear cog on the bottom left of the page.
- You should then see your website “Property” list in the middle of the page. If you have more than one, you may have to click the drop-down box to select the one you are checking.

- Under the “Property” click the Data Streams link.

When you first check your data stream, it may show a message stating “No data received in past 48 hours.” Here is what it will look like:
Once Google Analytics is connected successfully you’ll see a message stating “Receiving traffic in the past 48 hours“.
Once the code is added to all of your web pages, you are finished with the installation part of getting started using Google Analytics. Now, it’s time to start using analytics.


This is very helpful. I use Google Analytics Counter Tracker plugin on wordpress for my website and its so awesome, very simple and easy to install and operate.
Thank you so much! You made this super simple!
Great post. Installing Google Analytics on your website takes only a minute and is painless. Soon, you’ll be tracking social media metrics in your sleep, thanks to Google Analytics.
Ditto on the great, concise and current info.
In the head… why do other genius “advisors” make the choice so complicated???
Thanks.
This was the best site for how to put code on my website thank you for the help, regards , Ricky Tworivers