Table of Contents

Installing applications are much easier when using Softaculous. Softaculous has recently updated the installation script for Joomla! to include version 4.0.
This tutorial will show you how to install Joomla! 4.0 with Softaculous.
Steps to Install Joomla! 4.0 with Softaculous
- Login to cPanel.
- Open Softaculous in the Software section.
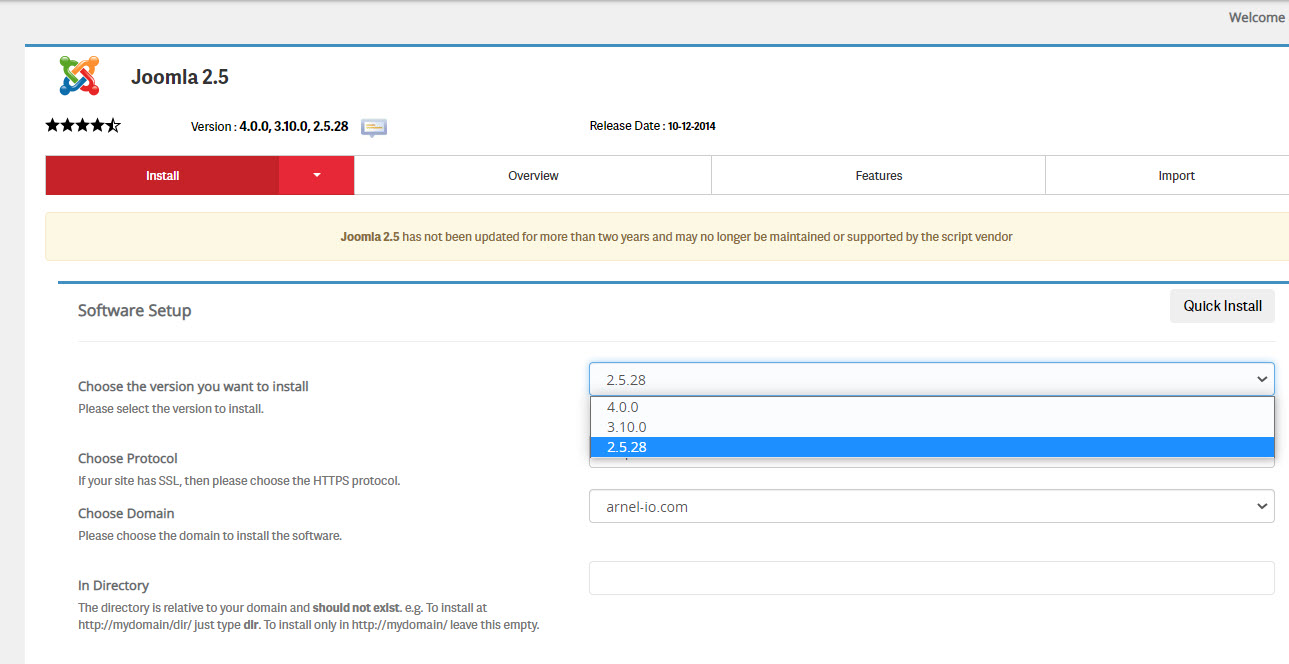
- Depending on your version of Softaculous you may see an older version of the Joomla installation options. For example:

This version is labeled “Joomla 2.5.” However, if you click on the version drop-down option you can see that there are newer versions available for download. Select and click on the 4.0 version of Joomla!.
NOTE: If you do not have the option for Joomla! 4.0 then you may need to speak with the hosting account owner or the InMotion Hosting technical support team for assistance in updating the Softaculous version on the server. - LIke most Softaculous installations you will see several sections that require completion in order to proceed with the installation. The first section requires that you choose a protocol (http or https), a domain for installation, and a directory where the files will be installed. Fill in these options then move to the next section by scrolling down.

- The next section of the Softaculous install is the Site Settings.

Here you can type in a name for the site and a site description. By default, the name is set to “My Joomla” and “My Joomla CMS”. Type in a name and description as needed.
- The following section is called Admin Account. You will need to add an administrator username, password, and email address. Type in the user criteria and then scroll to the next section.

- The final section of the Softaculous install is normally hidden. You can expand it by clicking on the plus sign next to where it is labeled Advanced Options.

You can customize the database name and prefix in this section. You can also change the default backup location and add an email address where Softaculous will send the installation configuration information. - Complete the installation by clicking on the blue Install button.
When the installation is in progress you will see the following screen:
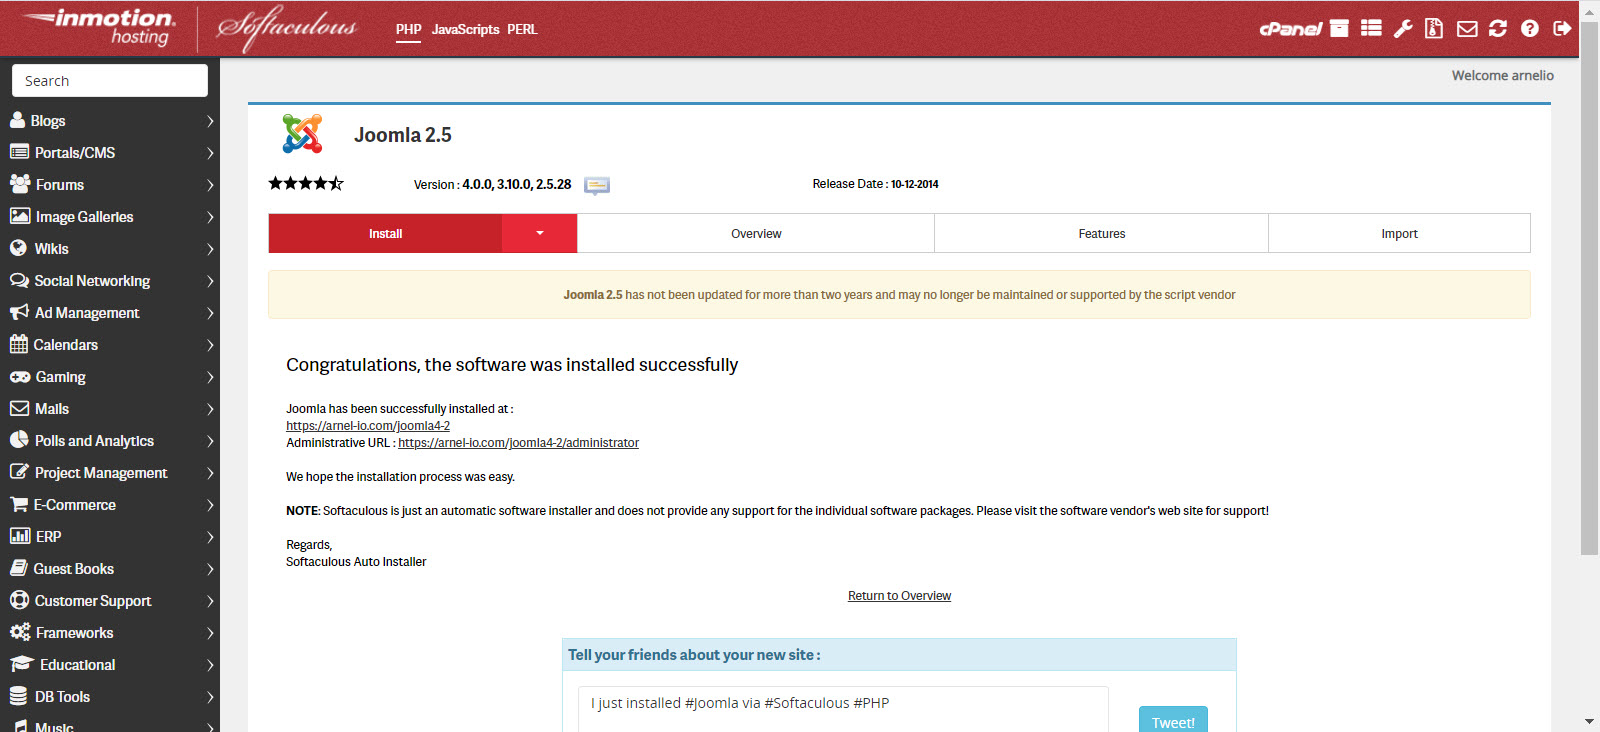
When it completes you will see a link for the front end of the Joomla site and a link to the backend for administrators. There is also an option to announce the installation through social media.
This completes our tutorial on using Softaculous to install Joomla! 4.0. If you want to learn more about using Joomla!, check out our InMotion Hosting Support Center website.


