Table of Contents
In this tutorial:
In WordPress, forms allow your visitors to submit information to you. Of the many form plugins available, Gravity Forms by rocketgenius is one of the most popular. In this tutorial, we will show you how to install Gravity Forms in WordPress. Since Gravity Forms is a commercial WordPress plugin, there is a license fee required.
Installing Gravity Forms
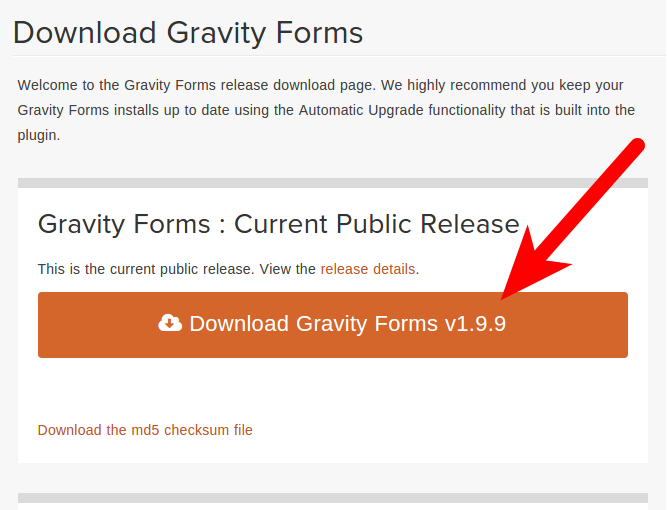
- Purchase and Download Gravity Forms from their site.

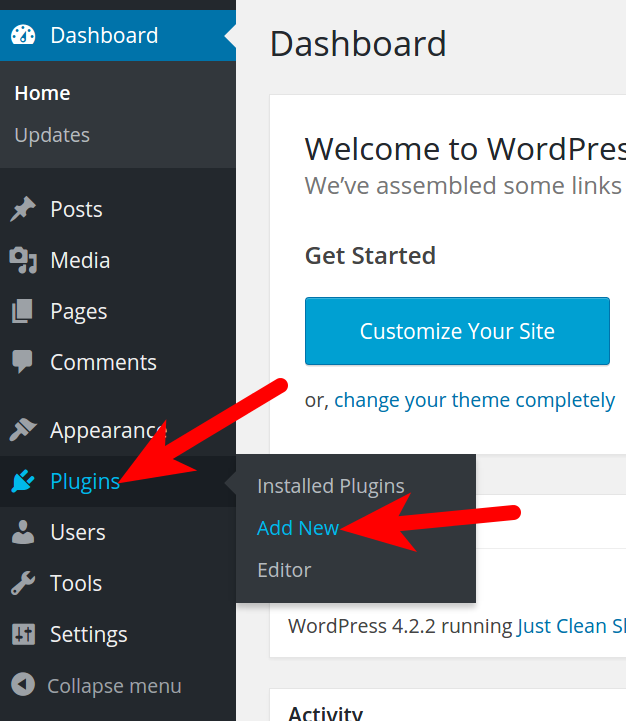
- Login to your WordPress Dashboard.
- Roll your mouse over Plugins, then click Add New.

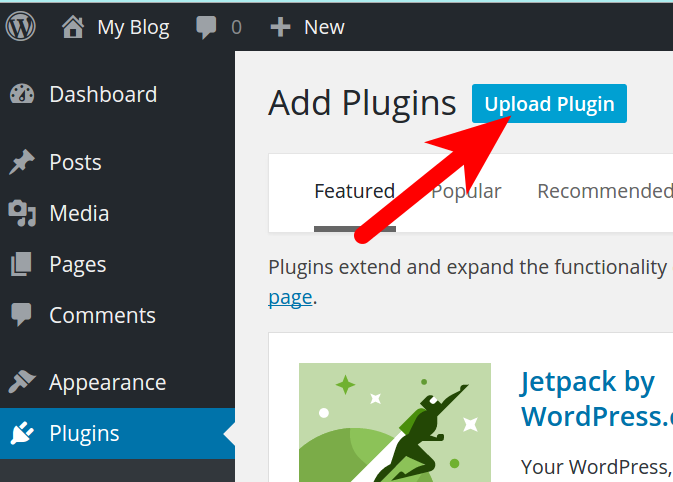
- Click the Upload Plugin button.

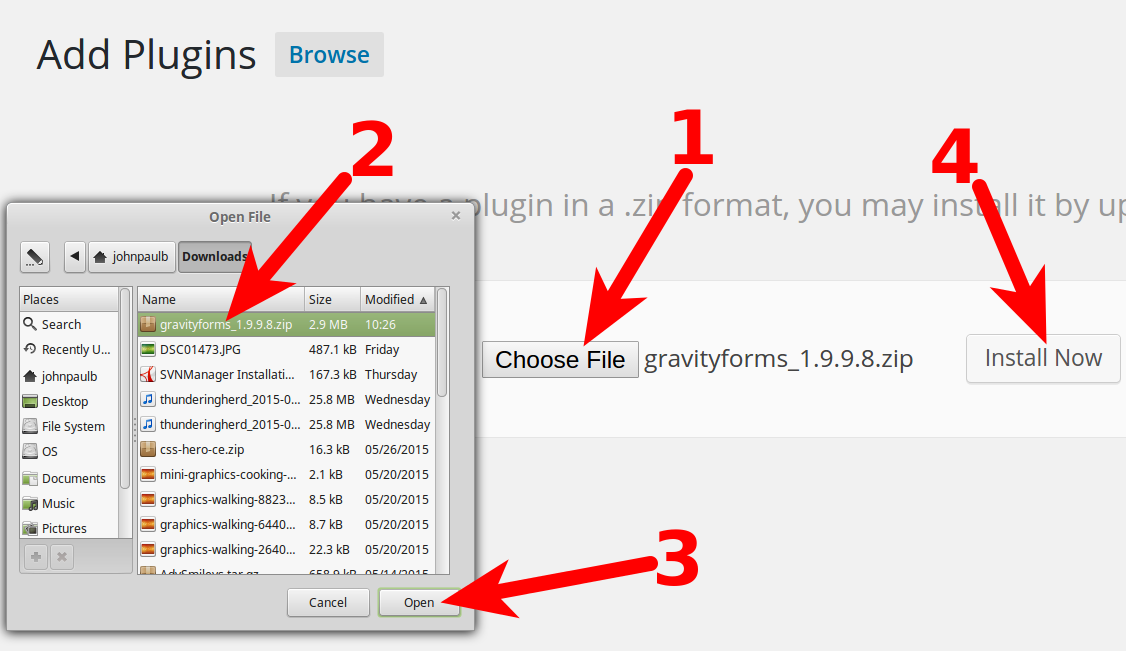
- Click the Choose File button, select and open the GravityForms plugin you downloaded in Step 1, then click Install Now.

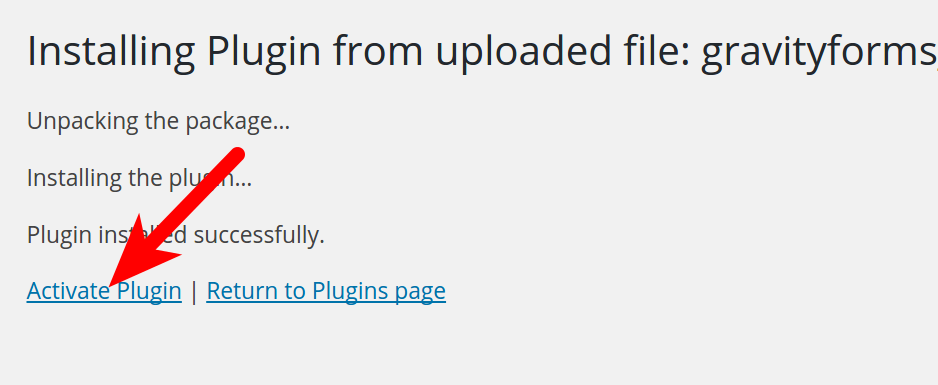
- When you see a “Plugin installed successfully” message, click the Activate Plugin link.

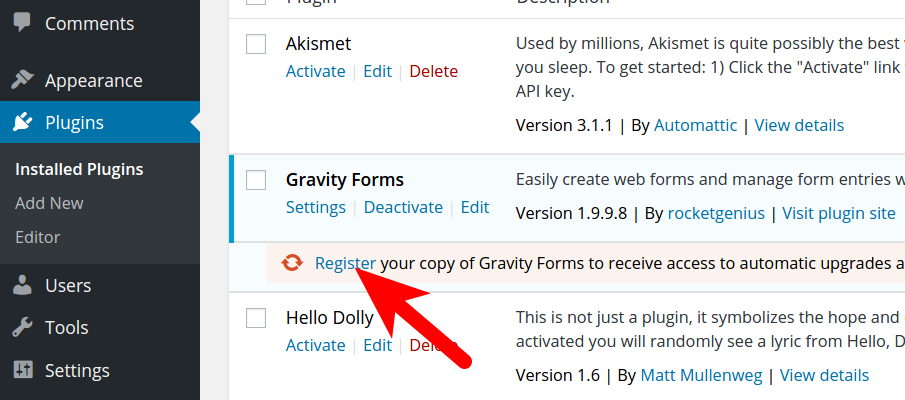
- You will see the Gravity Forms plugin listed, click the Register link.

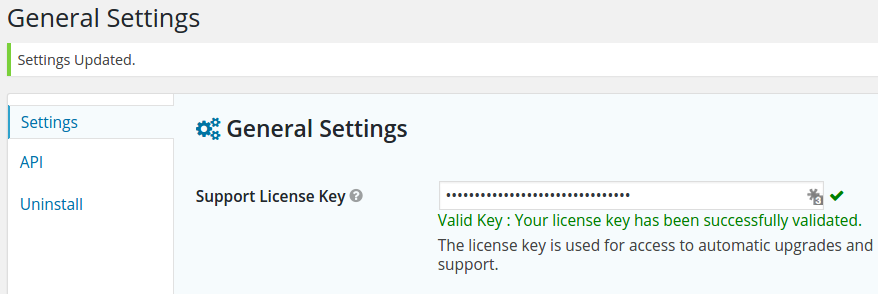
- On the General Settings page, enter your license in the Support License Key field, then click the Save Settings button. You can view your License in your account with gravity forms, here is a link: https://www.gravityhelp.com/customer-account/You are finished when you see a “Settings Updated“, and “Valid Key : Your license key has been successfully validated.” message.

Setup reCAPTCHA
Using reCAPTCHA in your forms can greatly reduce the amount of spam it receives. The following guide explains how to get your reCAPTCHA Public/Private Key.
Congratulations, now you know how to install Gravity Forms by rocketgenius for WordPress.
