Table of Contents
In this guide we will show you how to install and setup the Easy WP SMTP plugin in WordPress. It is highly recommended to use SMTP authentication to send emails from your WordPress website. This increases the probability of your email being delivered successfully instead of being flagged as spam. Let’s look at how to add SMTP authentication to your WordPress site with Easy WP SMTP and improve your email deliverability.
Why You Need an SMTP Plugin
WordPress has the built-in ability to send emails from your site, but without configuration WordPress will send mail with a PHP mail function. This mail is unauthenticated and spam-blockers usually treat it as junk. Despite this, WordPress still uses this method as the default. There’s no built-in way to resolve this, but thankfully there are a number of plugins like the Easy WP SMTP plugin that help you solve the problem quickly.
Installing the Easy WP SMTP plugin
- Login to you WordPress Dashboard.
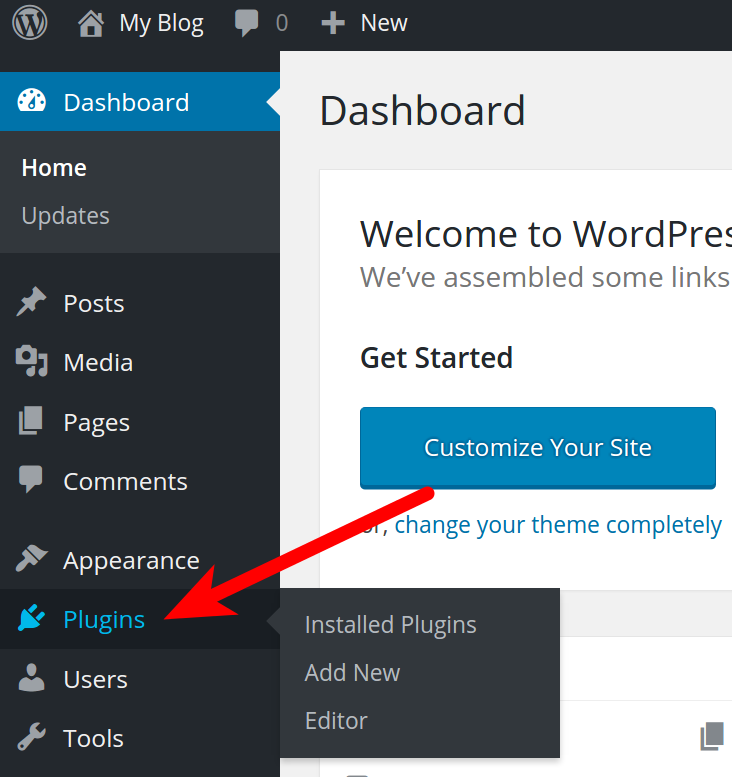
- Click Plugins in the left navigation menu.

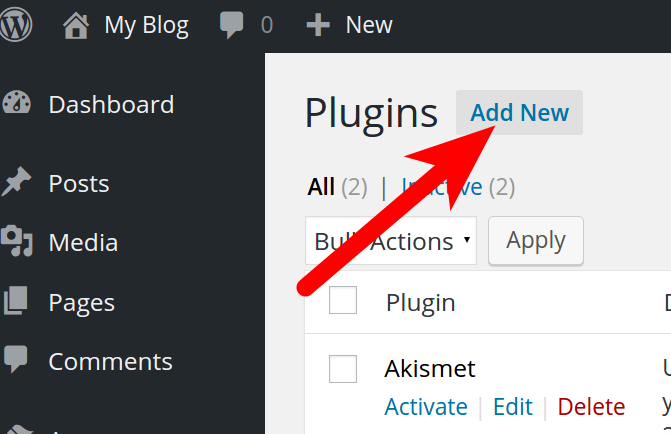
- Click Add New on the Plugins page.

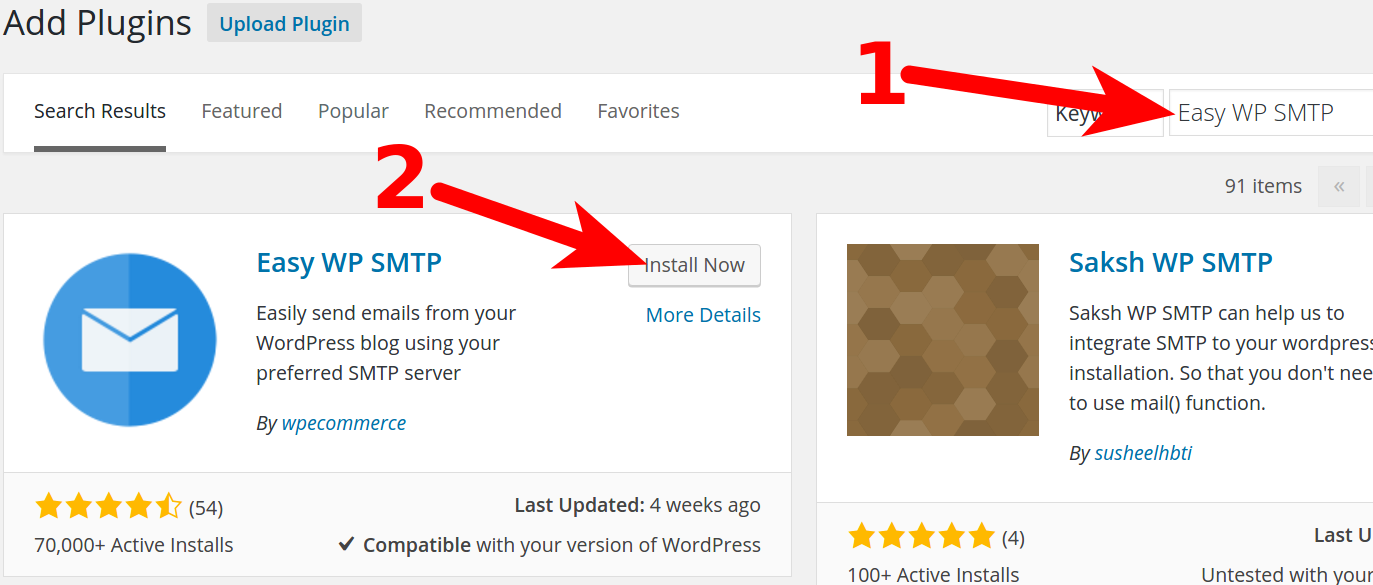
- In the Search Plugins field, type Easy WP SMTP then click the Enter key.
- You will see the Easy WP SMTP plugin listed. Click the Install Now button next to it.

- The plugin will then be installed and the Install Now button will change to the Activate button. Click the Activate Plugin button to activate Easy WP SMTP.
How to Setup Easy WP SMTP
- Go ahead and create an email address for your site mail if you have not already done so. To get around any spam filter issues, make sure that it has the same domain name as your site. For your own personal organization, it’s probably best if the sending address is a unique email address with no other use except for site mail.
- Optional: Depending on your business needs, you may need a separate ‘reply’ address as well — this is the address that will receive any mail sent in response to what you are going to mail out with your site.
- Login to you WordPress Dashboard and click Plugins in the left navigation menu; if you followed the installation steps above, you should already be here.
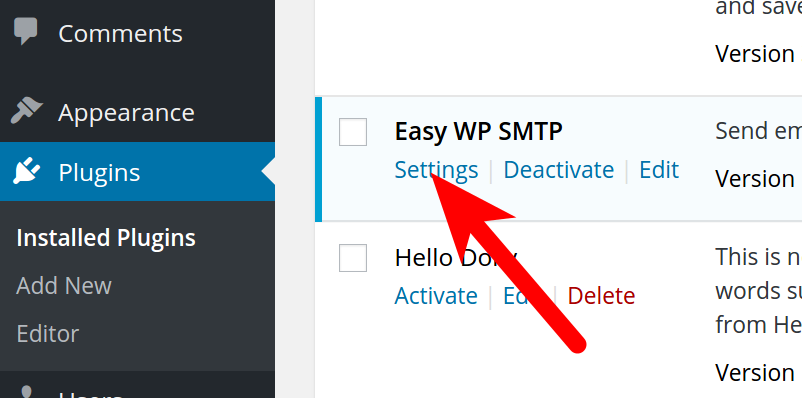
- You will see the Easy WP SMTP plugin listed, click the Settings link.

- On the General Settings page, fill in your SMTP settings using the information from your cPanel account and the email address you are going to use to send site mail. These settings can vary greatly from one account to another, so be sure to double check your site’s settings in cPanel! The plugin will not work if you use default settings.
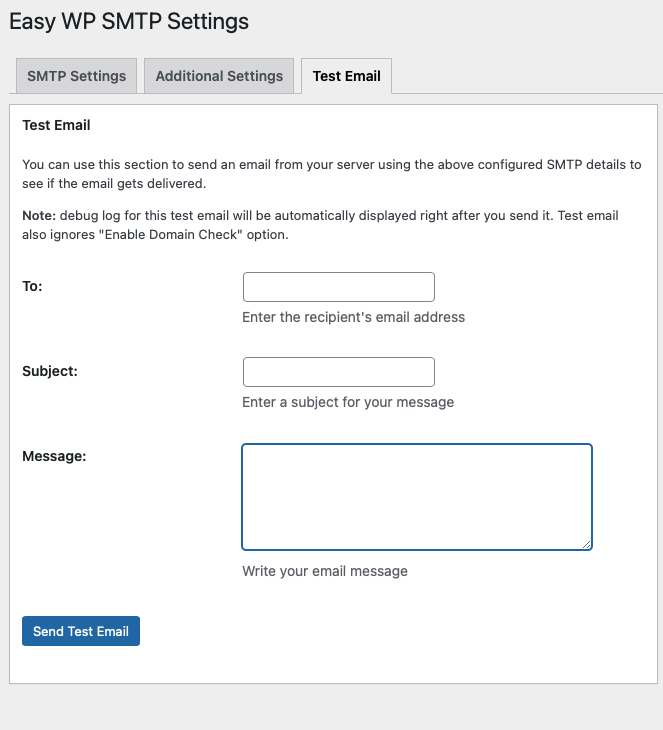
- Click the Save Changes button. You will then see a “Settings saved” message. Let’s not get ahead of ourselves, though. Click on the Test Email tab.
- Choose an address to send a test email to and write that in the To: field. This email address should not be on the same domain or server, just to make sure everything is working correctly. I usually use a personal address from a large provider like Microsoft or Gmail, just to make sure I’m not triggering any spam filters.
- Add a subject and a message for your test message, but be sure not to use gibberish! You don’t want your test message to be rejected for looking spammy — that won’t help you make sure everything works. A meaningful, coherent subject line and two or three sentences is usually more than enough. Once you’ve written a nice little note to yourself, click Send Test Email.
- If your test message works, you’ll see a confirmation. If your message fails, you’ll receive a notification letting you know. Either way, you’ll be able to review your message’s Debug Log and check on further details if you need to troubleshoot.

You should now have no trouble sending mail from your site. You still need to make sure you’re following email best practices, but you’ll no longer have messages rejected for sending unauthenticated mail.
Build a WordPress site fast with a hosting plan that includes a visual drag-and-drop website builder, free domain, and hundreds of design templates.
Free Templates
Fast & Easy Transfers
Free SSL
Endless Customization
Affordable



is their any option, for to delivery autoreply mail to sender???
I recommend you contact the plugin developers regarding the possibility or consider other contact form plugins such as Contact Form 7.
EXCELLENT video tutorial and help article, thank you!
Thanks for your feedback. We’re glad this article helped you solve your issue!