Table of Contents
Learning how to update WordPress plugins is vitally important for website security and usability. Keeping your plugins up-to-date helps harden your website security — closing doors hackers could use to access your website. It also ensures a positive user experience for your website visitors, making sure they are interacting with the most recent and compatible software.
Updates are rolled out constantly, which can make the task of updating plugins seem endless. When updating plugins after a large WordPress update and/or when newer versions of the plugins are released by the developers, you can use one bulk action or update plugins individually. Separate plugin updates are actually preferred by some website owners as it helps mitigate potential theme issues that could arise after updating a plugin. For example, if you update a plugin and then notice an area of your website is broken, you can simply disable the plugin to fix it.
In relation, before you update WordPress plugins, we recommended you backup your database and your website files. This will allow you to easily restore your WordPress site to the previous configuration if plugin updates break your website.
Continue reading to learn:
Update WordPress Plugins Manually
Using the steps below, you’ll be able to quickly update all of your WordPress plugins.
- Login to your WordPress dashboard.
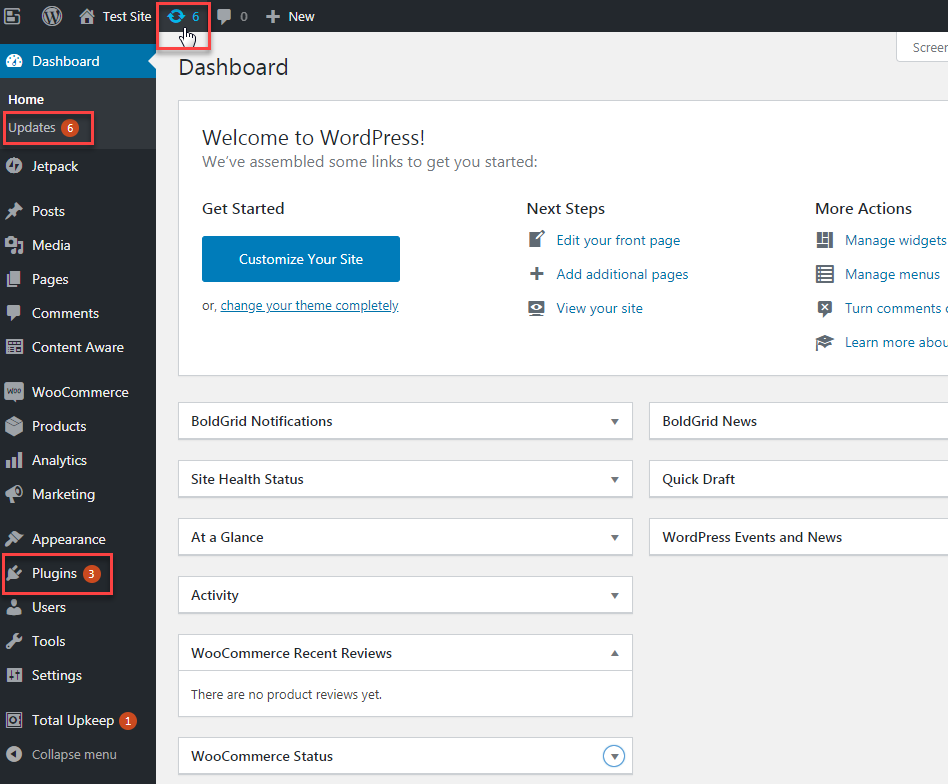
- There are three areas you can navigate to for updating plugins. 1) By clicking on the circle shaped like two arrows in the top header of your dashboard. 2) By clicking Updates towards the top of the left sidebar menu. 3) By clicking Plugins further down in the left sidebar menu.
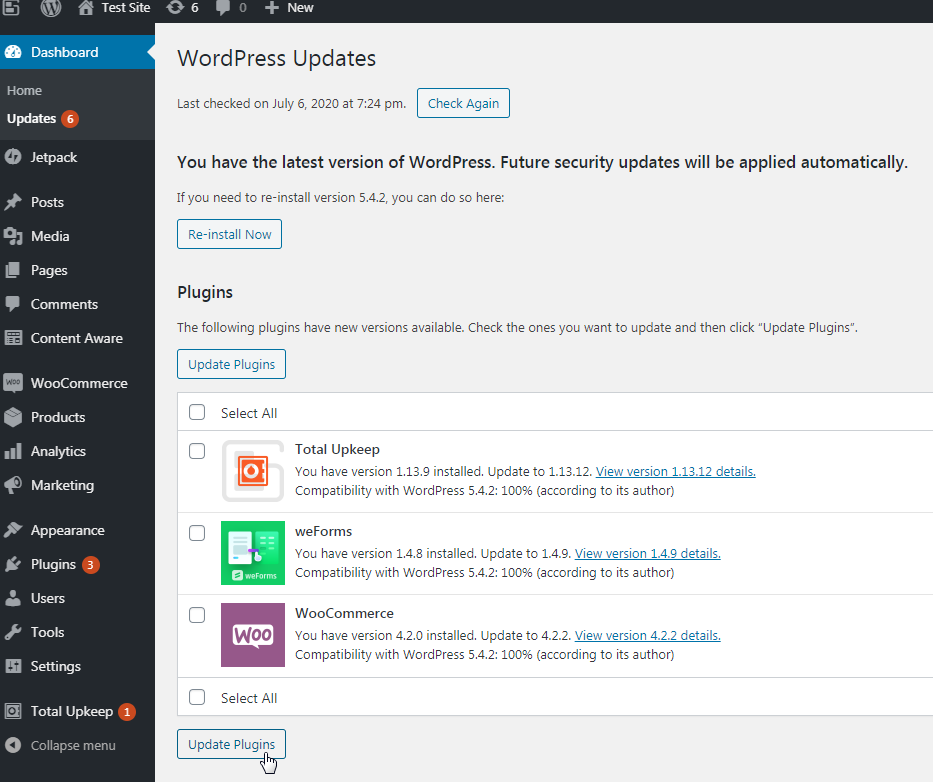
- If you click on the icon in the header or Updates in the left sidebar, you will be taken to a screen showing all updates available, both plugin and theme updates. To update your plugins, check Select All or select only the plugins you want to update. Then click Update Plugins. You will see a success message after the updates are complete.
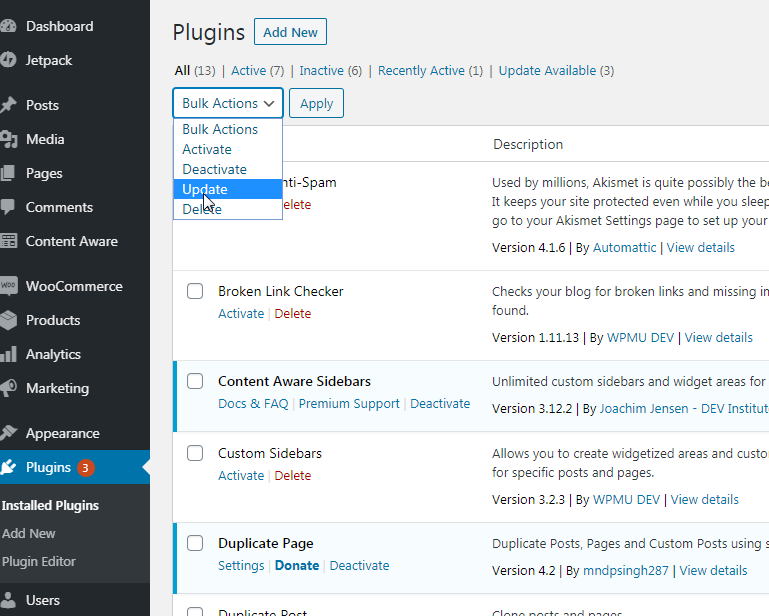
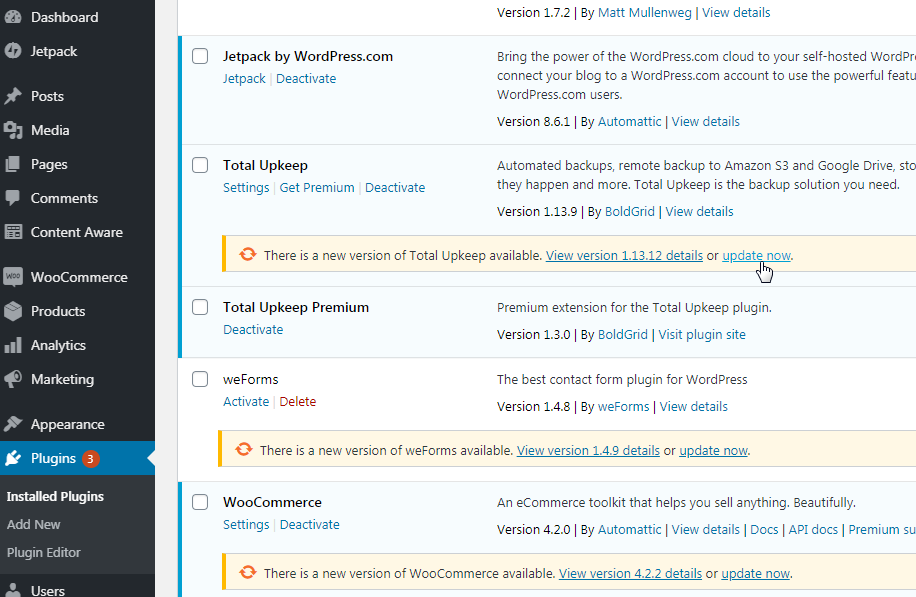
You can also update your theme in the above area following the same steps! - If you click on Plugins further down in the left sidebar, you will be taken to a page showing a list of your plugins only. Similar to the above, select the plugins you want to update, select Update under the Bulk Actions dropdown, then click Apply. You can also click the update now link under the individual plugins to update them separately. You will see a success message after the updates are complete.
Congratulations, you’ve updated your plugins!
Automatic Updates with Jetpack and WordPress 5.5 Release
If you’d rather automate the update process, you’re in luck. You can easily “set it and forget” with the Jetpack auto-update feature. Once Jetpack is installed, you can enable the auto-updates for all or certain plugins for simpler website management.
Also, as WordPress is a constantly evolving open-source software, automatic plugin updates will be built into the core as early as August 2020 with the WordPress 5.5 Release. Users can currently beta test the functionality via a plugin created by the contributors of the project. However, it seems that it will be a simple, seamless addition. Allowing you to determine which plugins will be updated automatically via the Plugins screen in the dashboard.
Become a master of WordPress plugins! Protect, optimize, secure, and expand the functionality of your website easily with the help of WordPress plugins!
Power Your Growth with Managed WordPress
Unlock the full potential of your mission-critical WordPress site with scalable, purpose-built servers. Give your website the performance, security, and support it needs to succeed - so you can focus on growing your business.
Scalable Cloud Servers
Advanced Security
Managed Updates
Expert Support
